
Introduction
This documentation is for Version 3 of CANDY HOUSE’s Sesame API. You can find documentation for Version 1/Version 2 here.
Welcome to the CANDY HOUSE Developer Site! We use RESTful API to provide basic manipulation of the Sesame smart lock, including:
- Get Sesame lock/unlock status
- Get battery status
- Lock and unlock Sesame
- Sync Sesame status
- Get results for lock, unlock, and sync commands
Many new functions are still under development and will be coming soon, so stay tuned!
Please note that in order to enable API for your Sesame, you must be the owner of Sesame and have it paired with the Wi-Fi Access Point.
To set up your Wi-Fi Access Point, follow these instructions to link your Wi-Fi Access Point to your home Wi-Fi network and pair it with your Sesame.
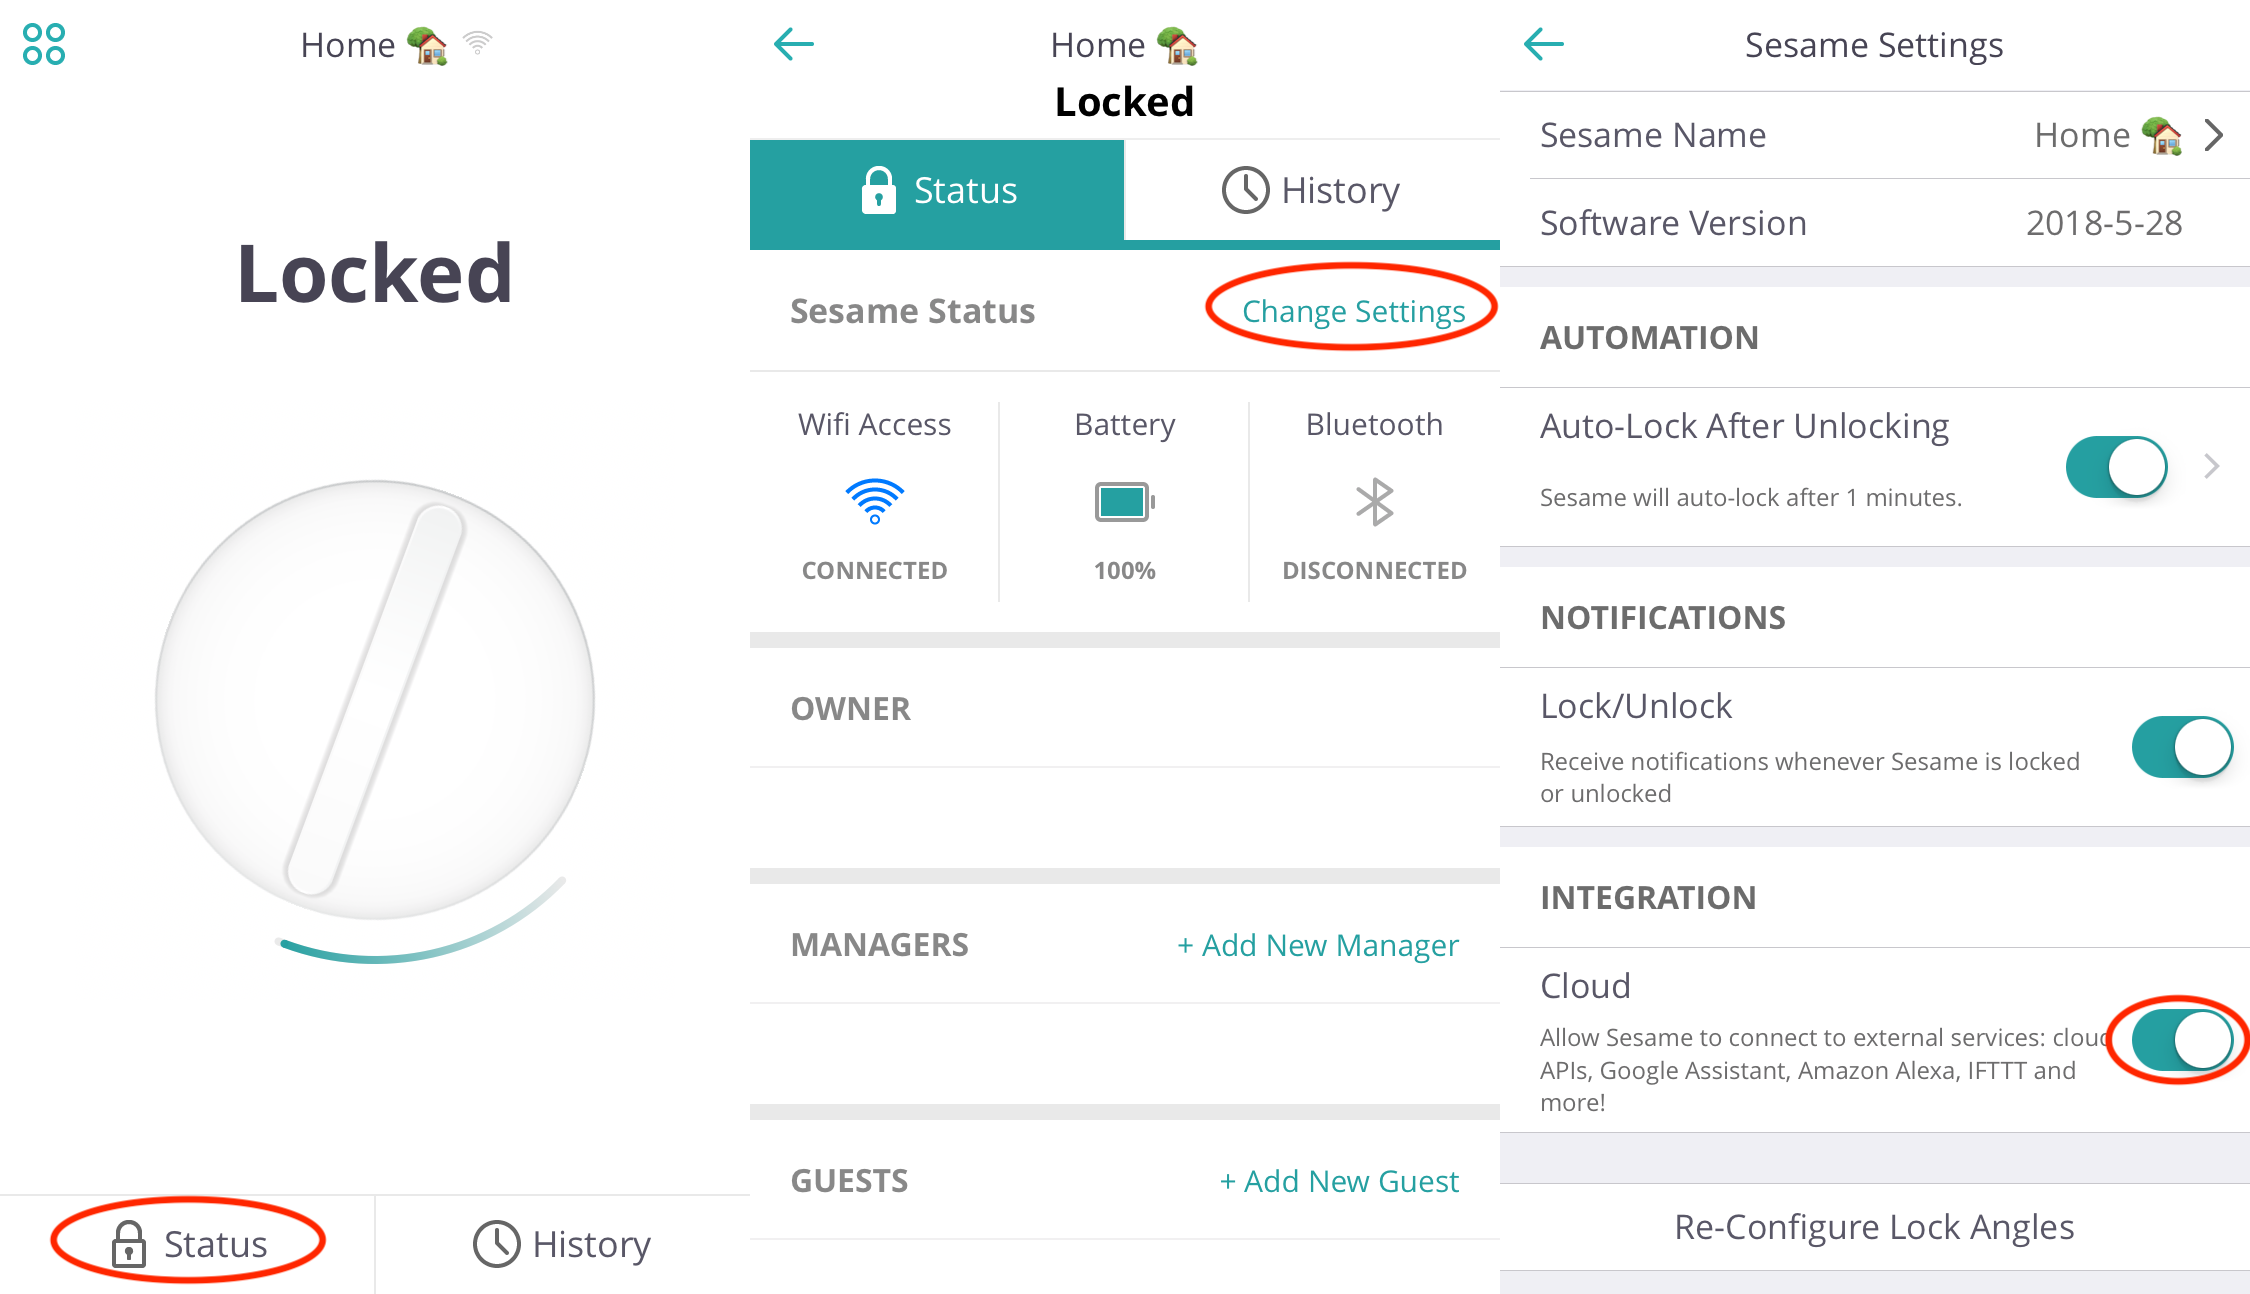
IMPORTANT: Once you have linked your Sesame to the Wi-Fi Access Point, go to Sesame Status > Change Settings > Integration and toggle this setting to ON to enable the API.
If you would like to suggest changes to the documentation or if you find any bugs, please feel free to contact us.
Endpoint
All requests should be prefixed with:
https://api.candyhouse.co/public
Parameters
Pass parameter in json body
curl -H "Content-Type: application/json" \
    -X POST -d '{"param1":"value1", "param2":"value2"}'
Pass parameter in query strings
curl "https://api.candyhouse.co/public?param1=value1¶m2=value2"
Always pass parameters in json body for POST and query strings for GET.
Authentication
curl -H "Authorization: YOUR_AUTH_TOKEN"
Please create the your auth token by logging into the CANDY HOUSE Dashboard with your CANDY HOUSE account. Click on “API Settings” in the sidebar, verify your identity, then add a new API key. This API key is your auth token. Every request must have the auth token set in the Authorization header.
Sesame API
Get Sesame list
curl -H "Authorization: YOUR_AUTH_TOKEN" \
  https://api.candyhouse.co/public/sesames
  [
    {
      "device_id": "00000000-0000-0000-0000-000000000000",
      "serial": "ABC1234567",
      "nickname": "Front door"
    }, {
      "device_id": "00000000-0000-0000-0000-000000000001",
      "serial": "DEF7654321",
      "nickname": "Back door"
    }
  ]
GET /sesames
Response Fields
| Parameter | Type | Description |
|---|---|---|
| array | Array of Sesames | |
[i].device_id |
UUID |
Sesame unique ID |
[i].serial |
string |
Sesame serial |
[i].nickname |
string |
Sesame nickname |
Get Sesame status
curl -H "Authorization: YOUR_AUTH_TOKEN" \
  https://api.candyhouse.co/public/sesame/00000000-0000-0000-0000-000000000001
  {
    "locked": true,
    "battery": 100,
    "responsive": true
  }
GET /sesame/{device_id}
Response Fields
| Parameter | Type | Description |
|---|---|---|
locked |
boolean |
Sesame is locked or not |
battery |
integer | Sesame battery status |
responsive |
boolean | Sesame is responsive now or not |
Control Sesame
curl -H "Authorization: YOUR_AUTH_TOKEN" \
    -H "Content-Type: application/json" \
    -X POST -d '{"command":"lock"}' \
    https://api.candyhouse.co/public/sesame/00000000-0000-0000-0000-000000000001
  {
    "task_id": "01234567-890a-bcde-f012-34567890abcd"
  }
POST /sesame/{device_id}
Post Body
| Parameter | Type | Description |
|---|---|---|
command |
string |
(required) lock, unlock or sync. Sync command will force the server to update Sesame status. NOTE: Frequent use of the sync command will reduce Sesame’s battery life. |
Response Fields
| Parameter | Type | Description |
|---|---|---|
task_id |
string |
Task ID which can be used to query execution result. |
Query Execution Result
curl -H "Authorization: YOUR_AUTH_TOKEN" \
    https://api.candyhouse.co/public/action-result?task_id=01234567-890a-bcde-f012-34567890abcd
  {
    "status": "terminated",
    "successful": true
  }
GET /action-result?task_id={task_id}
Query Parameters
| Parameter | Type | Description |
|---|---|---|
task_id |
string |
(required) Task ID from command result. |
Response Fields
| Parameter | Type | Description |
|---|---|---|
status |
string |
Can be “processing” or “terminated”. |
successful |
boolean |
This parameter only appears when the status is terminated. Indicates whether the execution was successful or not. |
error |
string |
Indicates the reason execution failed. |
Errors
All errors contain an error attribute indicating the error details.
400 Bad Request
{
  "error": "BAD_PARAMS"
}
{
  "error": "DEVICE_IS_BUSY 35"
}
BAD_PARAMSYour request paremeters are invalidCLOUD_INTEGRATION_NOT_ENABLEDPlease enable cloud integration in Sesame app under Sesame > Change Settings.LOW_BATTERYYour device cannot be operated because its batteries are low.DEVICE_IS_BUSYYour device cannot be operated because it is occupied by other requests.DEVICE_IS_BUSY :secondsYour device cannot be operated because the device is occupied by other requests. The:secondsis an integer indicating the max duration you have to wait until you can send the next request.
401 Unauthorized
UNAUTHORIZEDYour API key is missing or invalid.
403 Forbidden
ForbiddenORACCESS_DENYYou IP address has been blocked due to repeatedly exceeding our rate limits by a significant amount. The exact rate limit is subject to change as it is automatically determined by an algorithm, but request rates at 1 request per second (or lower) will not be restricted. If you receive this error, please cease requests for 30 minutes before trying again. If the error persists, please email us at sesame@candyhouse.co for assistance and provide your IP address.
429 Throttled
THROTTLEDYour request rate has exceeded the limit. The request rate limit is based on both user account and IP address. Each API endpoint has an absolute rate limit. Please email us at sesame@candyhouse.co if you have any questions or requests for an exception.
500 Internal Error
INTERNAL_ERRORServer cannot handle your request. These errors tend to be temporary; if it persists, please email sesame@candyhouse.co to let us know.
Sesame Webhook
You can set up a webhook URL at the CANDY HOUSE Dashboard by accessing your API Settings.
Method
- The webhook now supports GET and POST methods.
URL
- The webhook URL is limited to 256 characters.
- The webook URL supports variables; for example, when using
http://example.com/device={device_id},{device_id}will be replaced by the device UUID. - Variables Reference
- *
{device_id}: Device UUID - *
state:lockedorunlocked
Trigger
- The webhook will be triggered when Sesame’s lock status has changed.
- The webhook will not retry if the HTTP request fails.
Third-Party Libraries & Plugins
We love seeing what awesome things Sesame users are doing with our cloud API!
Have something to share? Email us and we’ll be happy to add it to the list!
Libraries using V3 API
Pysesame2
by Anonymous
Sesame.NET
by Ben Randall
“A .NET client for the Sesame API.”
Homebridge-Sesame
“Homebridge plugin for the Sesame smart lock.”
Sesame/SmartThings Integration
by tobycth3
“Integration between Sesame API and SmartThings.”
GSuiteScript for Sesame API
by Jerming Gu
“Integrate Google Apps with Sesame and lock/unlock Sesame from Google Sheets.”
Home Assistant Sesame
“The sesame platform allows you to control your Sesame smart locks made by CANDY HOUSE, Inc.”
Libraries using V1 & V2 API
Pysesame
by Albert Lee
“Python API for controlling Sesame smart locks made by CANDY HOUSE, Inc.”
QSesame
by Brendan
“QSesame is a Homebridge plugin that allows you to control Sesame smart locks with Siri by integrating with HomeKit.”
Sesame Ruby
“This gem provides a simple Ruby wrapper around the CANDY HOUSE Sesame API to control Sesame Bluetooth and Internet-connected locks.” (source)
Tutorial 1: API (Postman)
Introduction
In this tutorial, you will learn how to get status updates for your Sesame, lock and unlock your Sesame, sync status, and check the results of your API commands. You will do so by making GET and POST requests to Sesame’s RESTful API using the free Postman app.
To complete this tutorial, you must have the following:
- Sesame smart lock
- Wi-Fi Access Point
- Computer with internet access
Before You Start
You must be the owner of Sesame to enable the API.
You must have a Wi-Fi Access Point properly set up and paired with your Sesame (instructions here).
Make sure to enable cloud integration for your Sesame under Status > Change Settings > Integration.
Keep the Sesame app closed while using the API; if it’s open it will prevent the API from connecting to your Sesame. Only one device can connect to Sesame at a time.
Obtain Your API Key
Login to your CANDY HOUSE Account on the CANDY HOUSE Dashboard with your email and password or Google account.

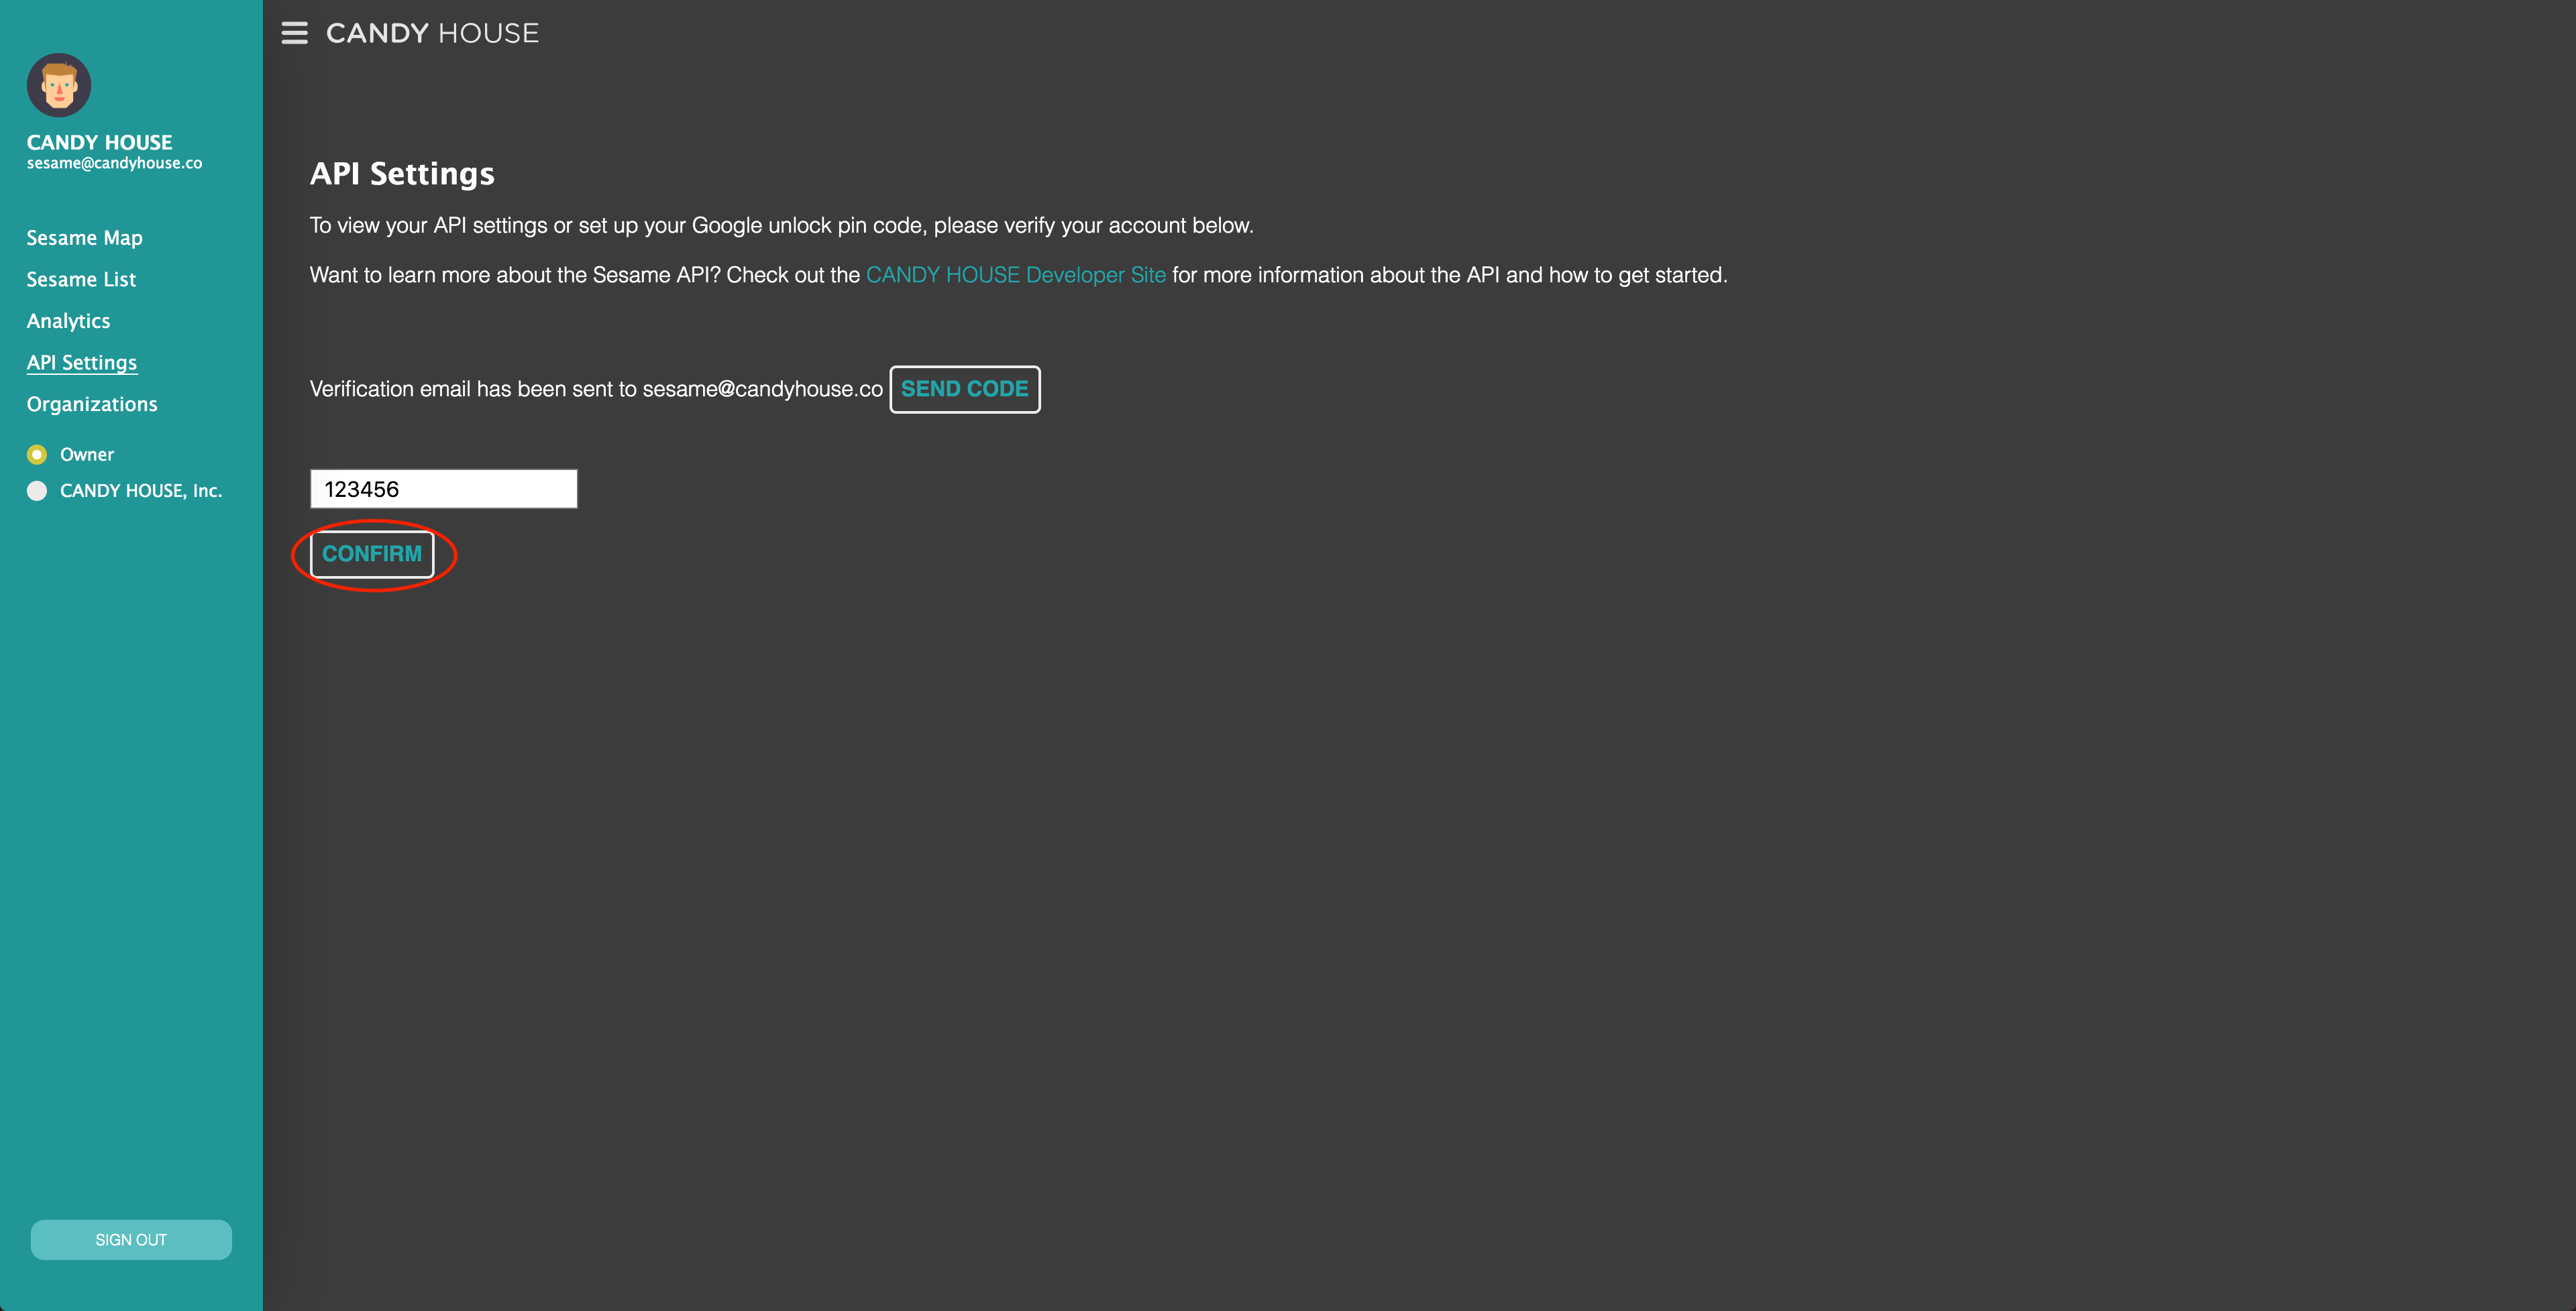
Click on API Settings in the sidebar. To access your API Settings, you will need to enter a verification code. Click SEND CODE and your verification code will be sent to the email address you used to login. Enter the code and then click CONFIRM.

Once you’ve entered the verification code, you will be able to access your API settings. Click ADD to add a new API Key. Please note that the full key will no longer be visible once you refresh or logout, so be sure to save a copy somewhere. You can also delete existing keys and create additional keys as needed.


Get Postman
Download the free Postman app and create an account. Make sure you’ve downloaded the latest version.

Create an account if you haven’t already, then login to the app. We recommend unchecking “Show this window on launch.” Close the launch screen to begin.

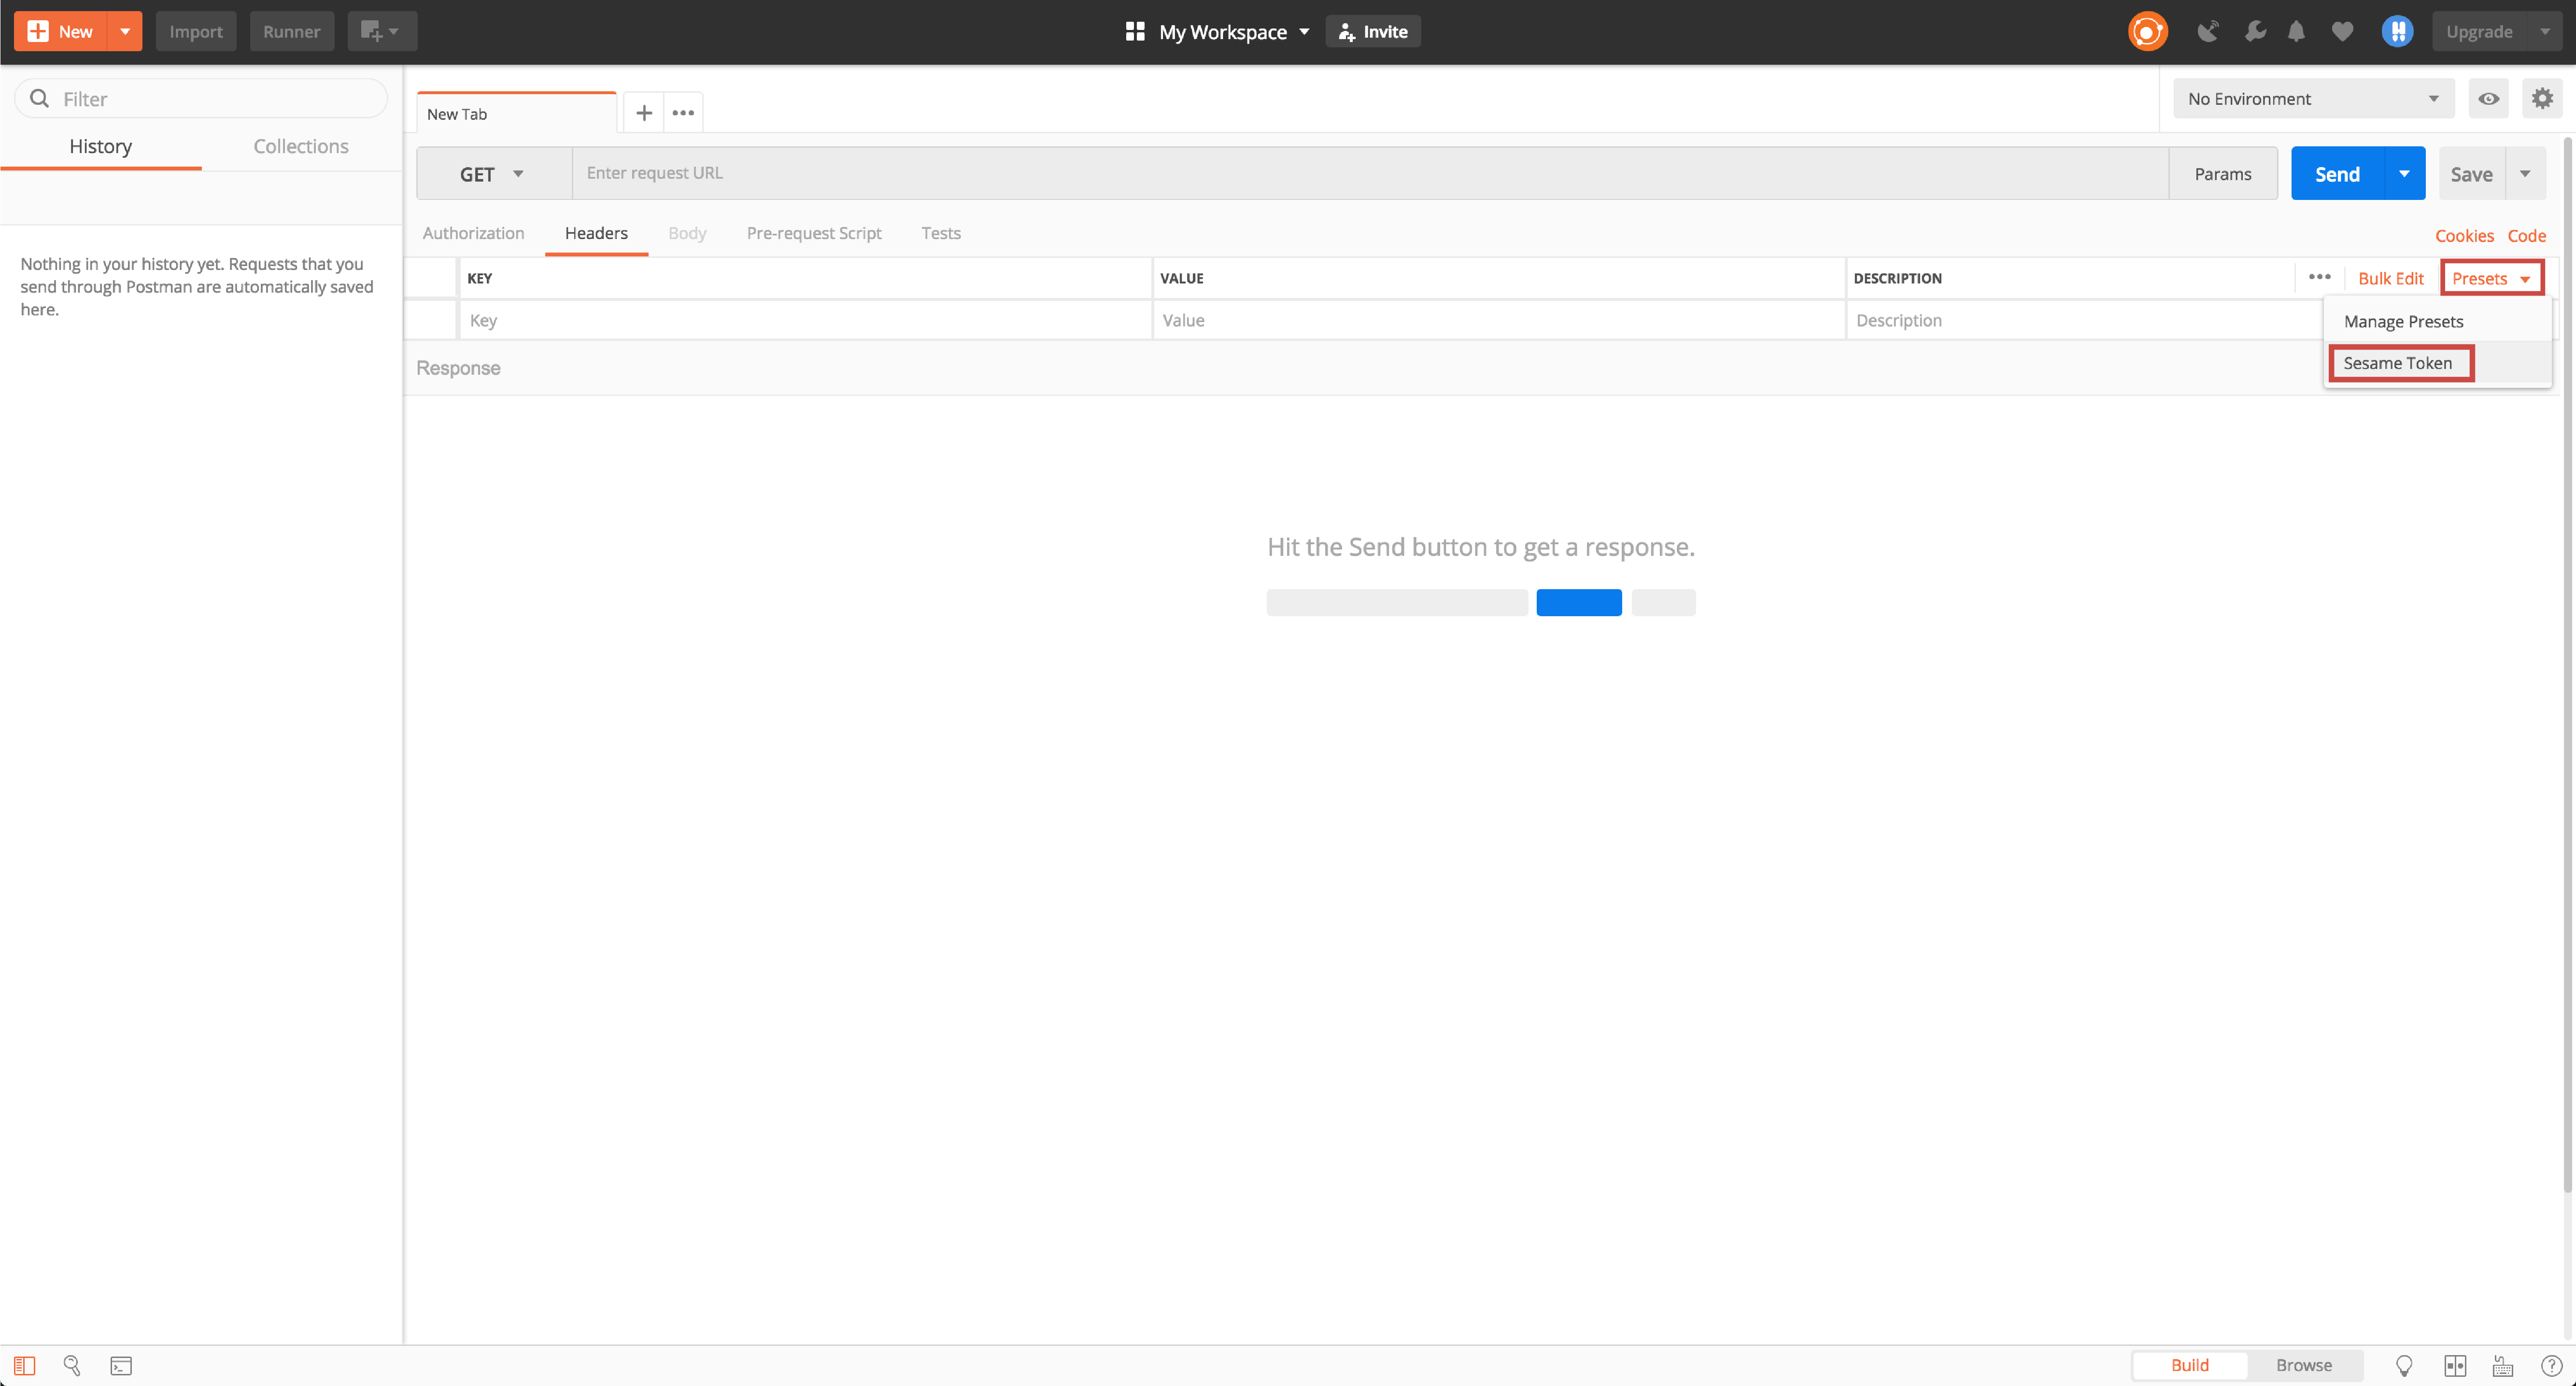
Save Your API Key as a Preset
Save your API key as a preset so you won’t need to keep copy/pasting it in the header over and over for each of the following steps. On your emply tab, do the following:
- Select the Headers tab
- Click Presets
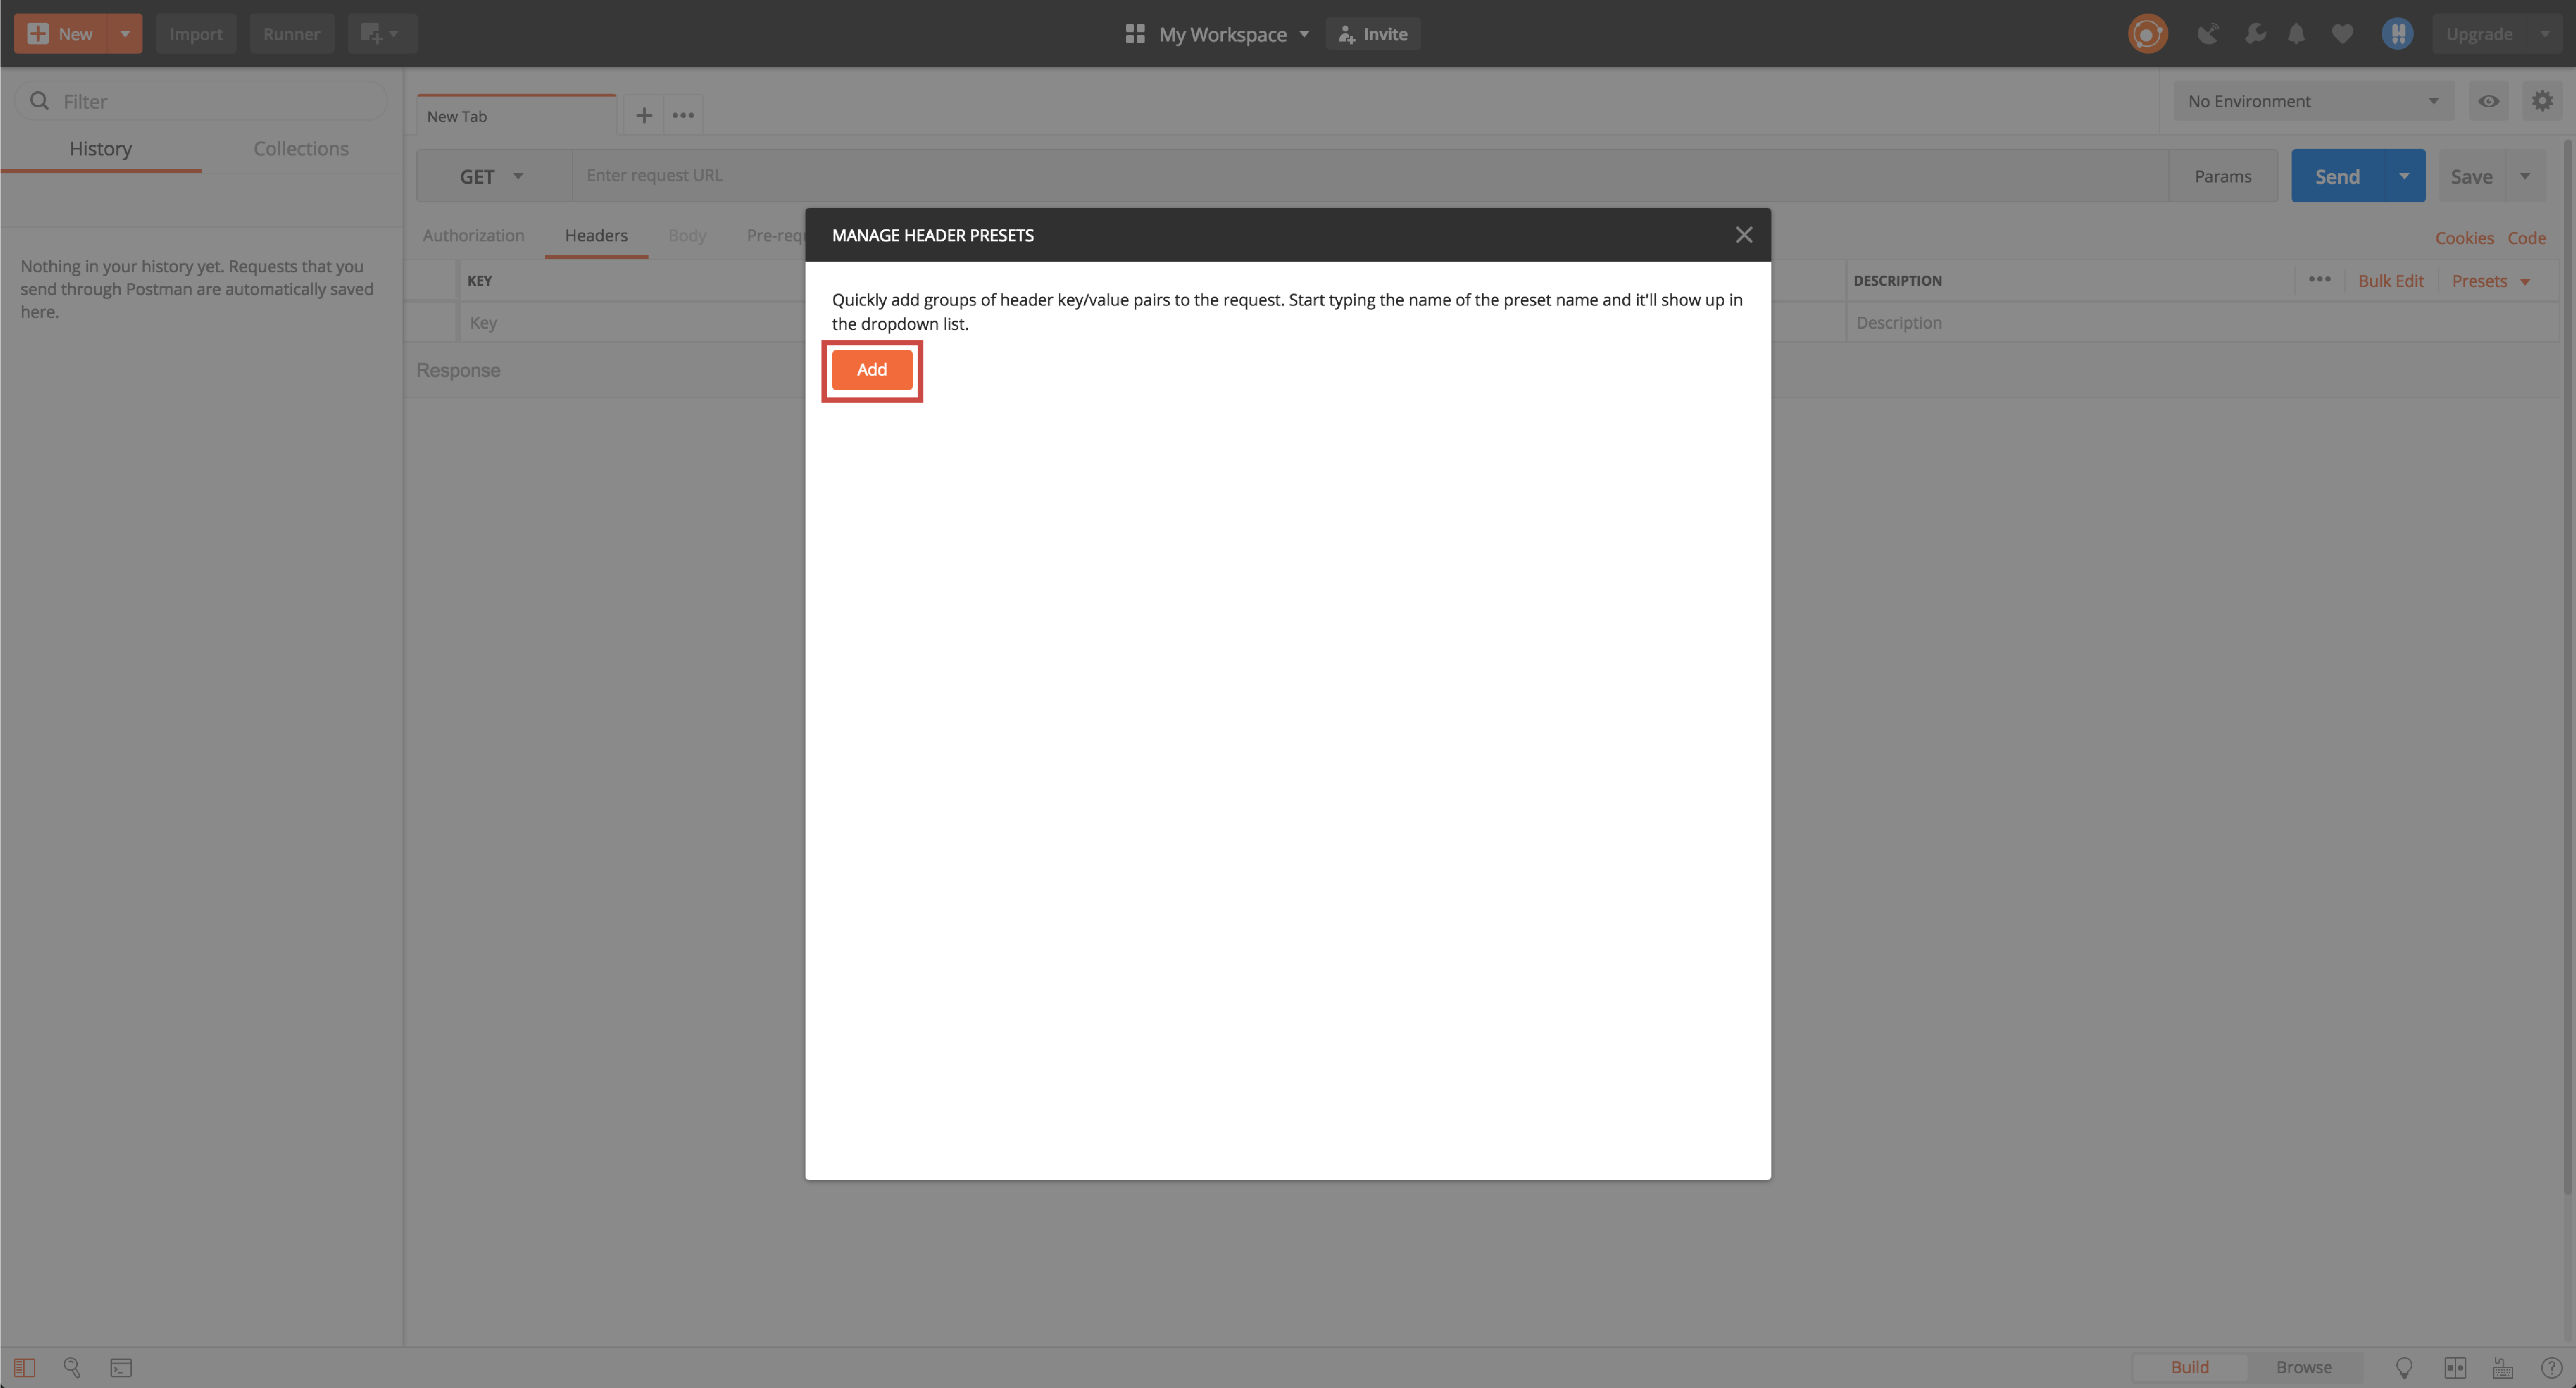
- Click Manage Presets
- Click Add

Enter the following information:
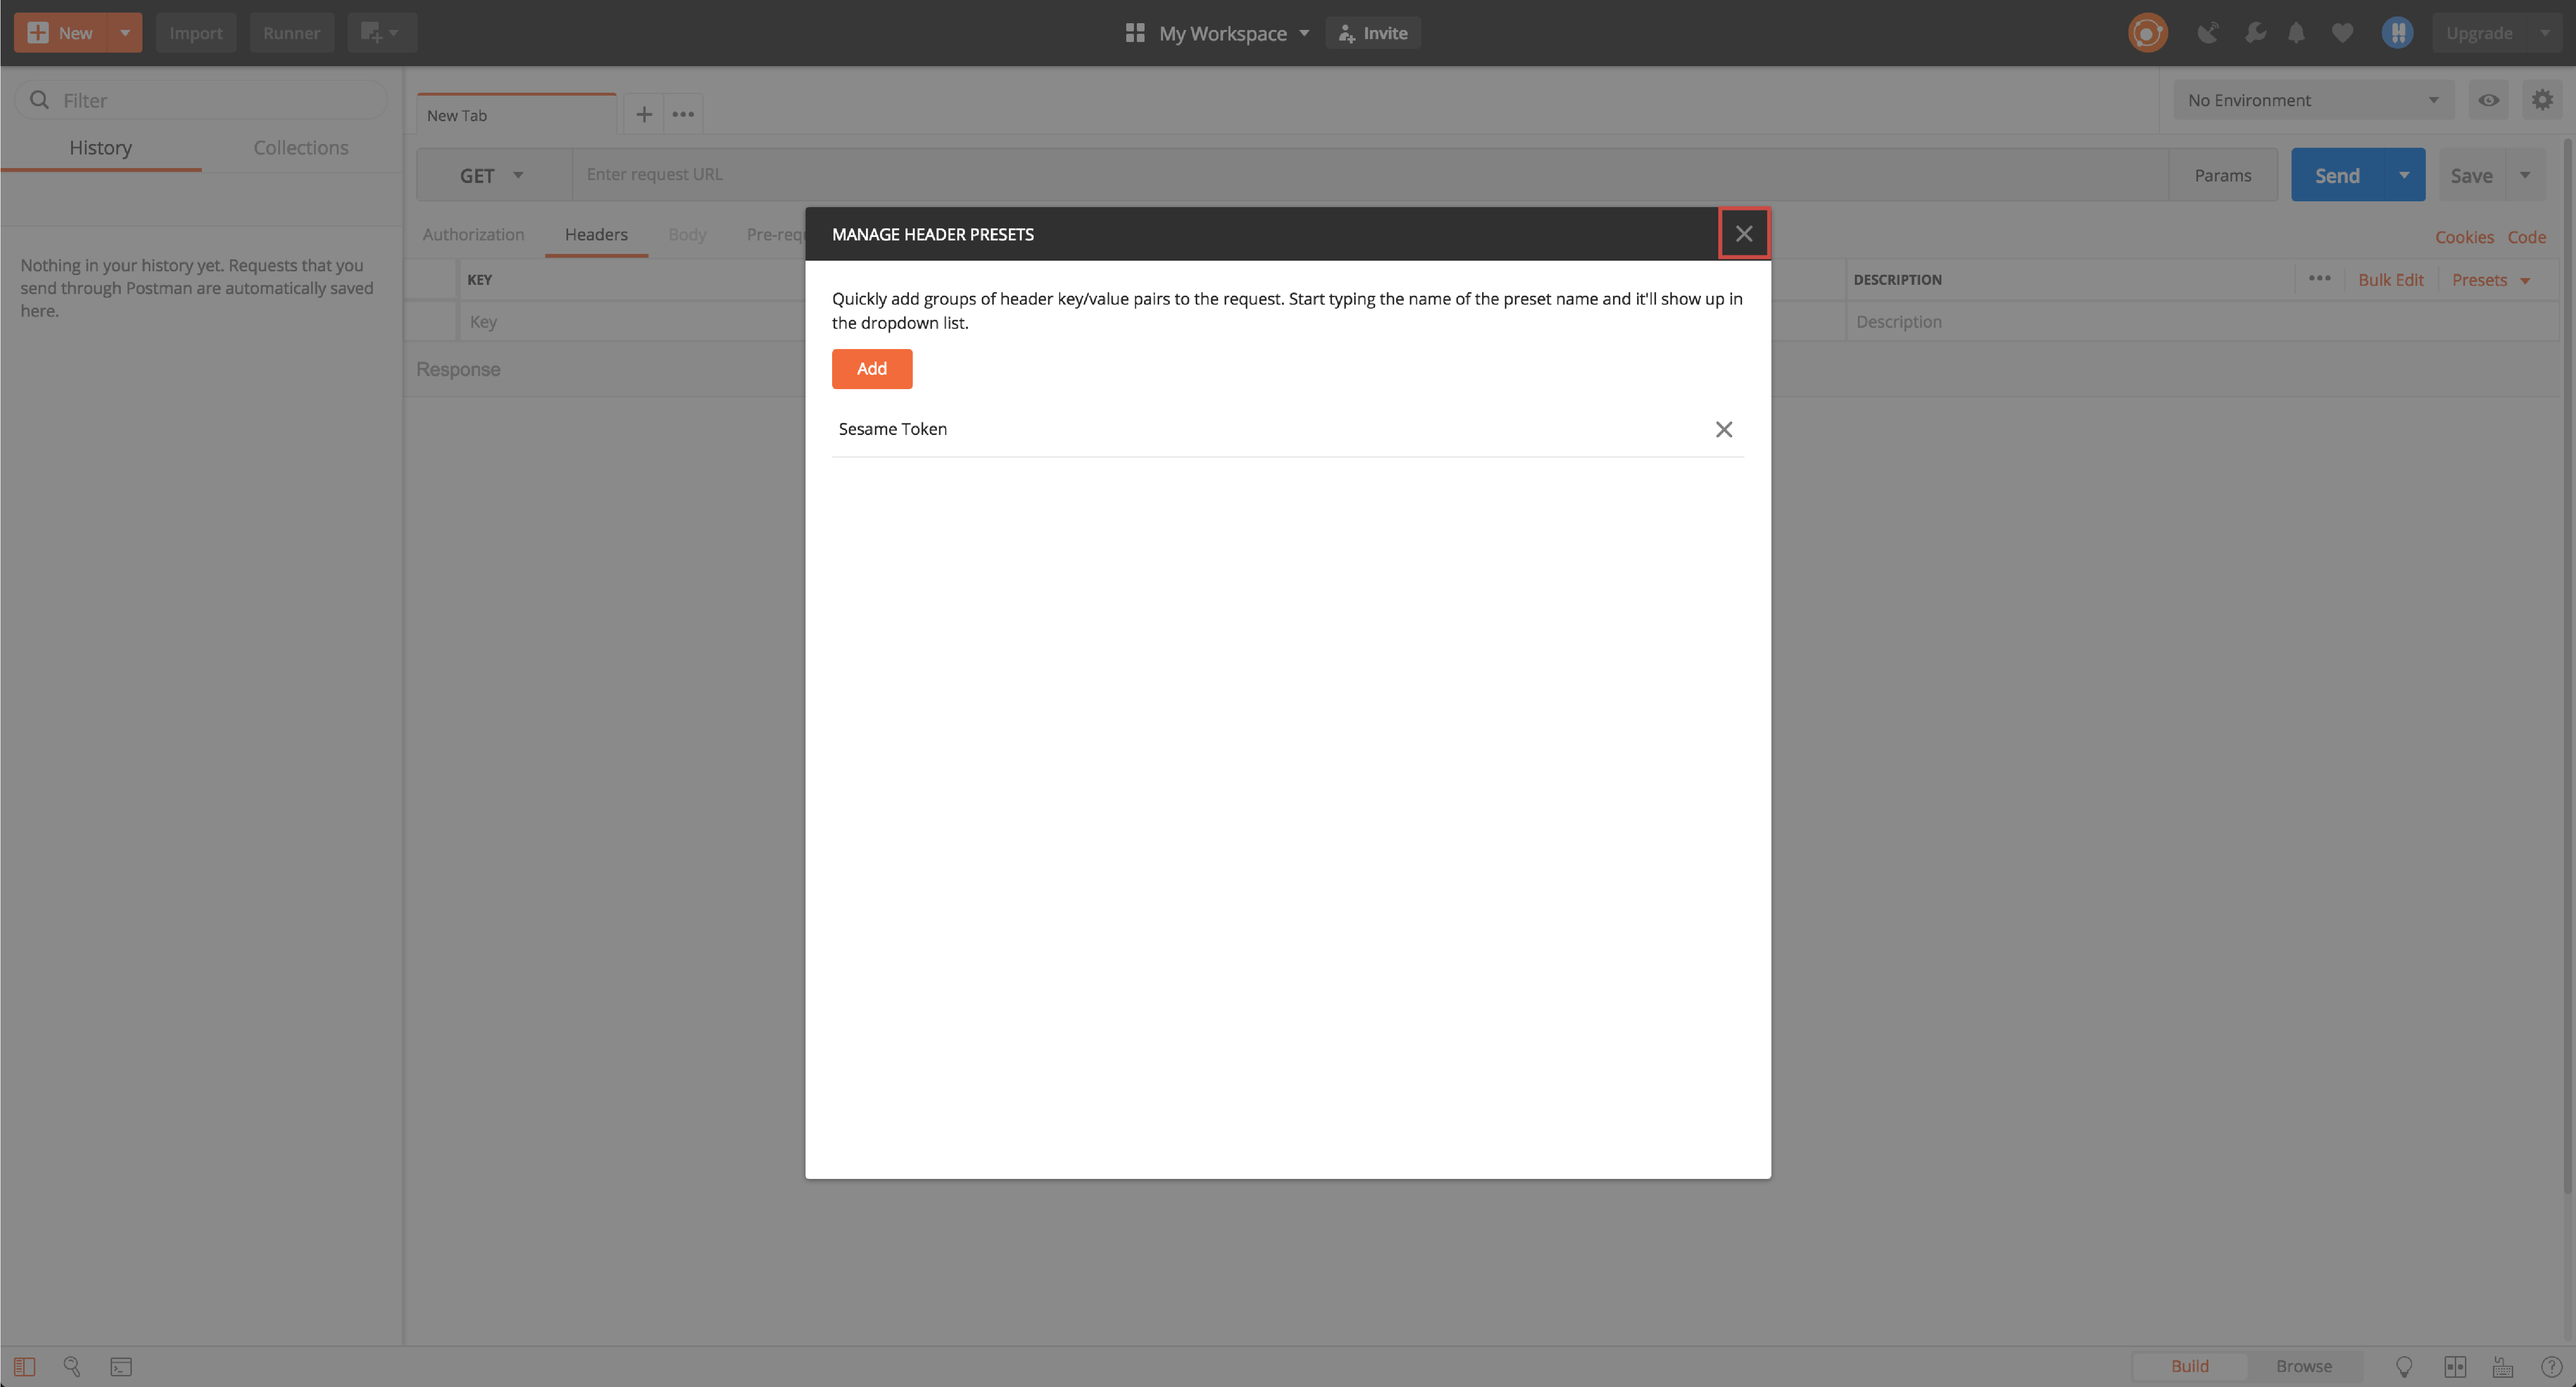
- Give your Preset a name, such as: Sesame Token
- Enter the name of your key: Authorization
- Copy and paste the API key from the CANDY HOUSE Dashboard.
- When you’re done, click Add.
- Click the X in the upper right corner once you’re done.

The next time you want to use your authorization token, go to Header, click Preset, and select Sesame Token to automatically input the token. The token must be included for each of the following requests. Do so now as you will need it for the next step.
Request Sesame List
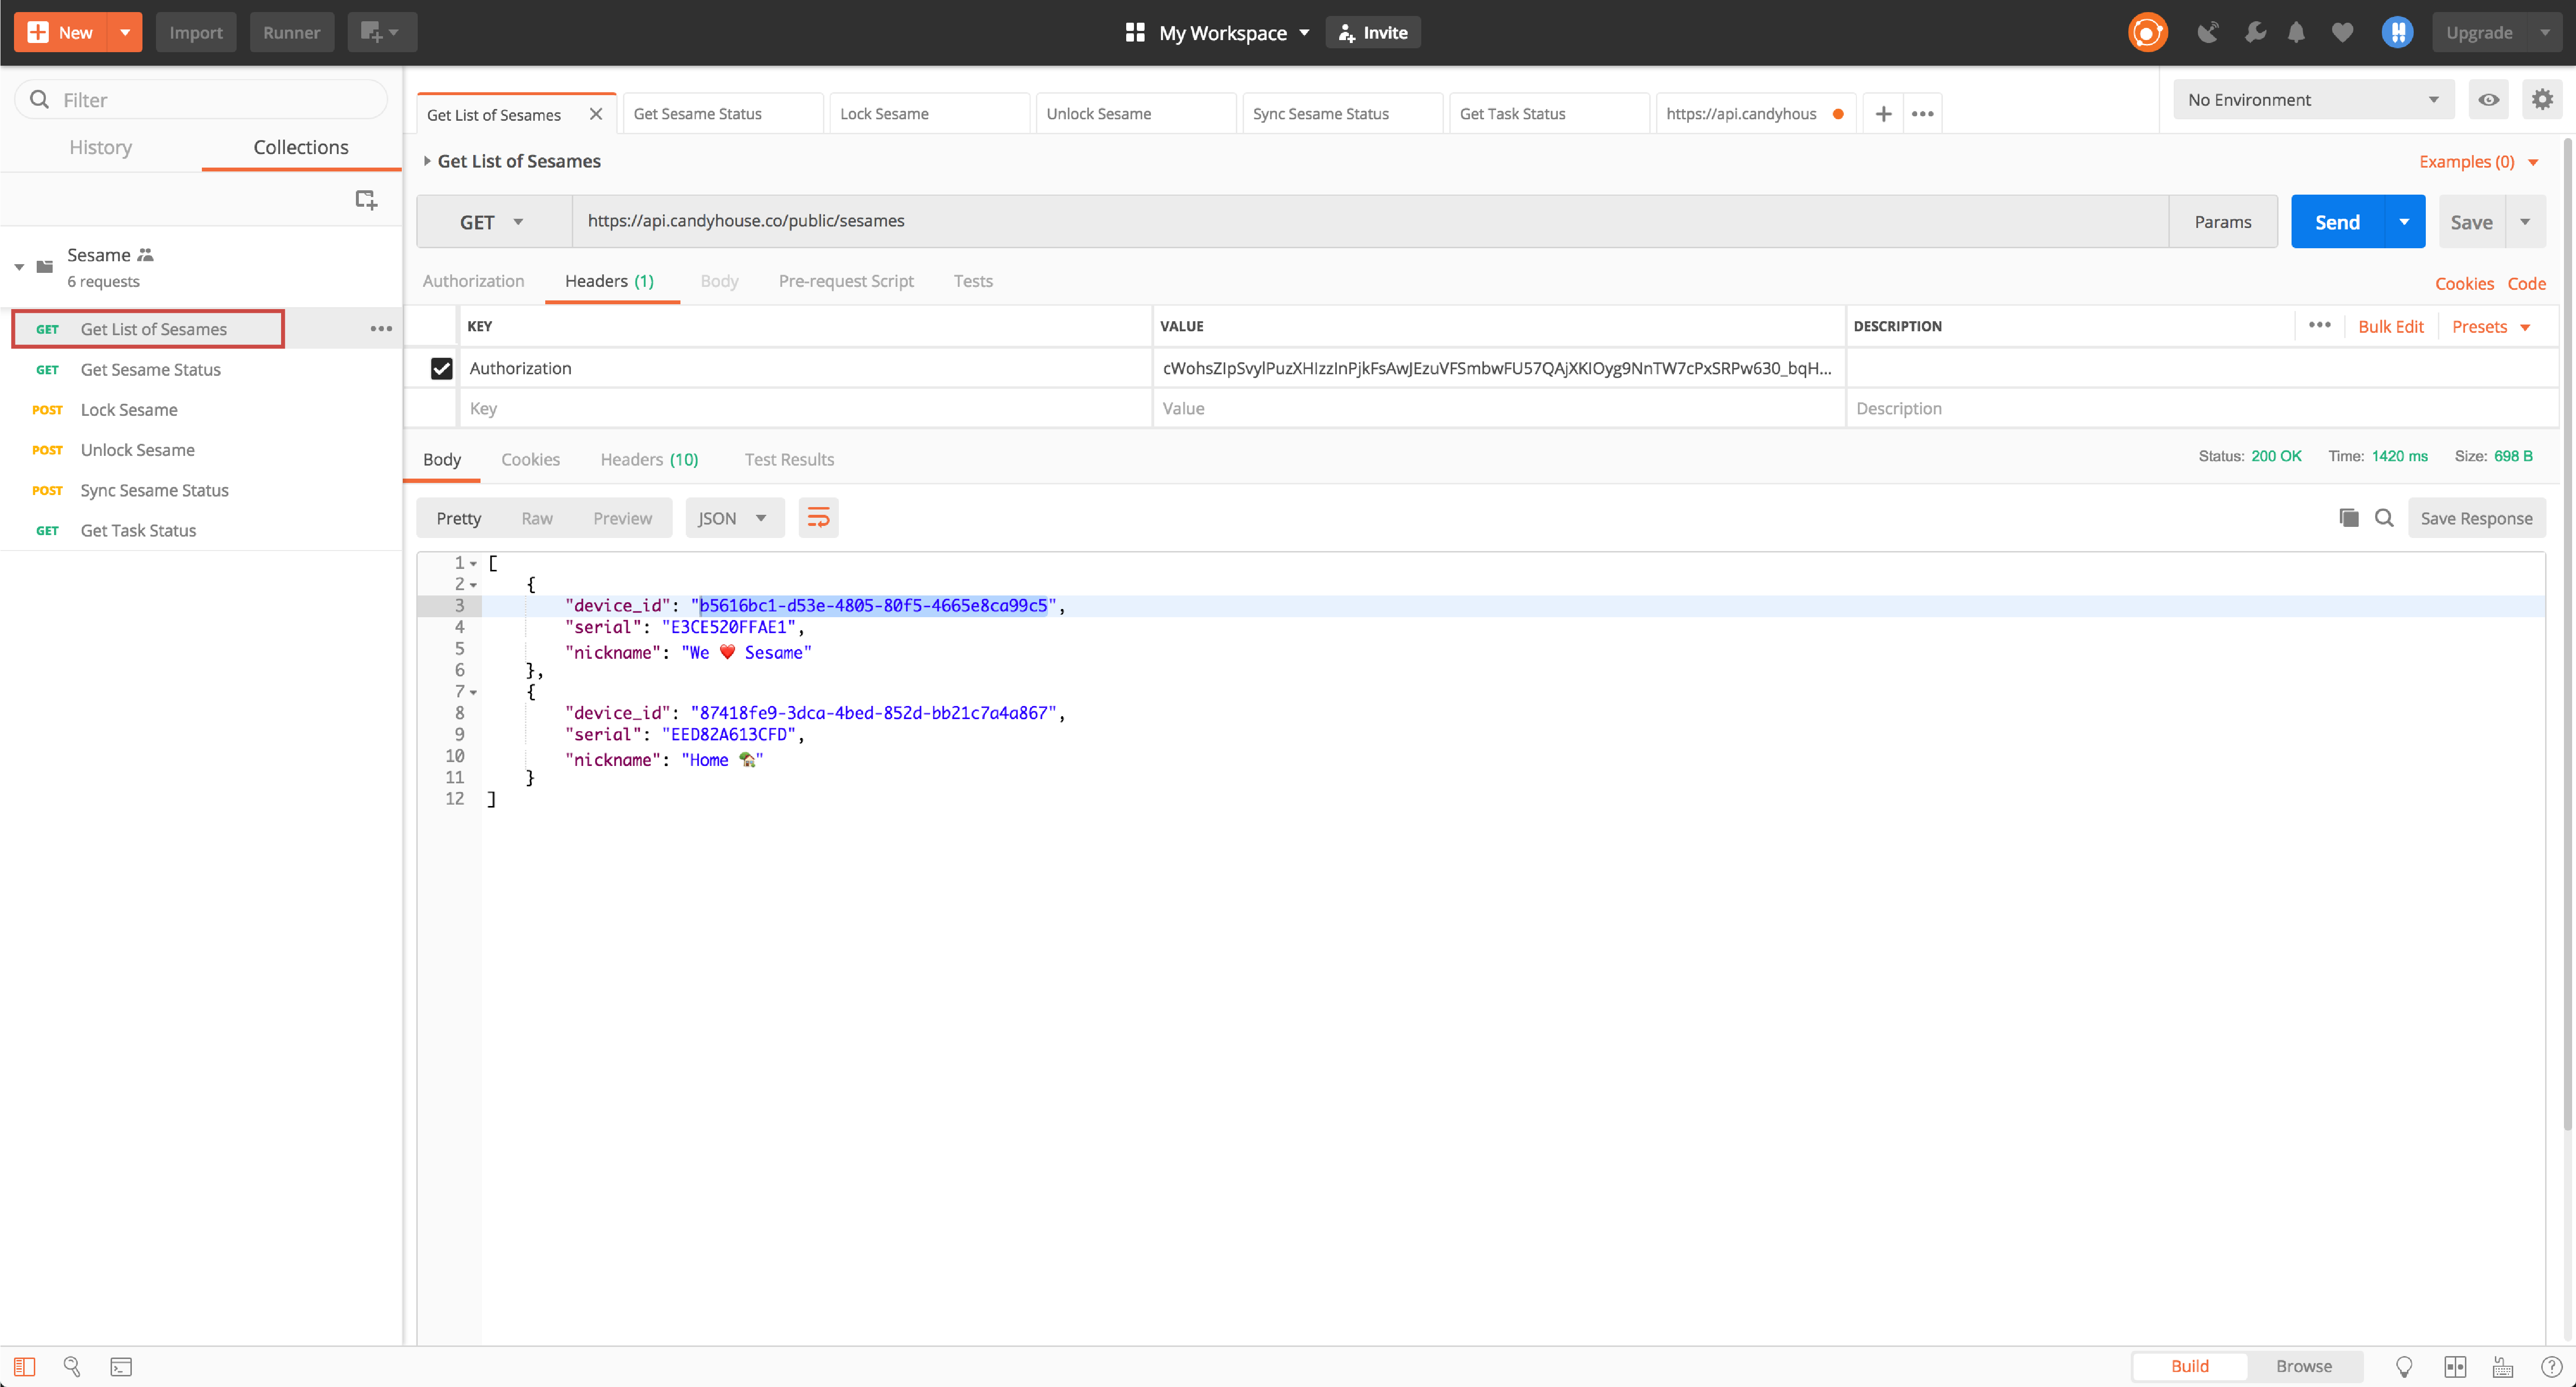
Next, we will check if the token is correct by requesting a list of Sesames for which you are the owner. Please note that you will only be able to use the API for Sesames for which you are the owner. In your current tab, enter the following information:
- Leave GET as GET
- Enter the request URL:
https://api.candyhouse.co/public/sesames
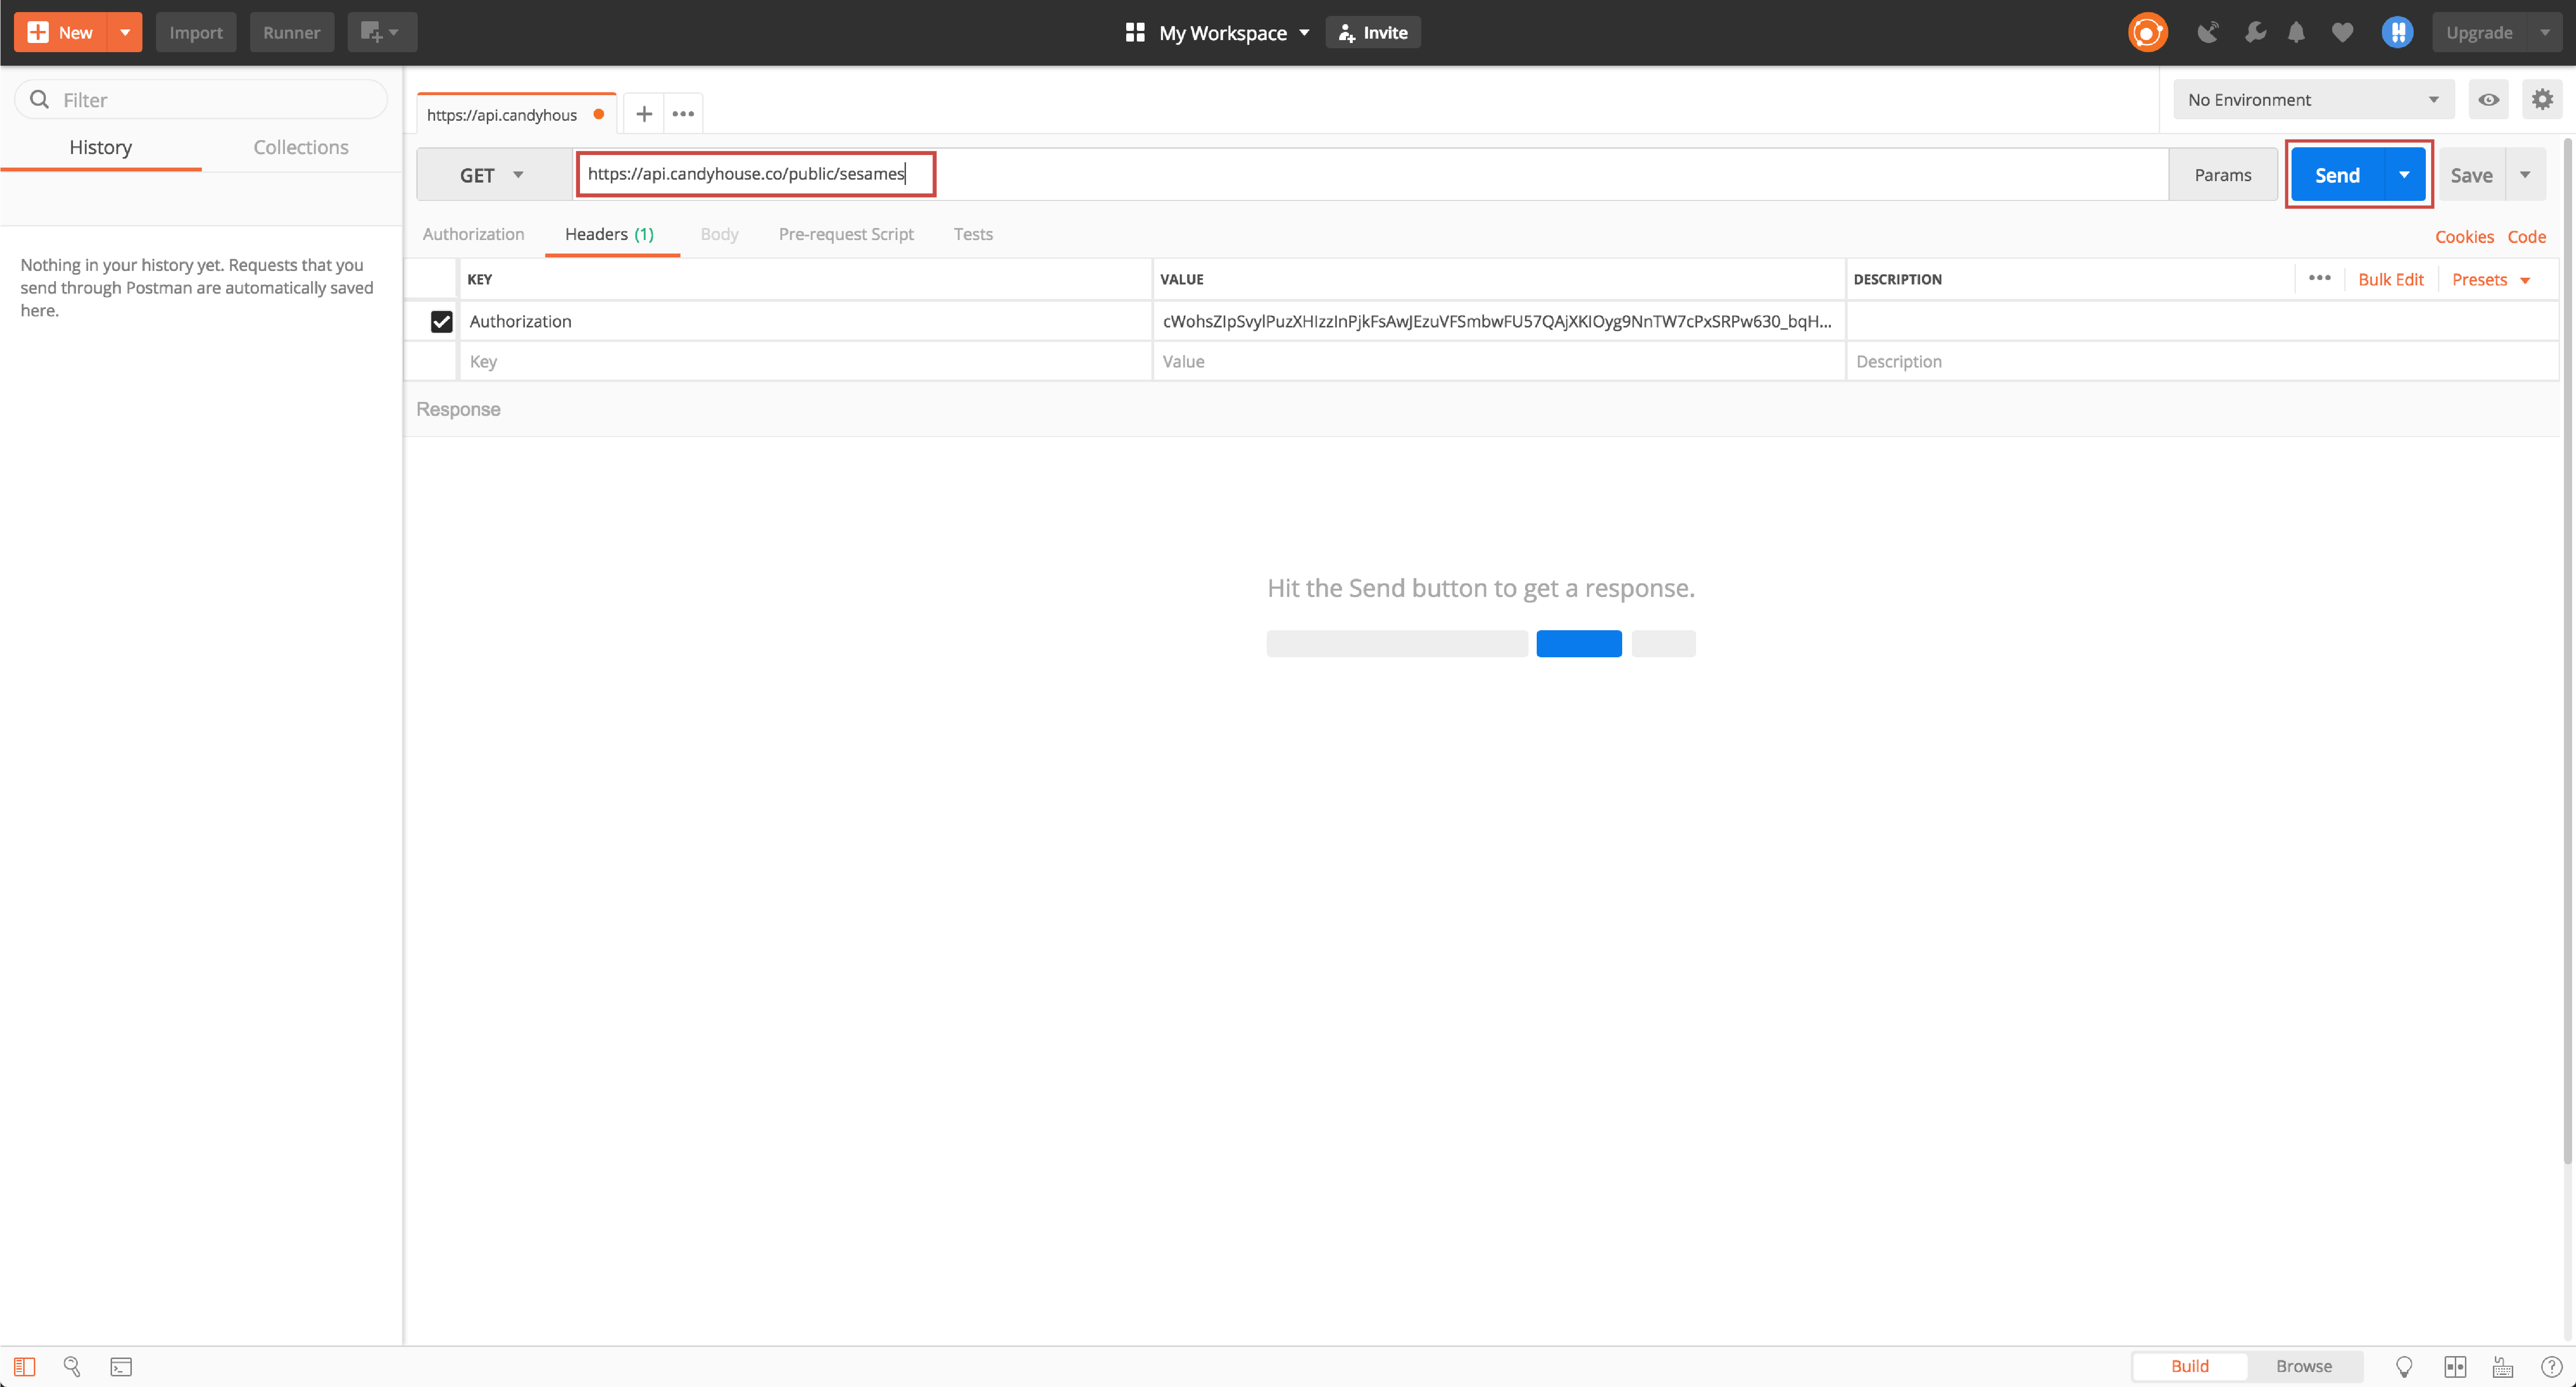
Once you’ve confirmed all of the above is correct, click the blue Send button. If your request is successful, the API will return status 200 plus a list of Sesames owned by your CANDY HOUSE account, as well as the following information for each Sesame:
- Device ID
- Serial
- Nickname
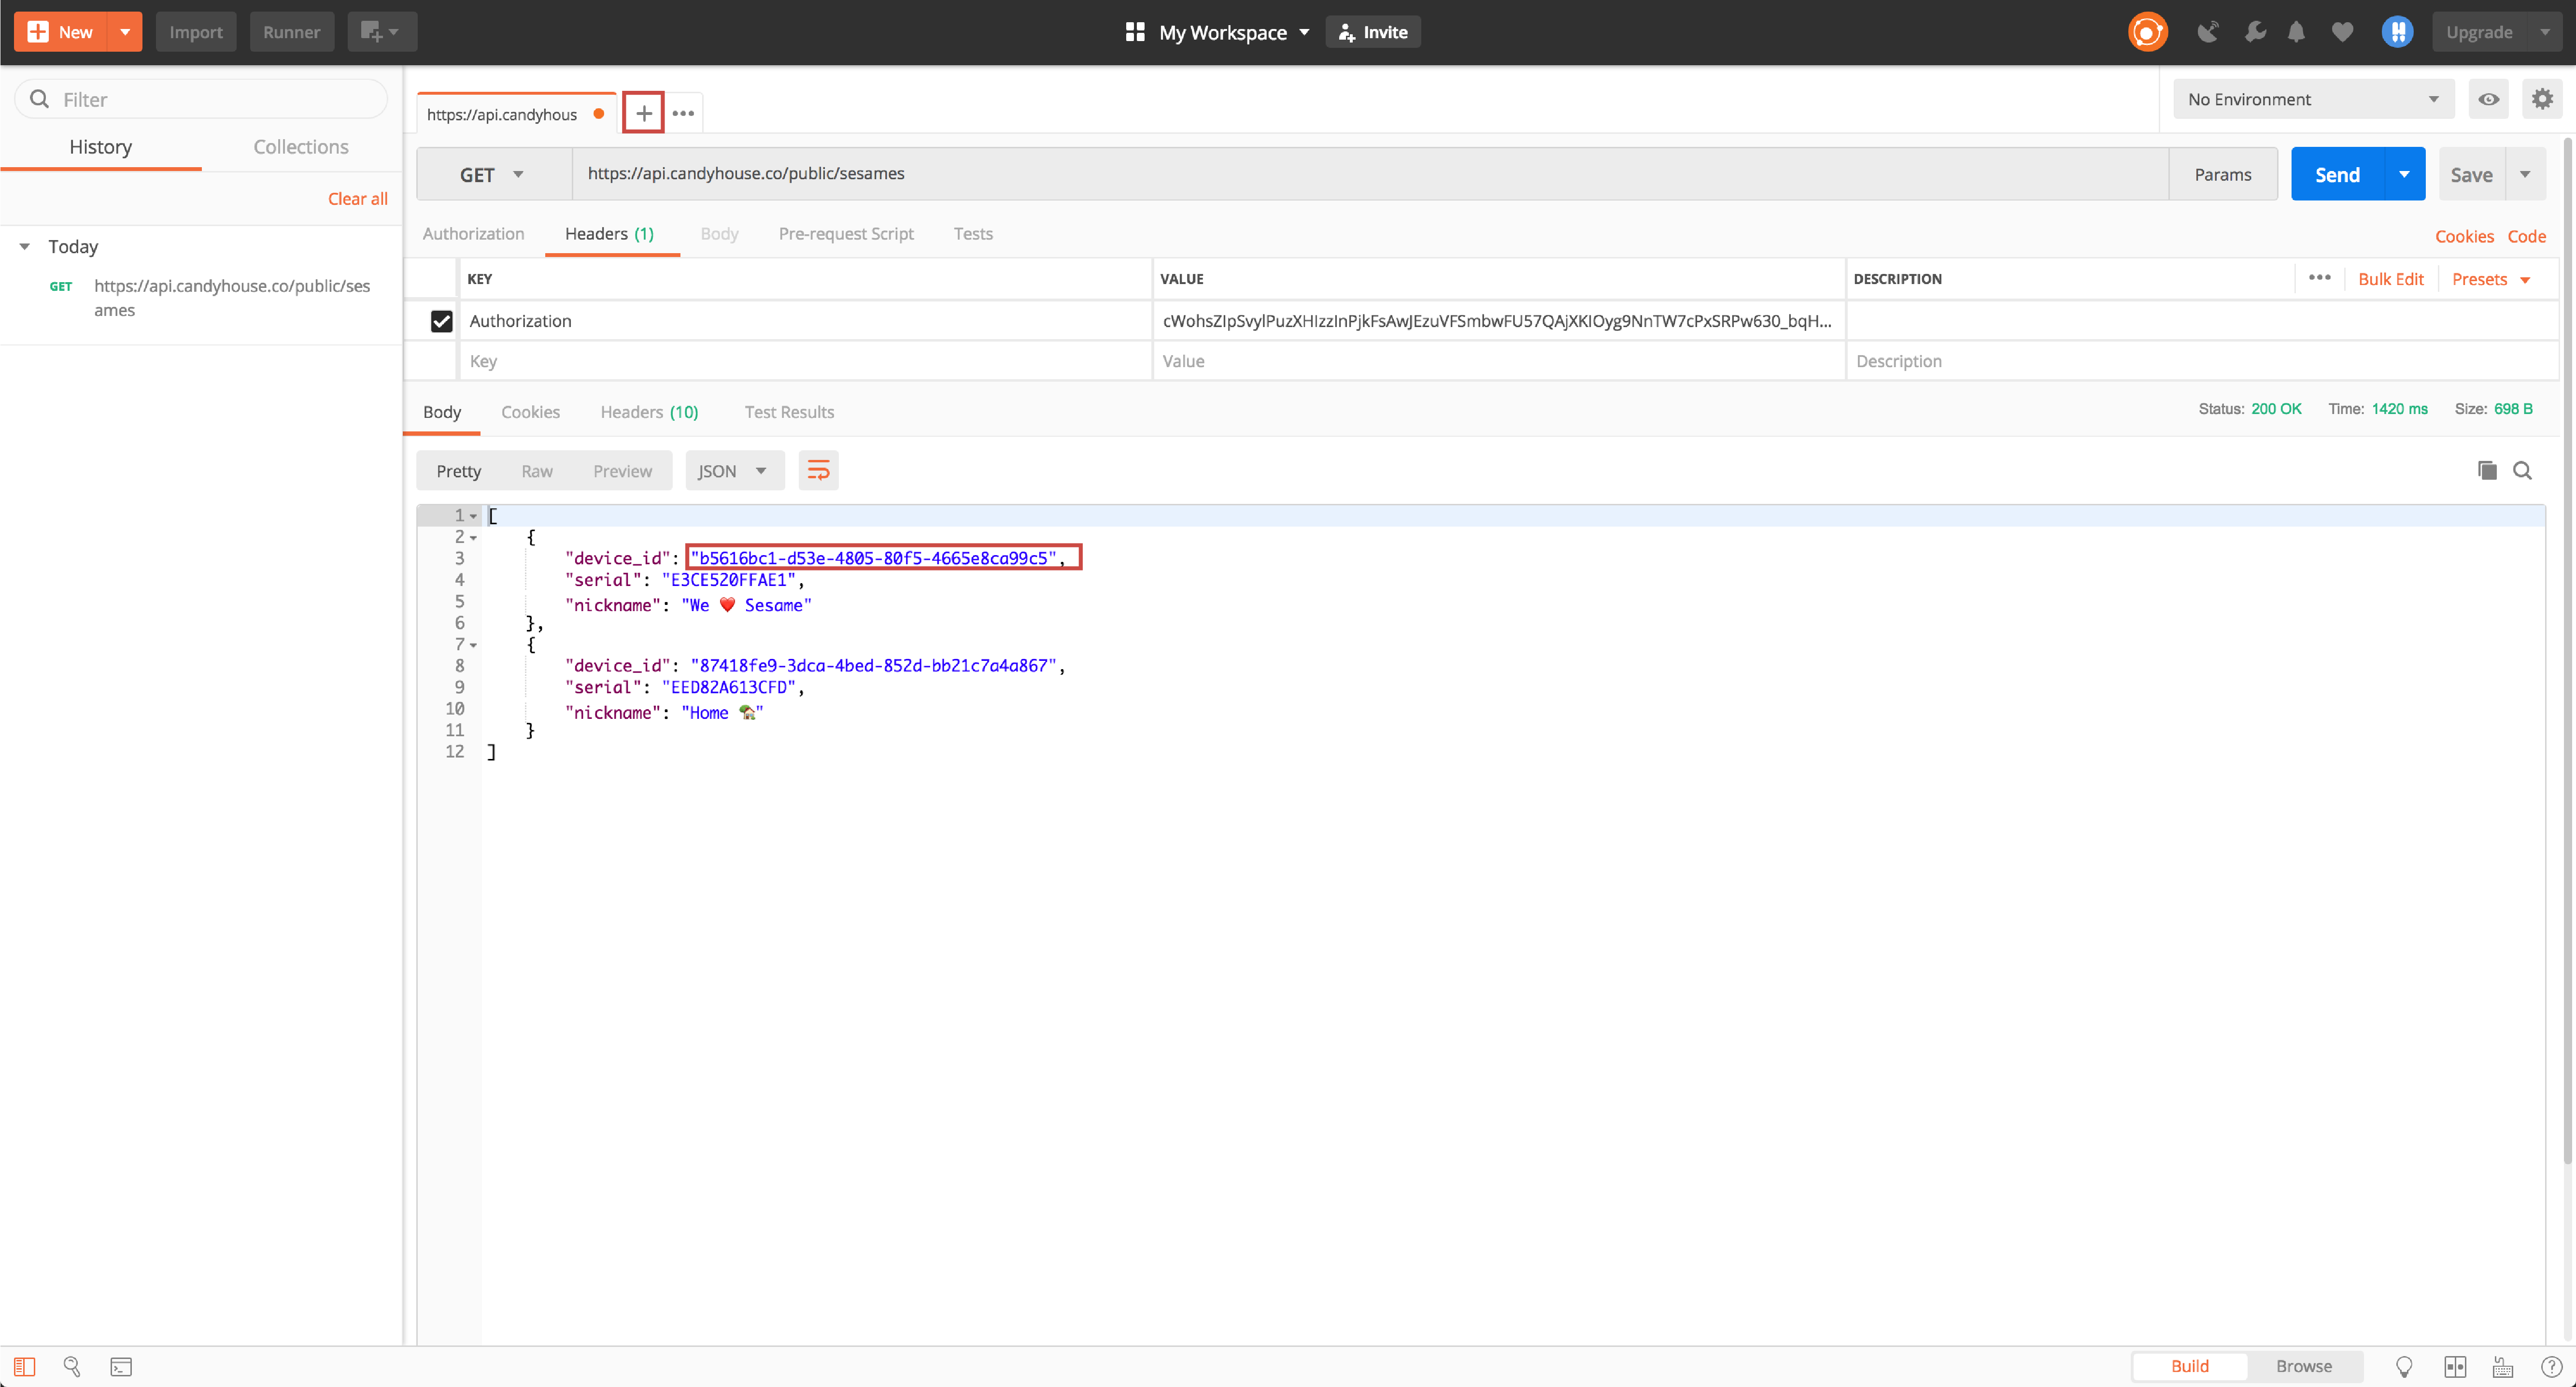
Copy the Device ID for the following steps, then click on the plus sign next to your current tab to open a new tab.
Request Sesame Status
Next, we will request the status for a Sesame in your list using its device ID. On your new tab, enter the following information:
- Leave GET as GET
- For the request URL, enter the following but change
*DEVICE_ID*to the actual ID of a Sesame you own:https://api.candyhouse.co/public/sesame/*DEVICE_ID* - Select the Headers tab
- Add your Sesame Token preset

Once you’ve confirmed everything is correct, click the blue Send button. If your request is successful, the API will return status 200 plus the following information for your Sesame:
- Locked (true = locked, false = unlocked)
- Battery percentage
- Responsive (true = responsive, false = unresponsive)

Lock Sesame
Next, we will pass a command to lock Sesame. Duplicate the “Get Sesame Status” tab by clicking the three circles next to the plus sign, then click Duplicate Current Tab.

On your duplicated tab, do the following:
- Change GET to POST
- Select the Body tab
- Select raw
- Select JSON (application/json)
- In the text field, type the following:
{"command":"lock"}

Make sure the information in both the Headers and Body sections are correct, then click the blue Send button. If your request is successful, the API will return status 200 plus the task ID. Copy the Task ID for the next step.

Query Task Result
- Next, we will check whether the command was successfully carried out by Sesame. Receiving the task ID merely indicates that our servers successfully received the request, but it doesn’t necessarily mean that Sesame was actually locked. Querying the status will let you know if the commane was successfully executed, and if not, the reason for failure. To begin, open a new tab, then enter the following information:
- Leave GET as GET
- For the request URL, enter the following but change
*TASK_IDto the actual task ID for your lock Sesame command:https://api.candyhouse.co/public/action-result?task_id=*TASK_ID* - Select the Headers tab
- Add your Sesame Token preset

- Make sure the information in both the Headers and Body section is correct, then click the blue Send button. If your request is successful, the API will return the status of your task. If the status is terminated, the API will also return whether the command was successful, and if not, why it failed.

Unlock Sesame
Now it’s time to unlock Sesame. Find the tab you used to lock Sesame, then duplicate the tab by clicking the three cirlces and Duplicate Current Tab. Next, do the following:
- Select the Body tab
- In the text field, change the content to the following:
{"command":"unlock"}

Click the blue Send button. If the request is successful, the API will return status 200 and the task ID. You can copy this task ID and query its status if you’d like.
Sync Sesame Status
In addition to the lock and unlock commands, you can also use the sync command to force the server to update Sesame status. To do so, duplicate your unlock Sesame tab by clicking the three cirlces and Duplicate Current Tab. Next, do the following:
- Select the Body tab
- In the text field, change the content to the following:
{"command":"sync"}

Click the blue Send button. If the request is successful, the API will return status 200 and the task ID. You can copy this task ID and query its status if you’d like.
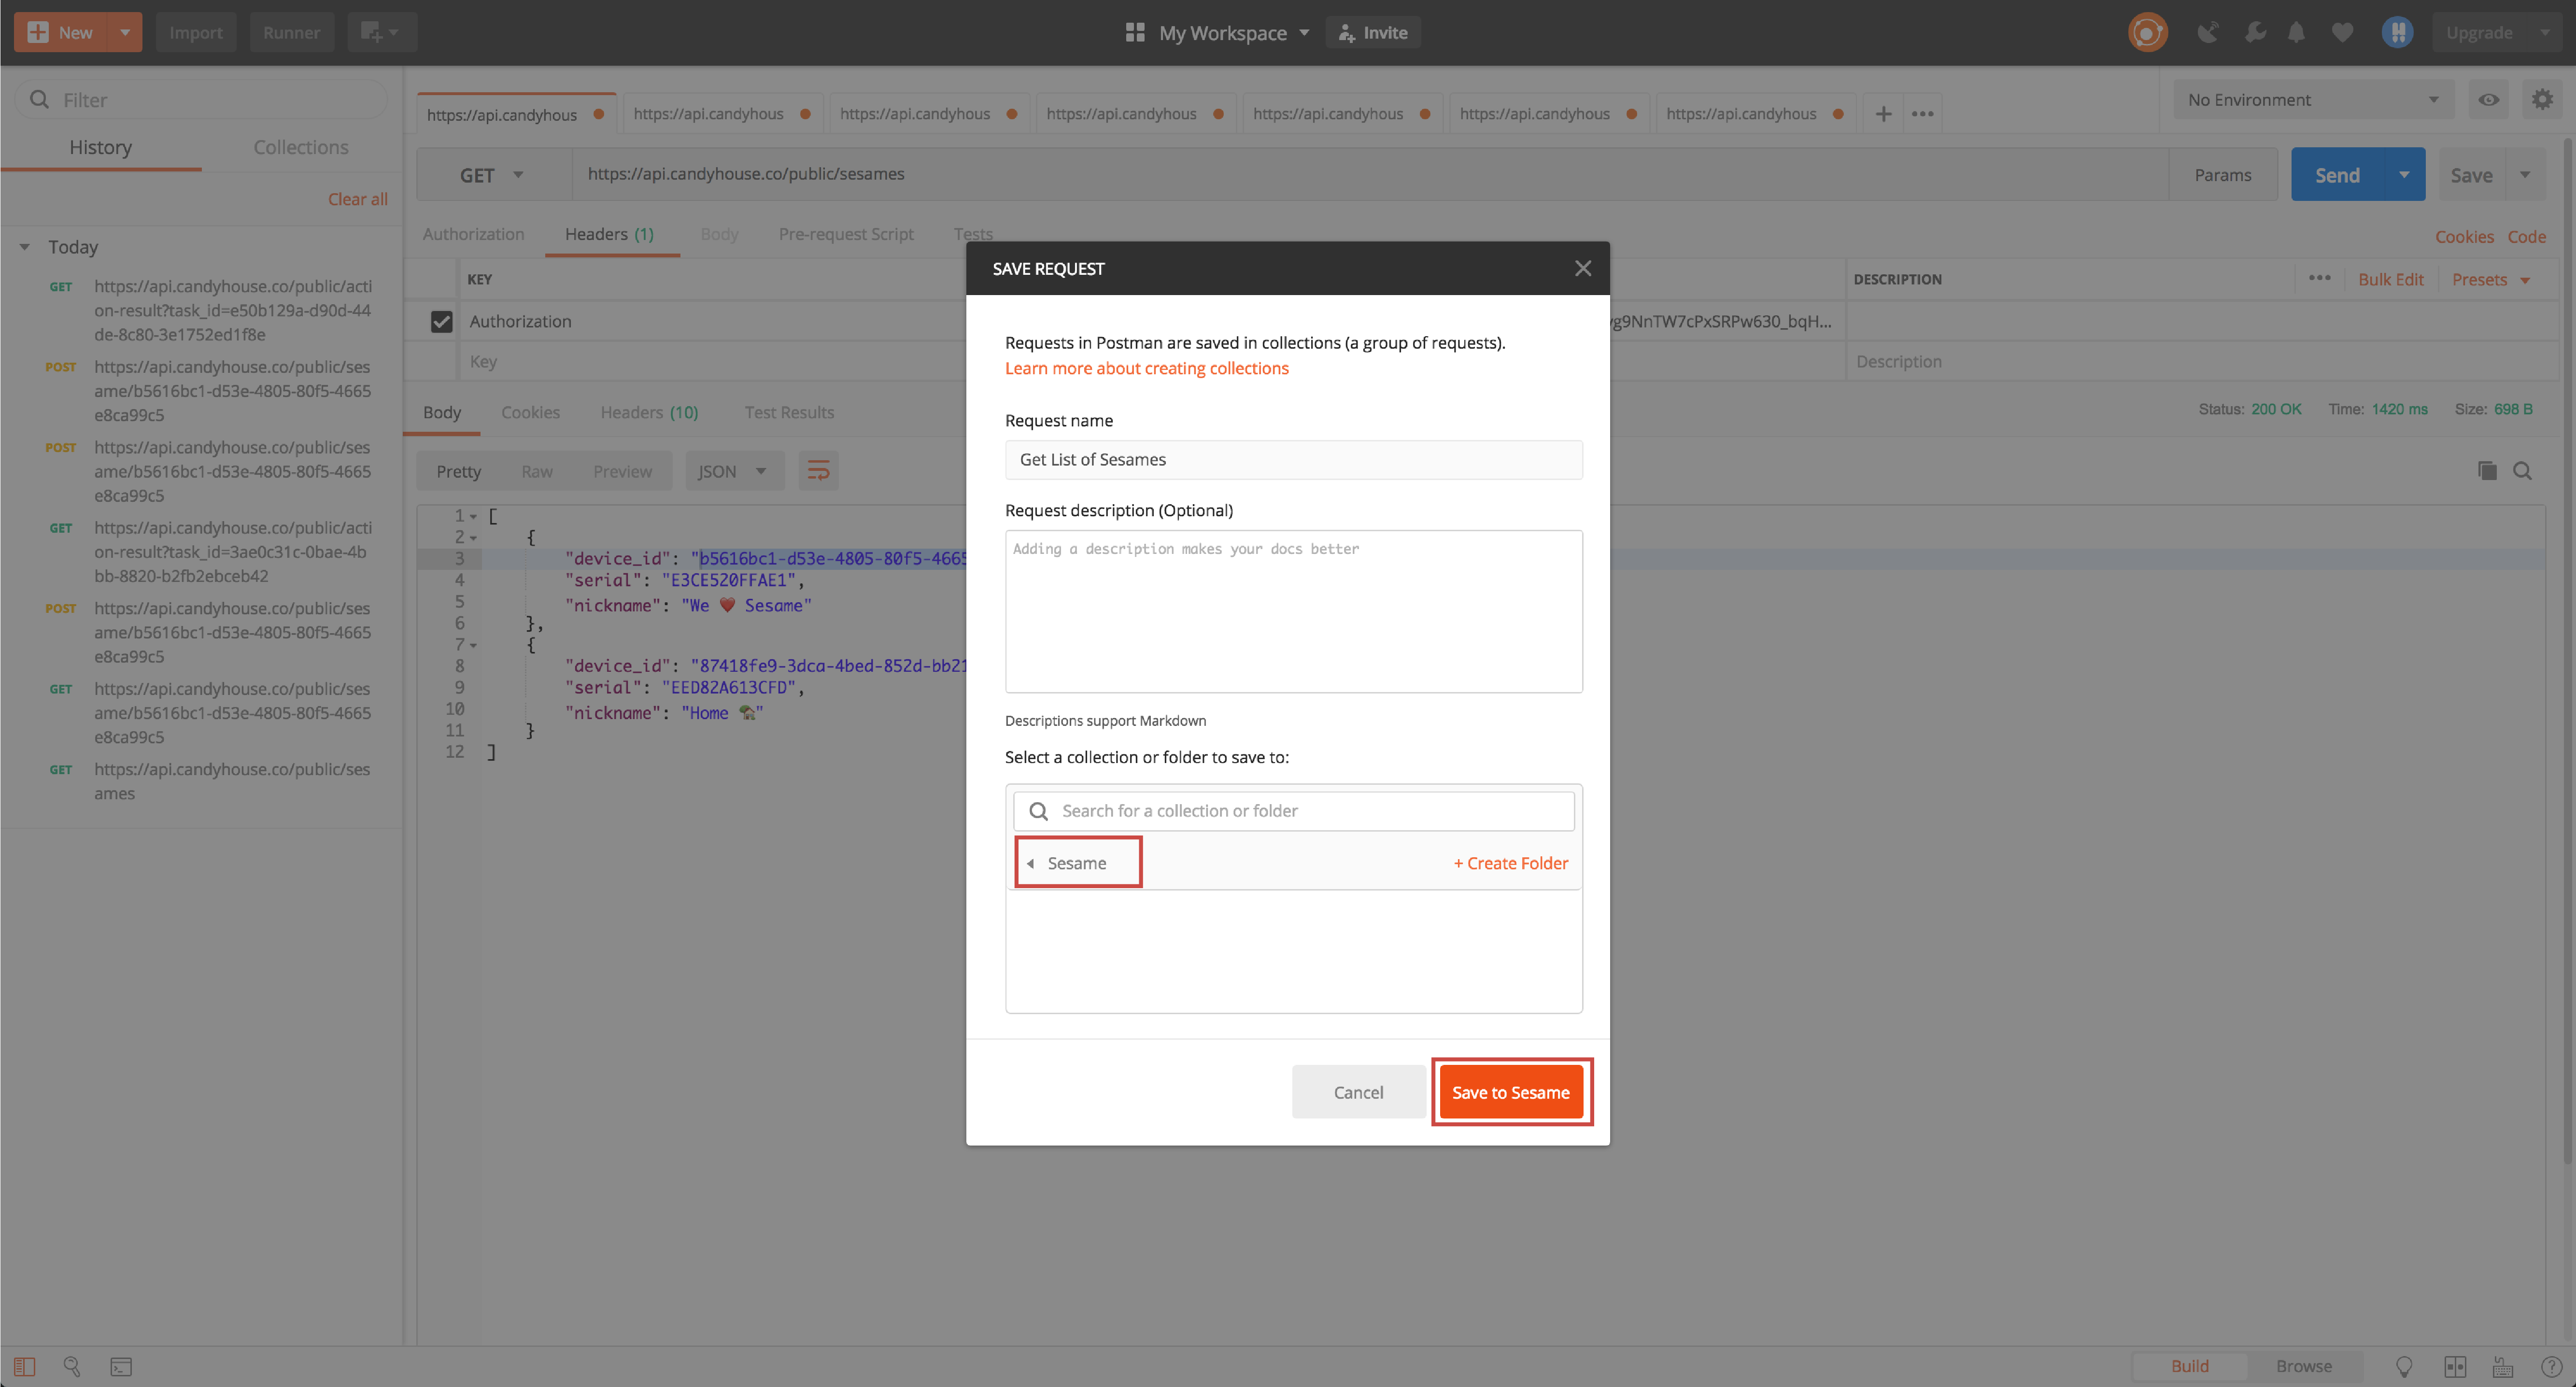
Saving Your Requests
If you haven’t already, be sure to save each of your requests by clicking the Save button and giving the request a name that describes its function.

You will also need to create a collection in which to save all your requests. Click Create Collection, give your collection a name, then click the checkmark.

Once you’ve done so, select your collection and click Save.
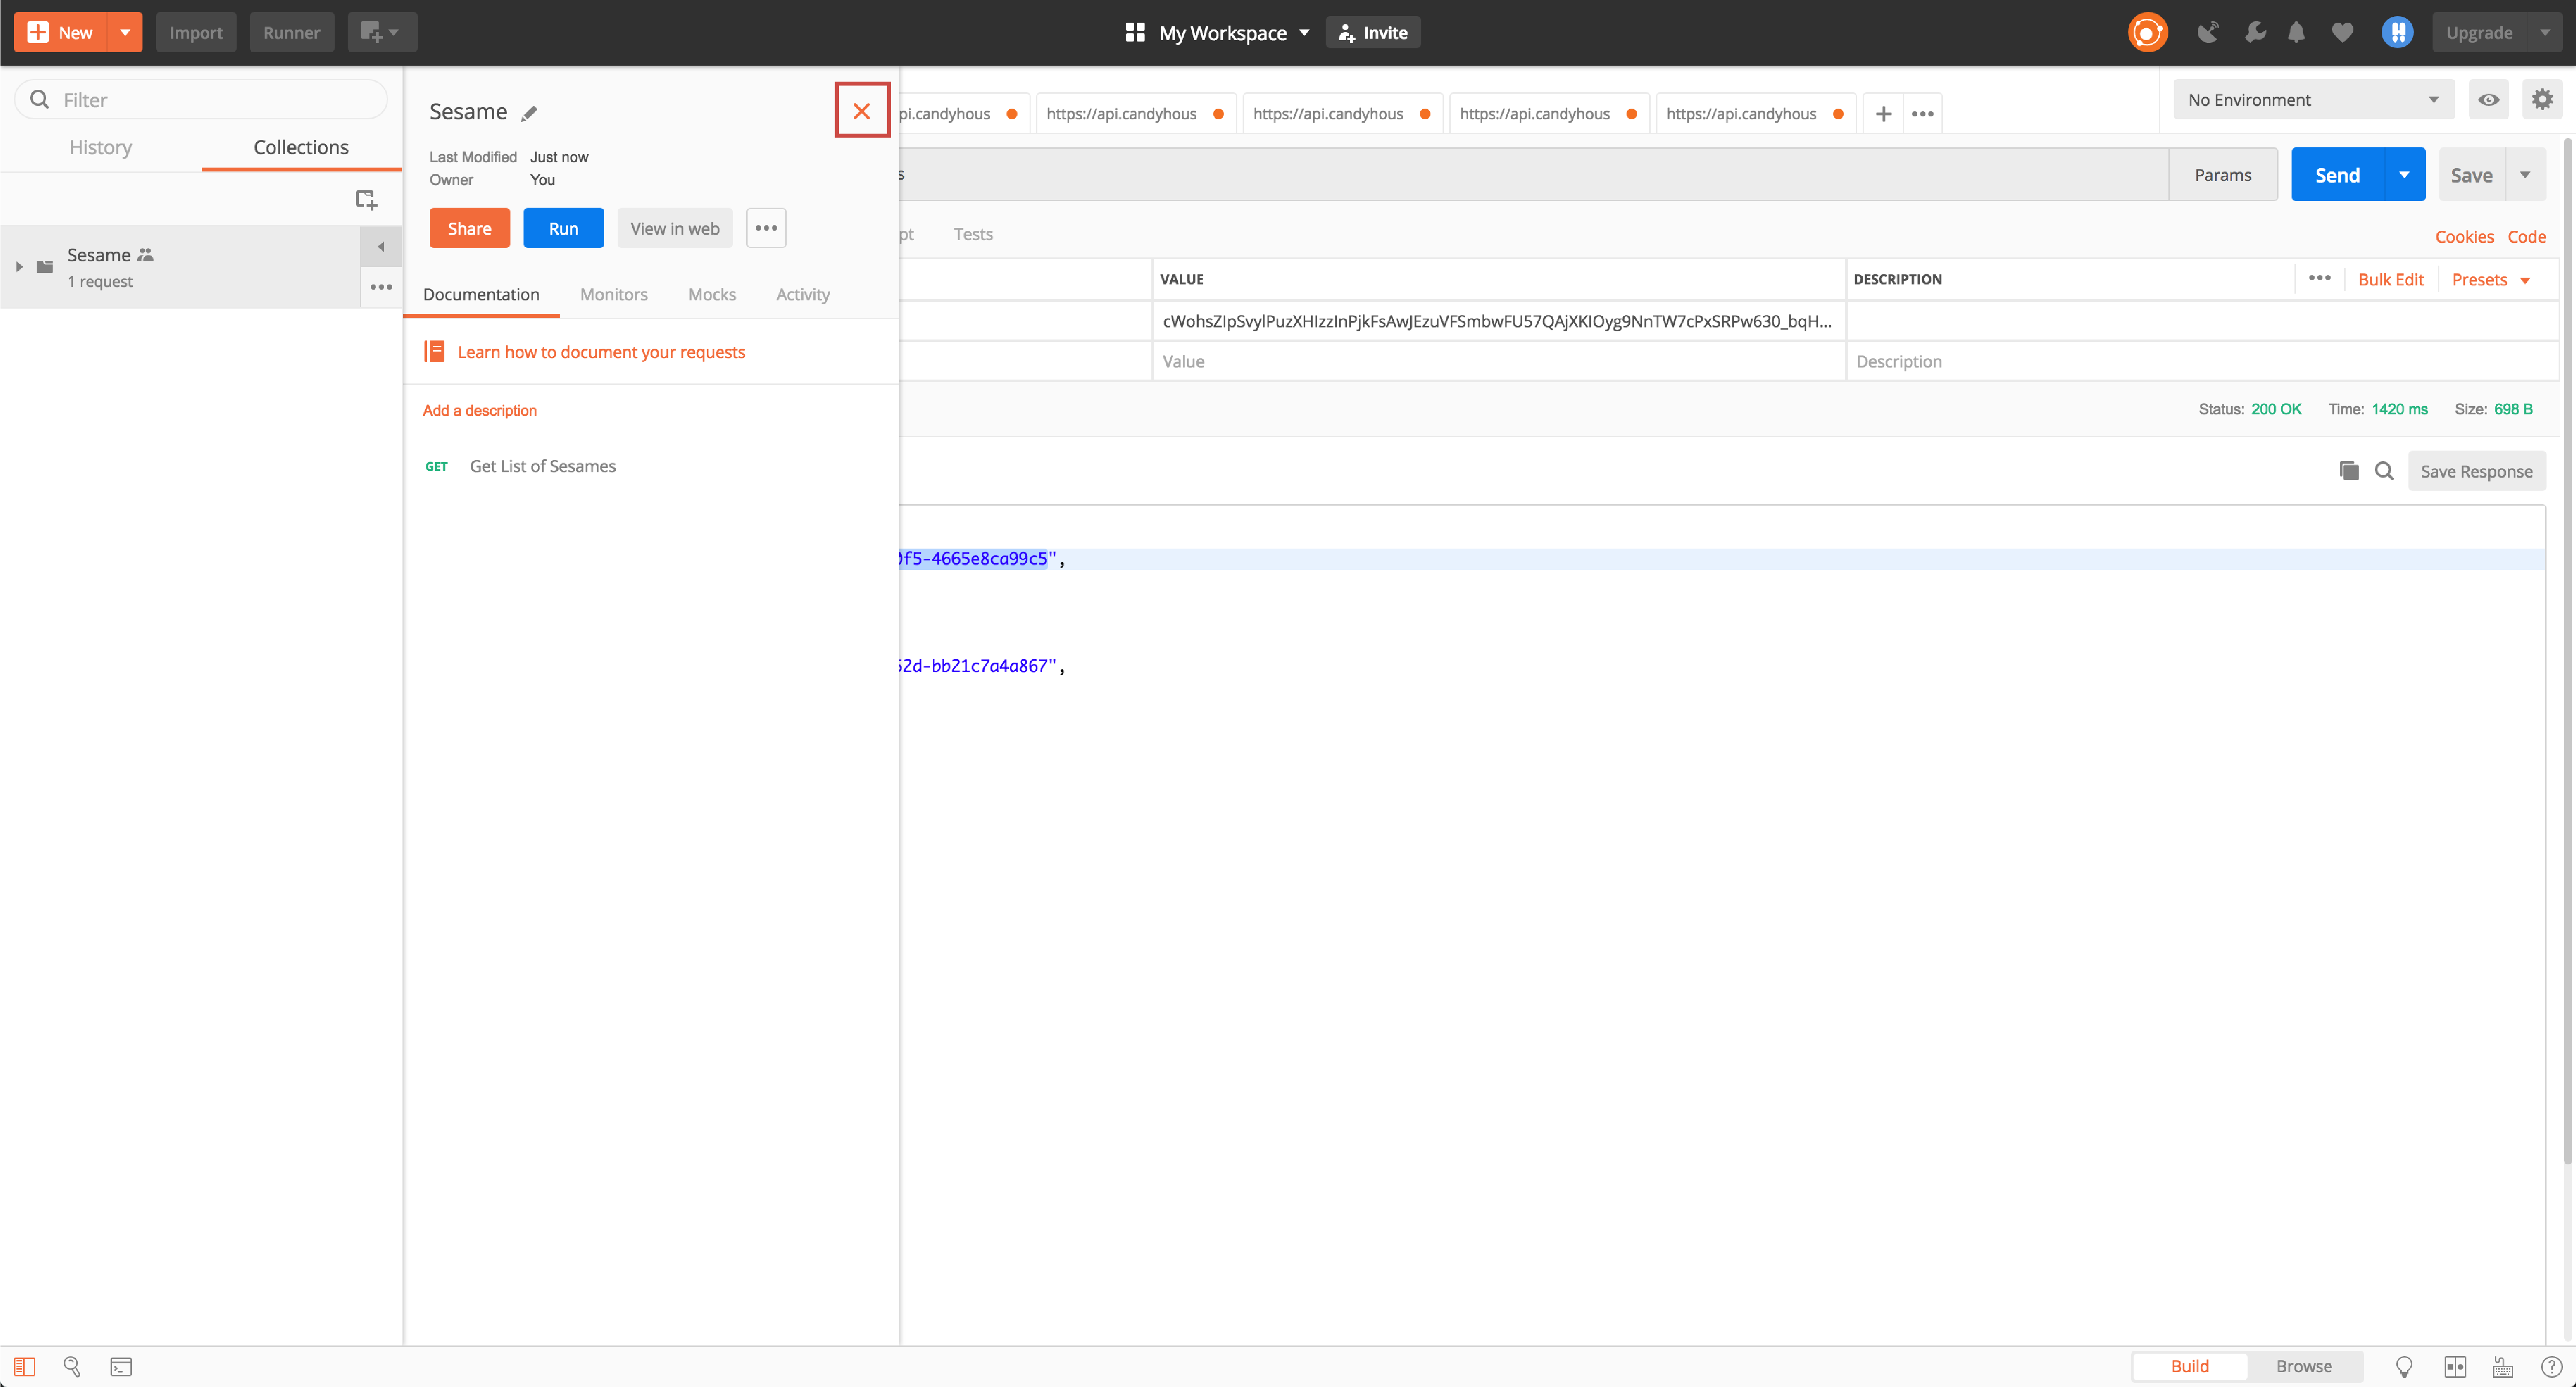
After you save your first request in a collection, the collection sidebar will open. Click the X on the upper right to close this sidebar. Once you’ve done so, you can continue saving your other requests.
The next time you’d like to send a request, you can either click on the existing tab or find your request in your Sesame collection. Click the Send button to make the request.
Support
We hope you found our tutorial helpful! If you have any feedback or questions for us, please feel free to email sesame@candyhouse.co and we’ll be happy to answer your questions! You can also check out the CANDY HOUSE forum for API-related discussions - just sign in with your CANDY HOUSE account email and password.
Tutorial 2: API & Webhook (IFTTT)
Introduction
In this tutorial, you will learn how to turn Sesame being locked or unlocked into an IFTTT trigger (“If This”) as well as lock or unlock Sesame as an IFTTT action (“Then That”). You will use both the Sesame RESTful API as well as the Sesame Webhook as well as the IFTTT platform.
To complete this tutorial, you must have the following:
- Sesame smart lock
- Wi-Fi Access Point
- Computer or mobile device with internet access
Before You Start
You must be the owner of Sesame to enable the API.
You must have a Wi-Fi Access Point properly set up and paired with your Sesame (instructions here).
Make sure to enable cloud integration for your Sesame under Status > Change Settings > Integration.
Keep the Sesame app closed while using the API; if it’s open it will prevent the API from connecting to your Sesame. Only one device can connect to Sesame at a time.
You will need to create an account at IFTTT in order to create IFTTT applets.
Obtain Your API Key and Device ID
Login to your CANDY HOUSE Account on the CANDY HOUSE Dashboard with your email and password or Google account.
Click on API Settings in the sidebar. To access your API Settings, you will need to enter a verification code. Click SEND CODE and your verification code will be sent to the email address you used to login. Enter the code and then click CONFIRM.
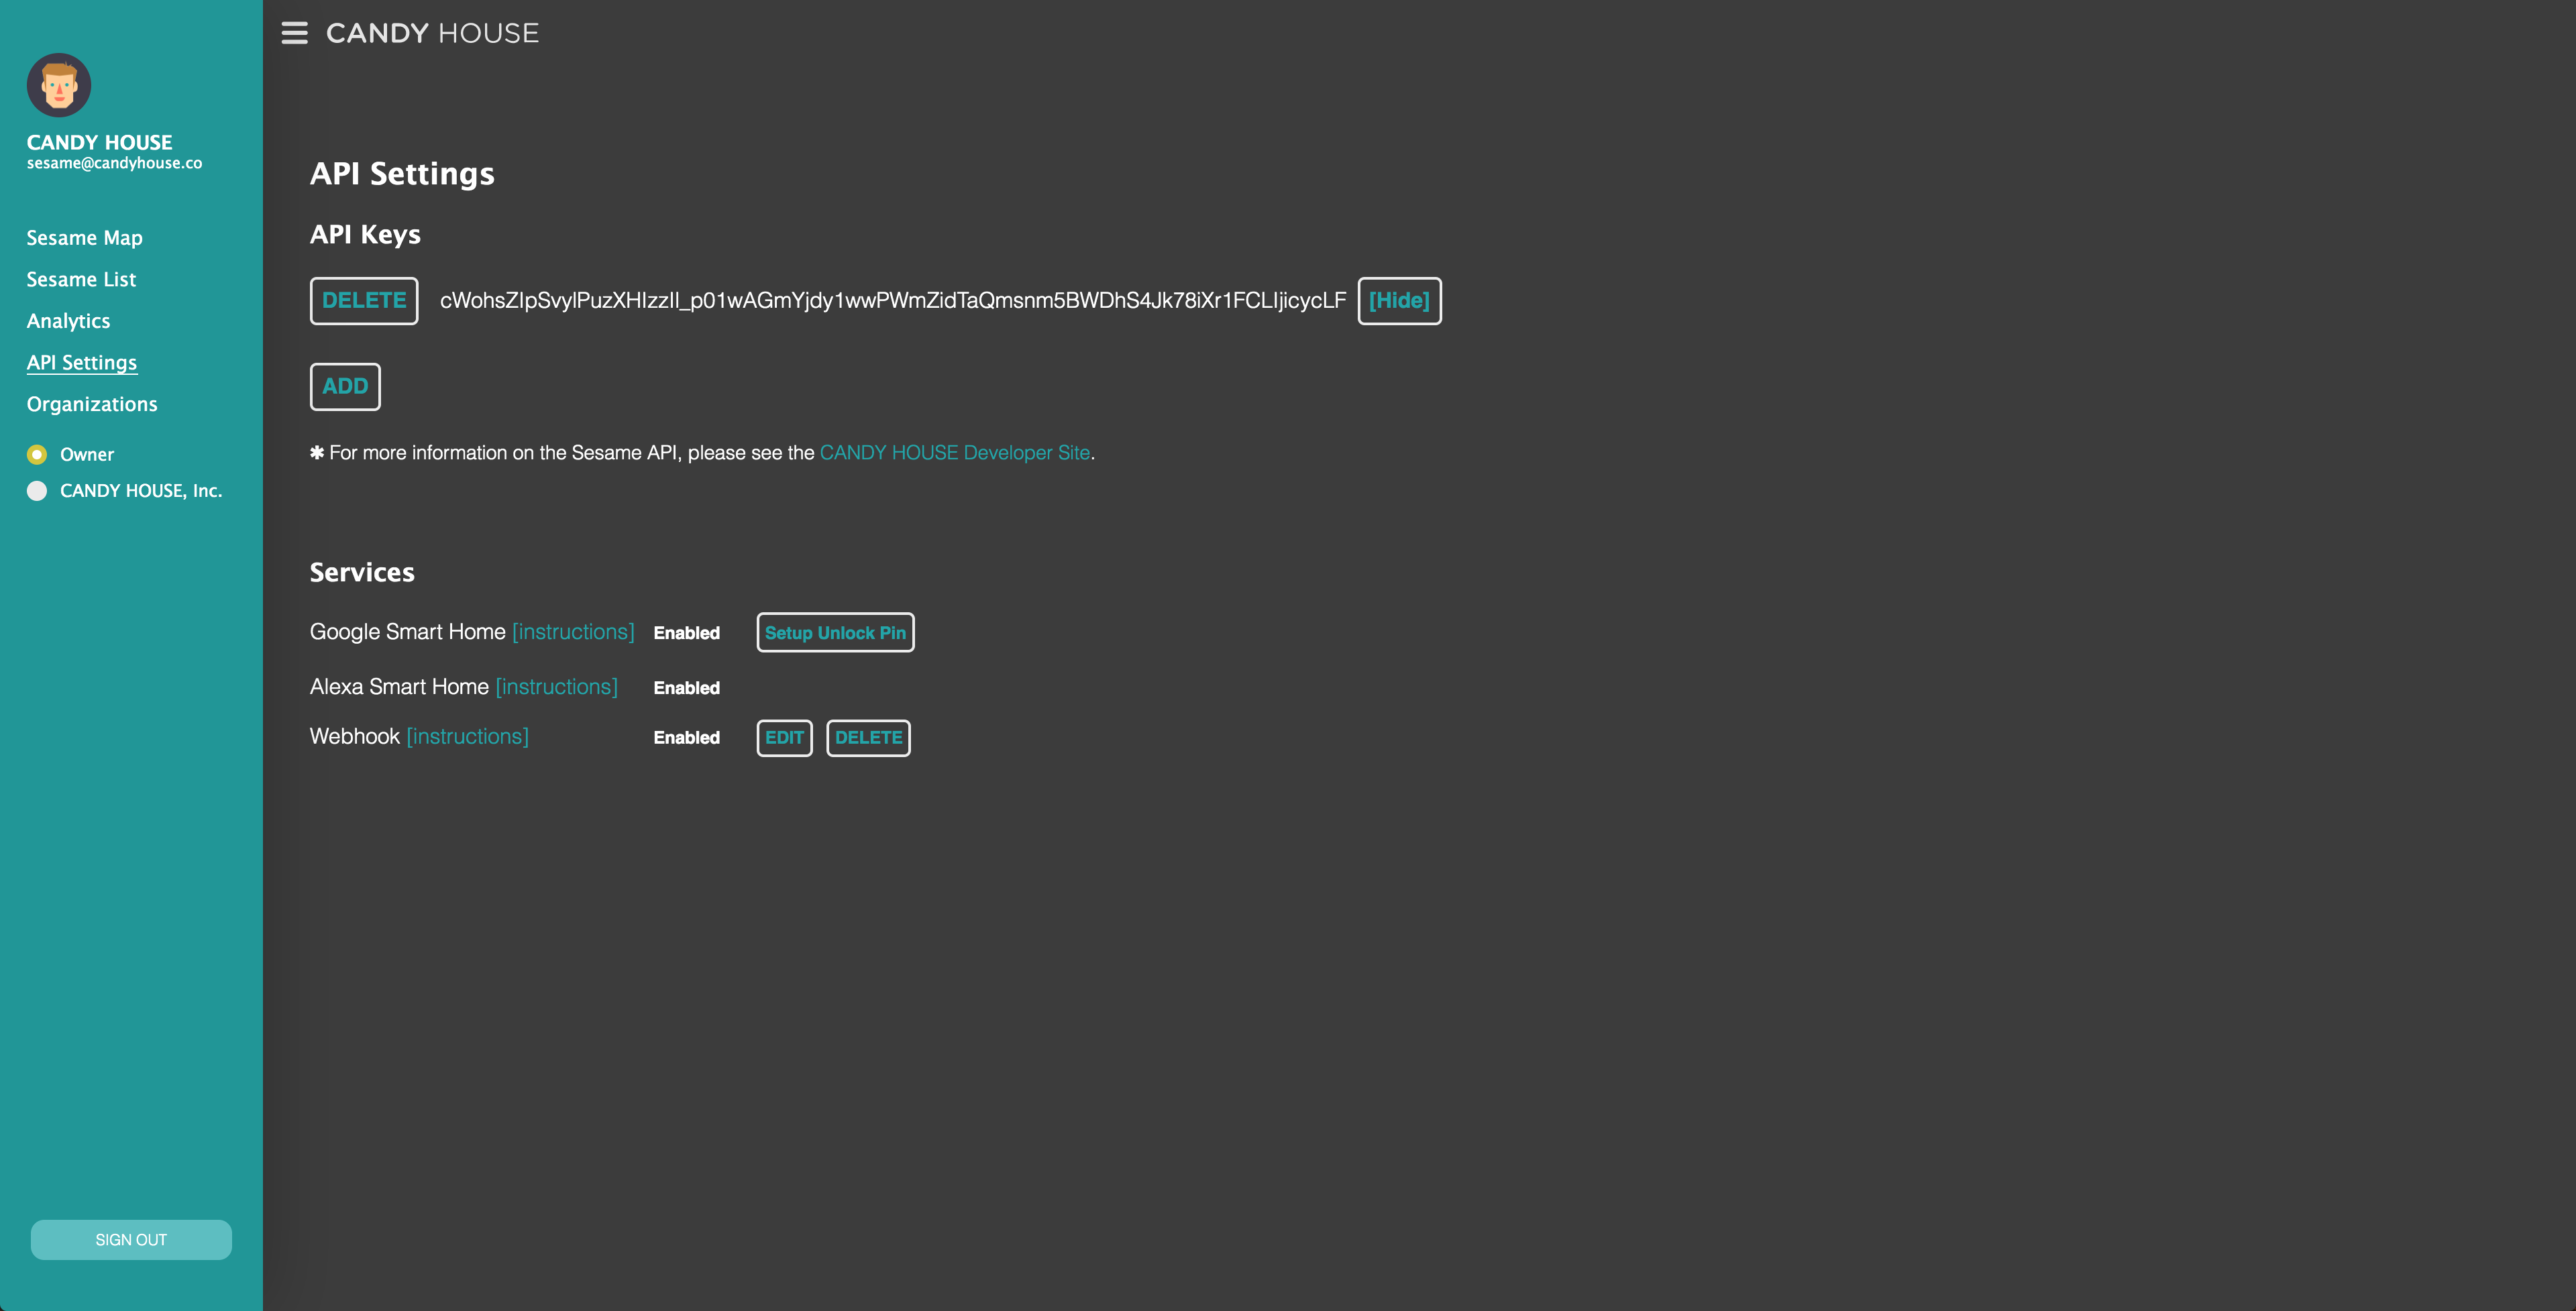
Once you’ve entered the verification code, you will be able to access your API Settings. Click ADD to add a new API Key. Please note that the full key will no longer be visible once you refresh or logout, so be sure to save a copy somewhere. You can also delete existing keys and create additional keys as needed.
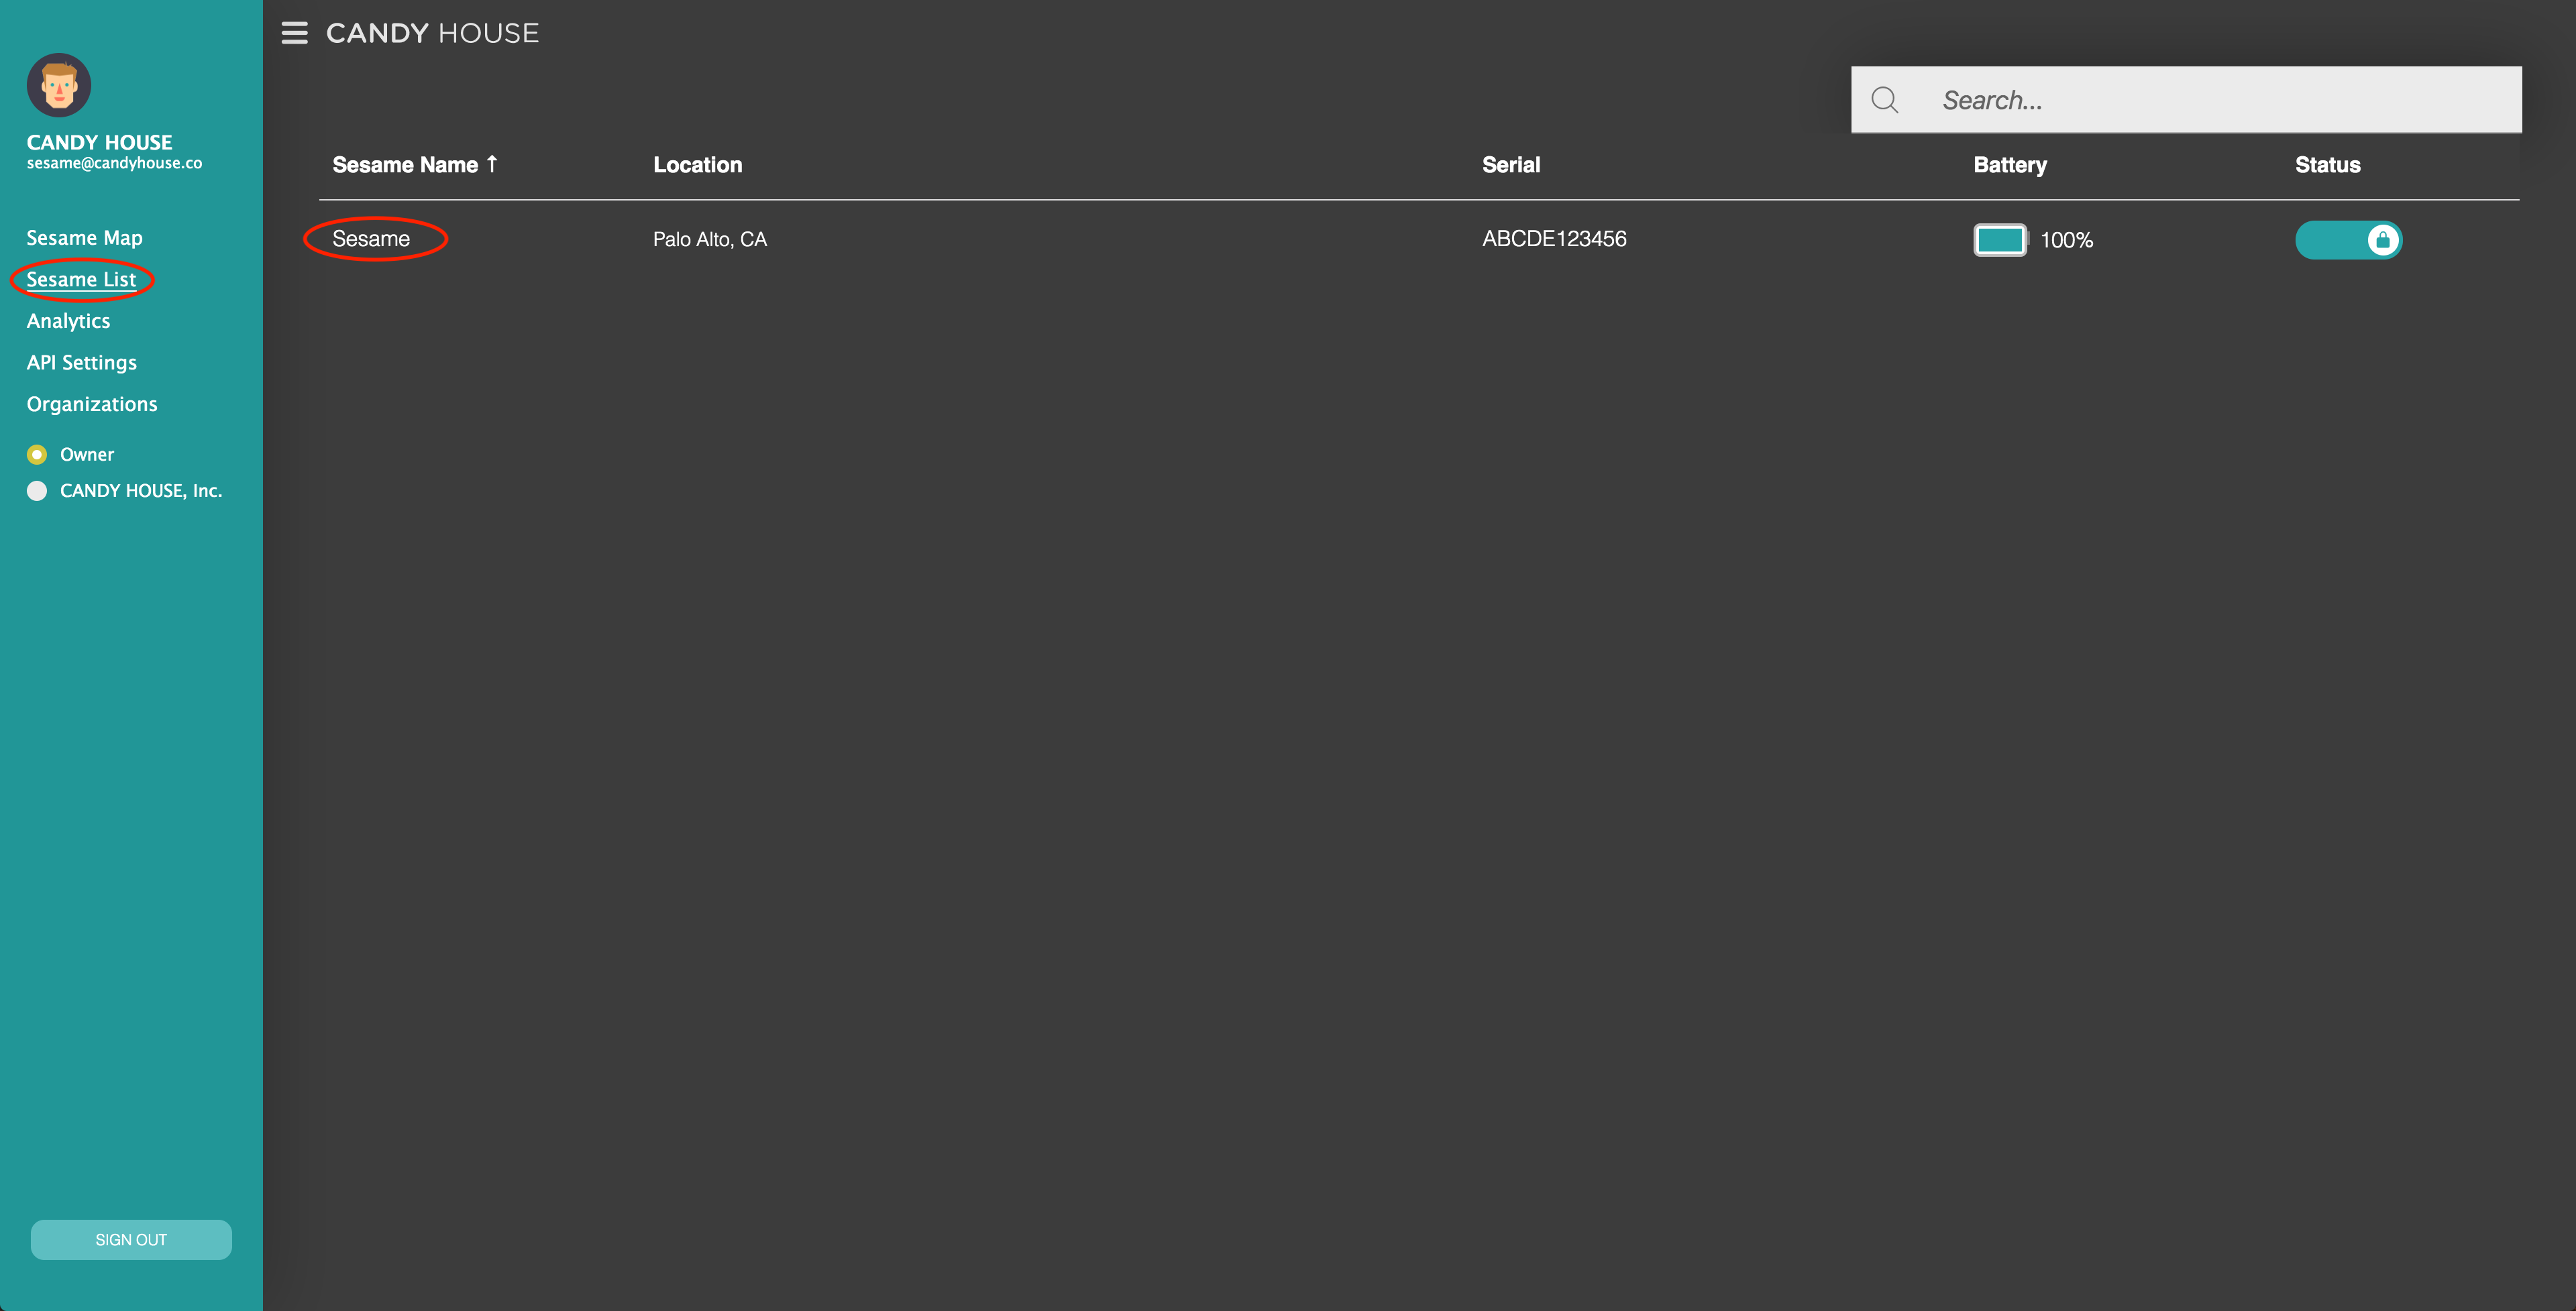
To obtain your Device ID, click on Sesame List in the sidebar, then click on your Sesame. The device ID will be in the URL. Select the alphanumerical string after the last slash in the URL; you will use this as the device ID later, so keep the tab open or copy it to a safe place.

Lock or Unlock Sesame as an IFTTT Action
First, make sure you go to the Webhook service and click CONNECT to add this service to your IFTTT account.
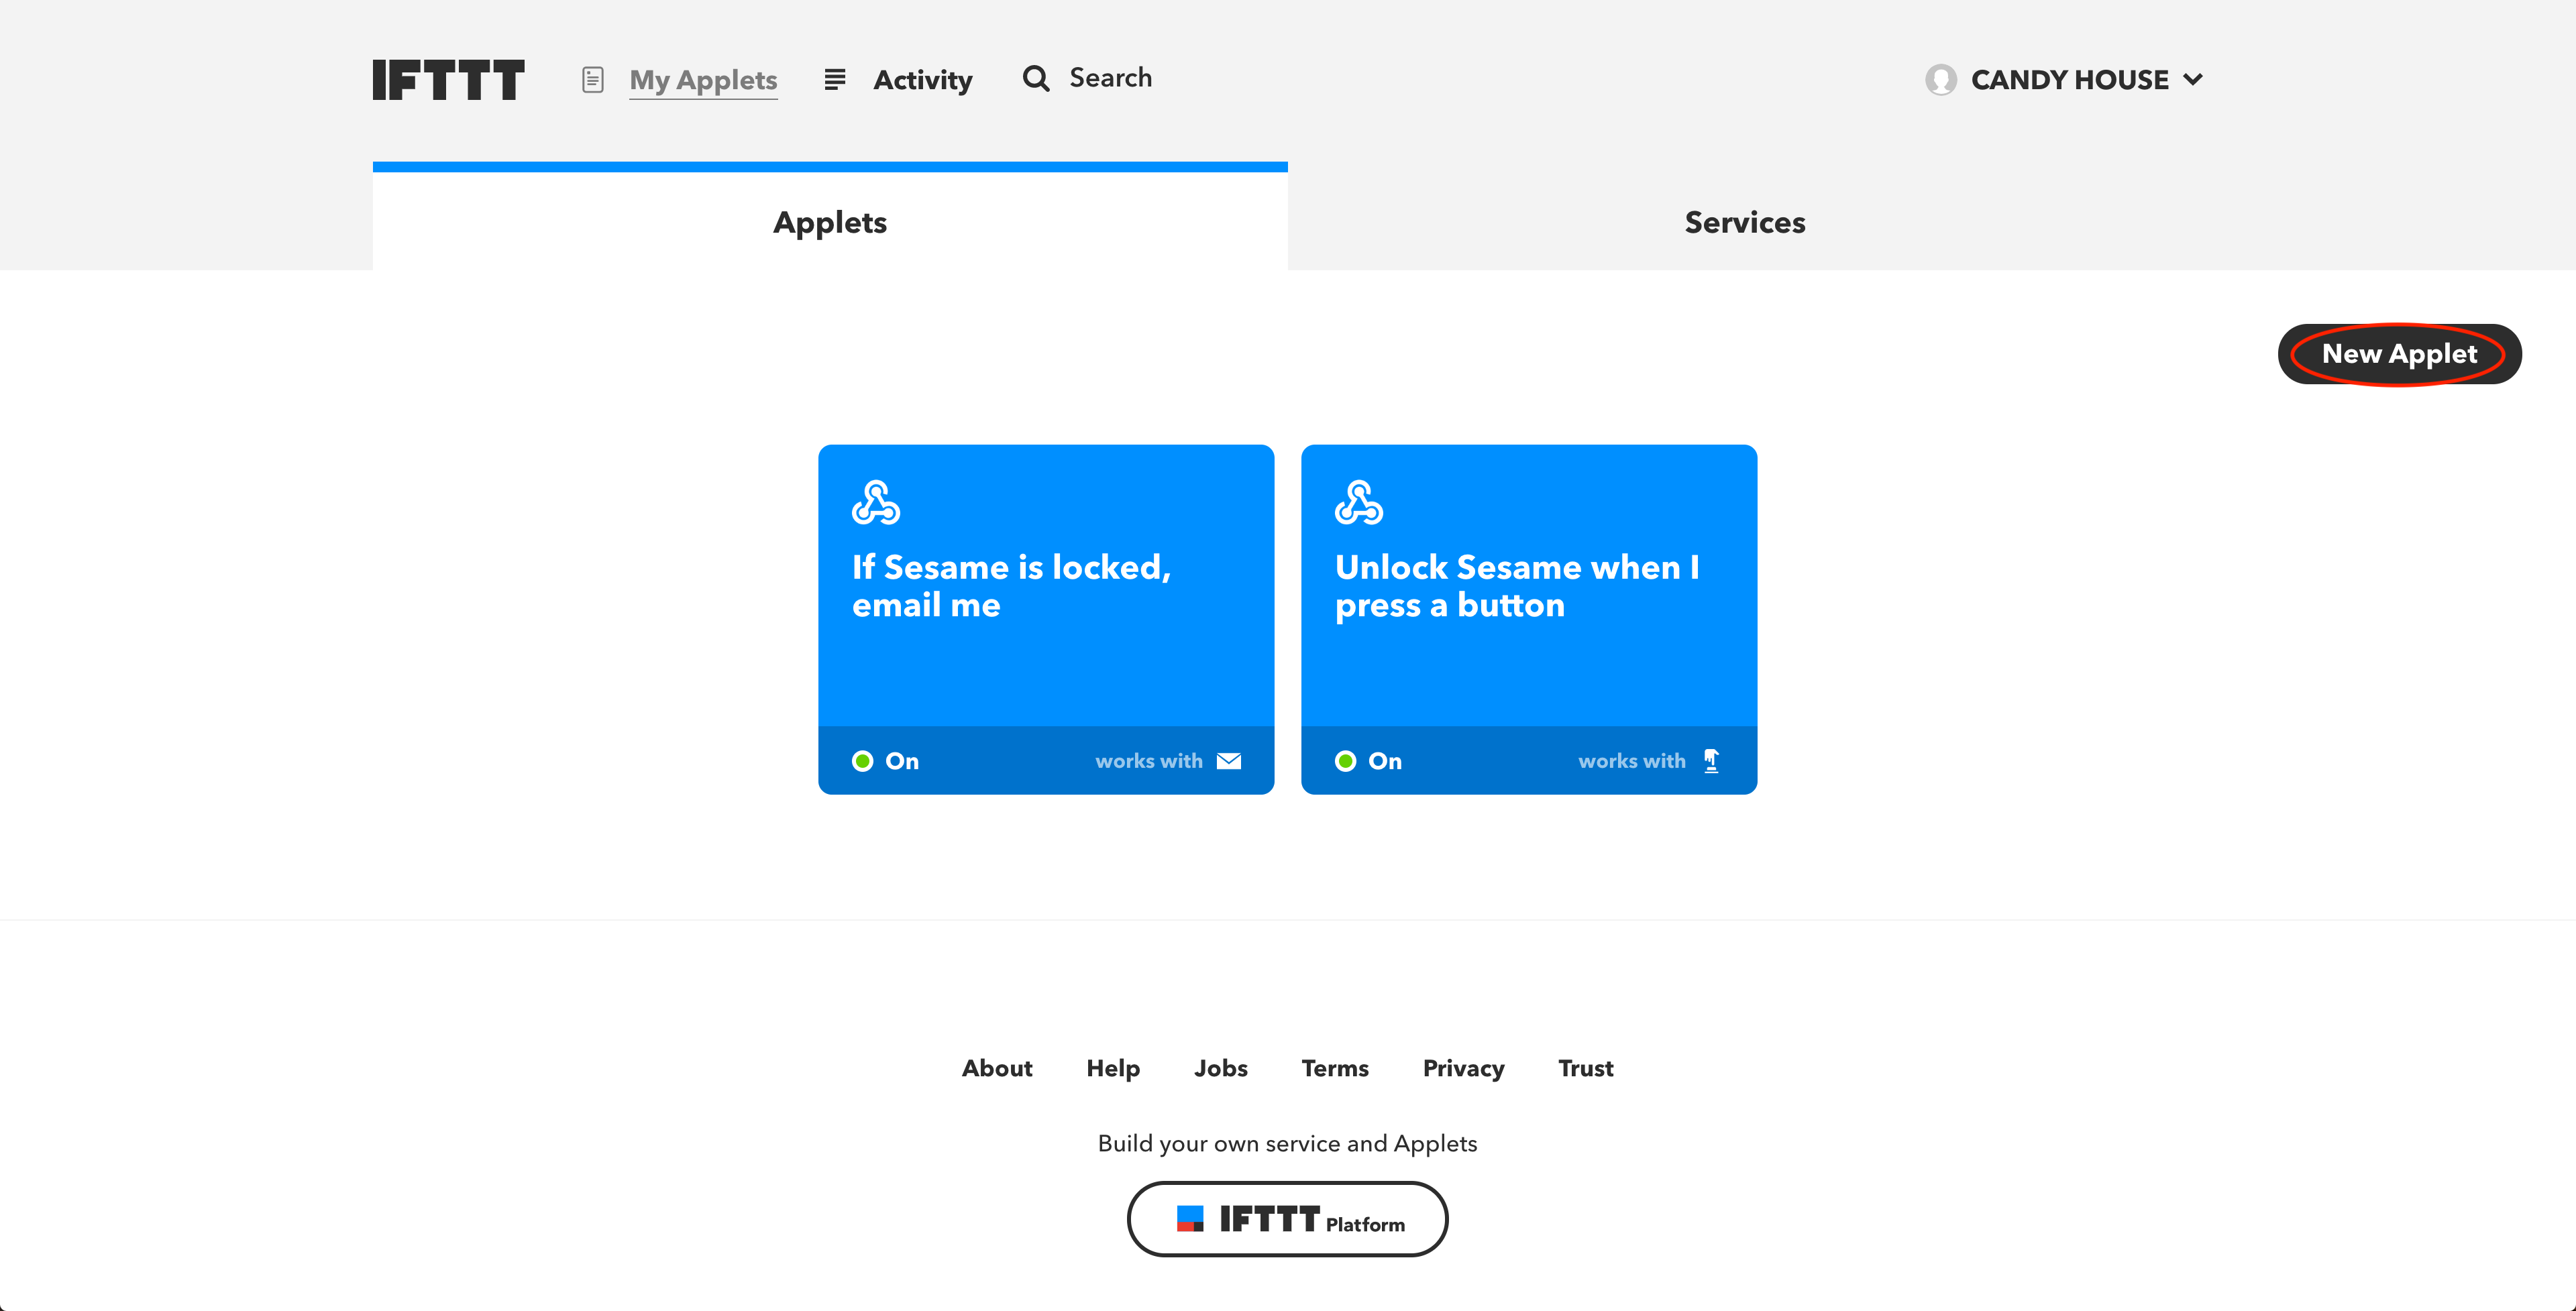
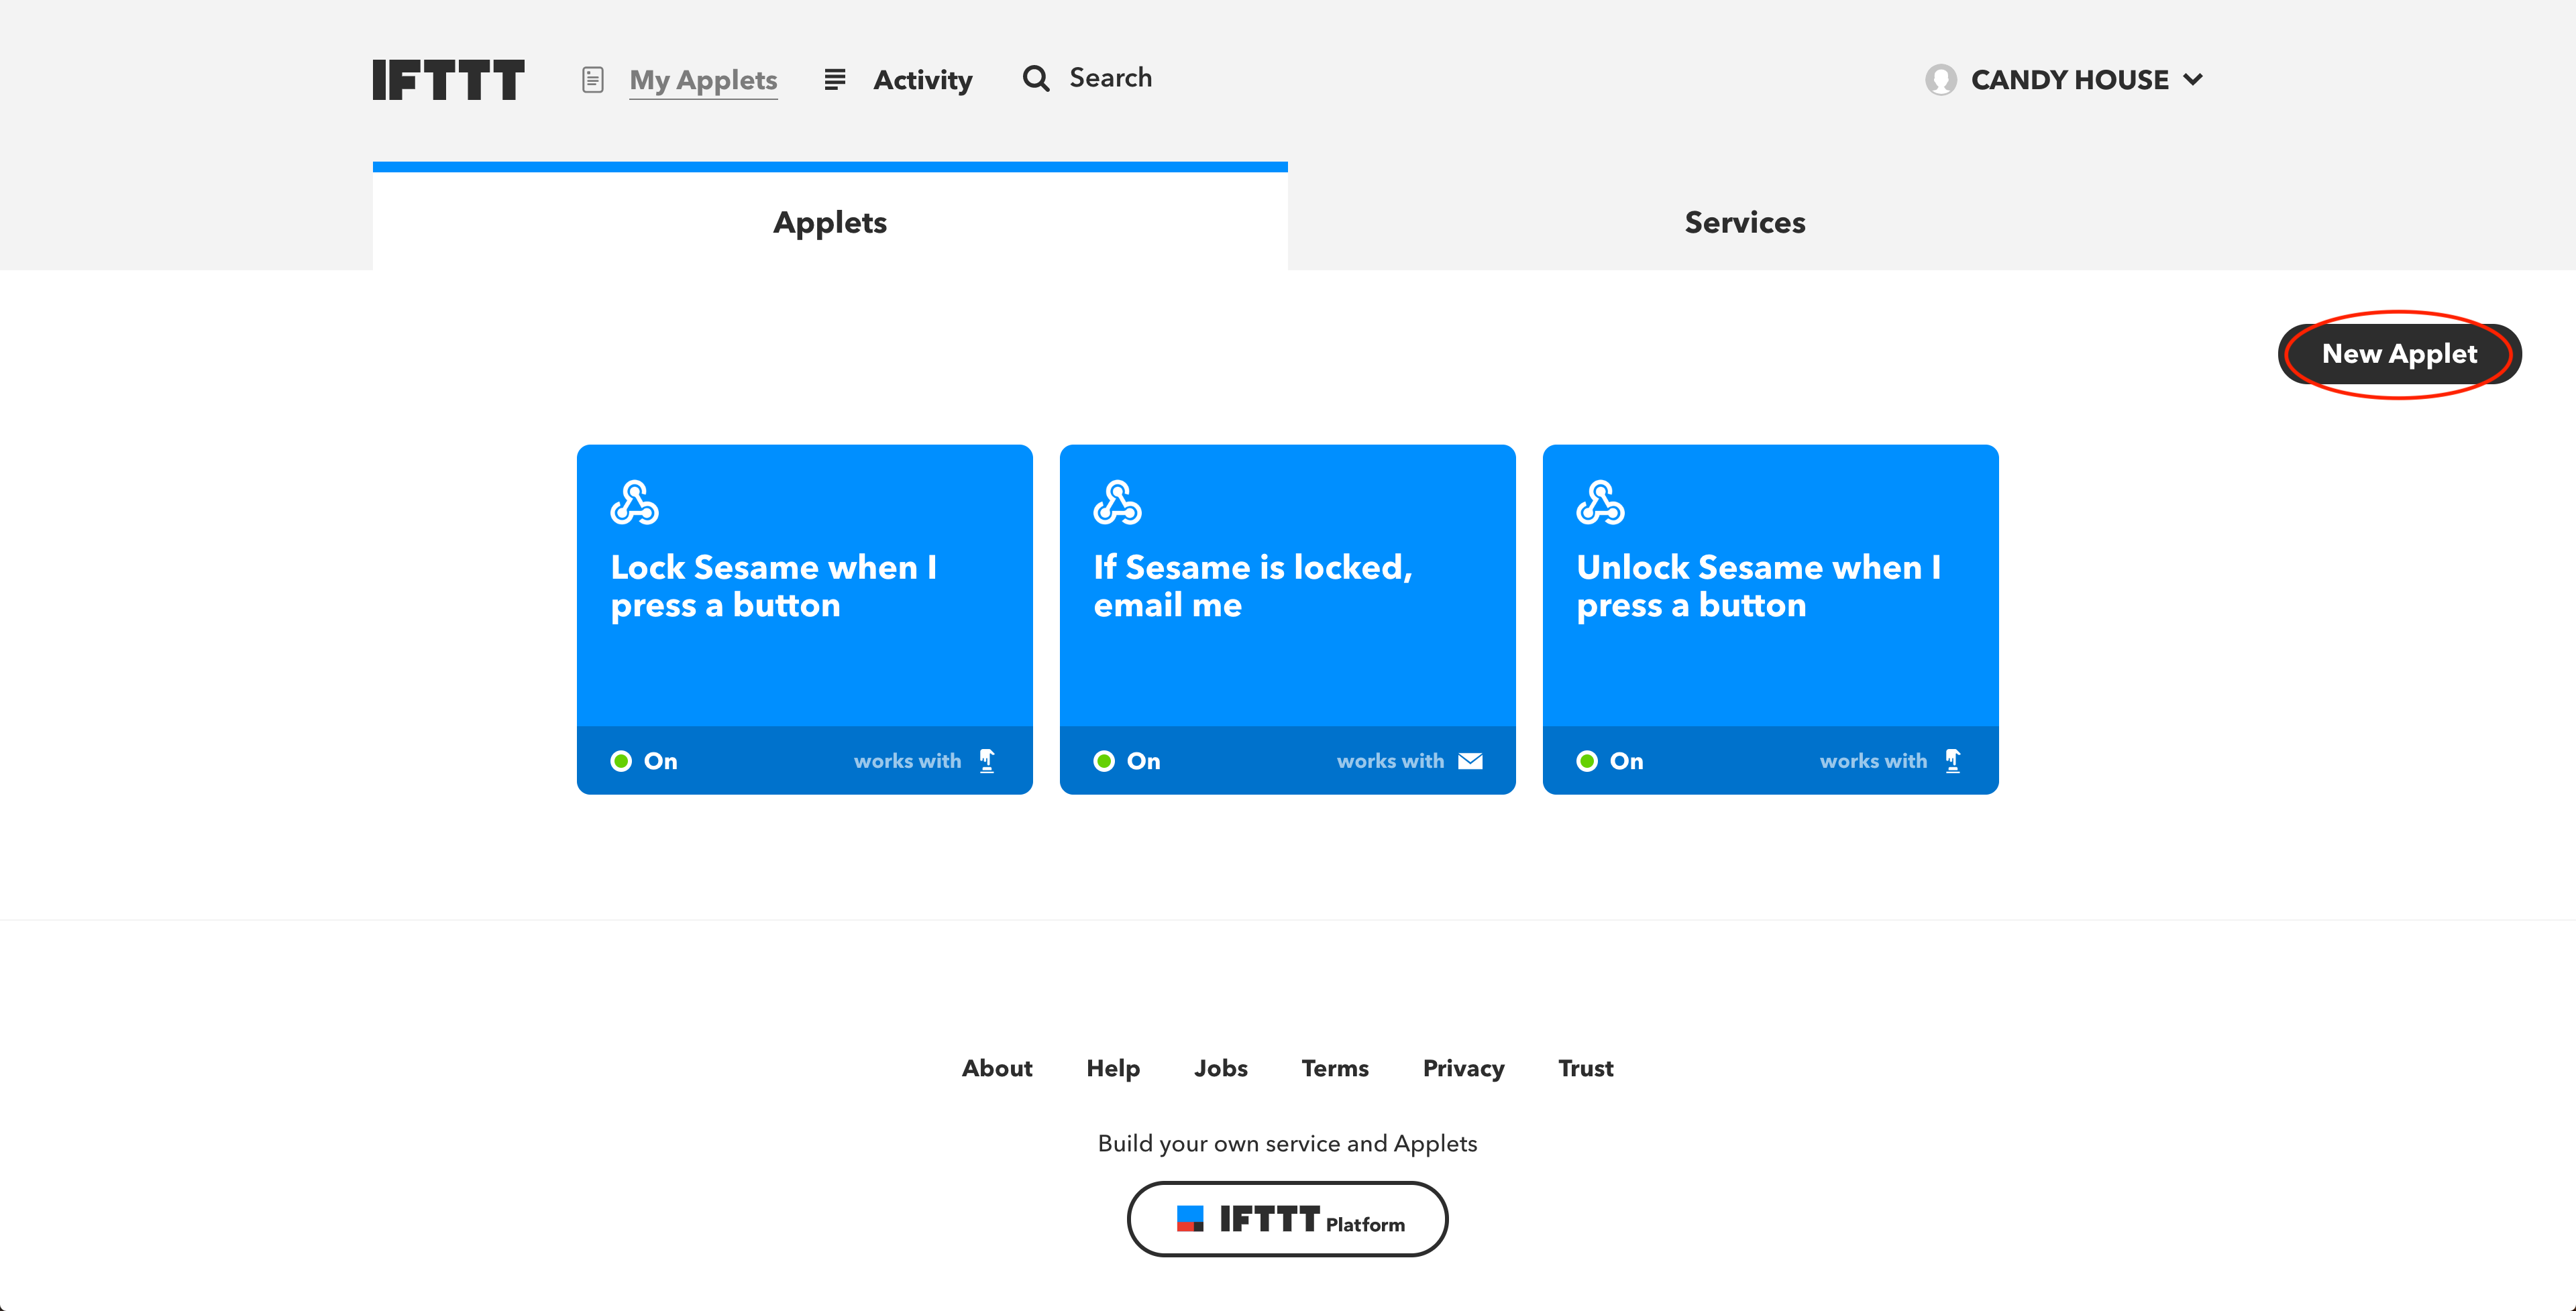
Next, go to your IFTTT account and click on the New Applet button.
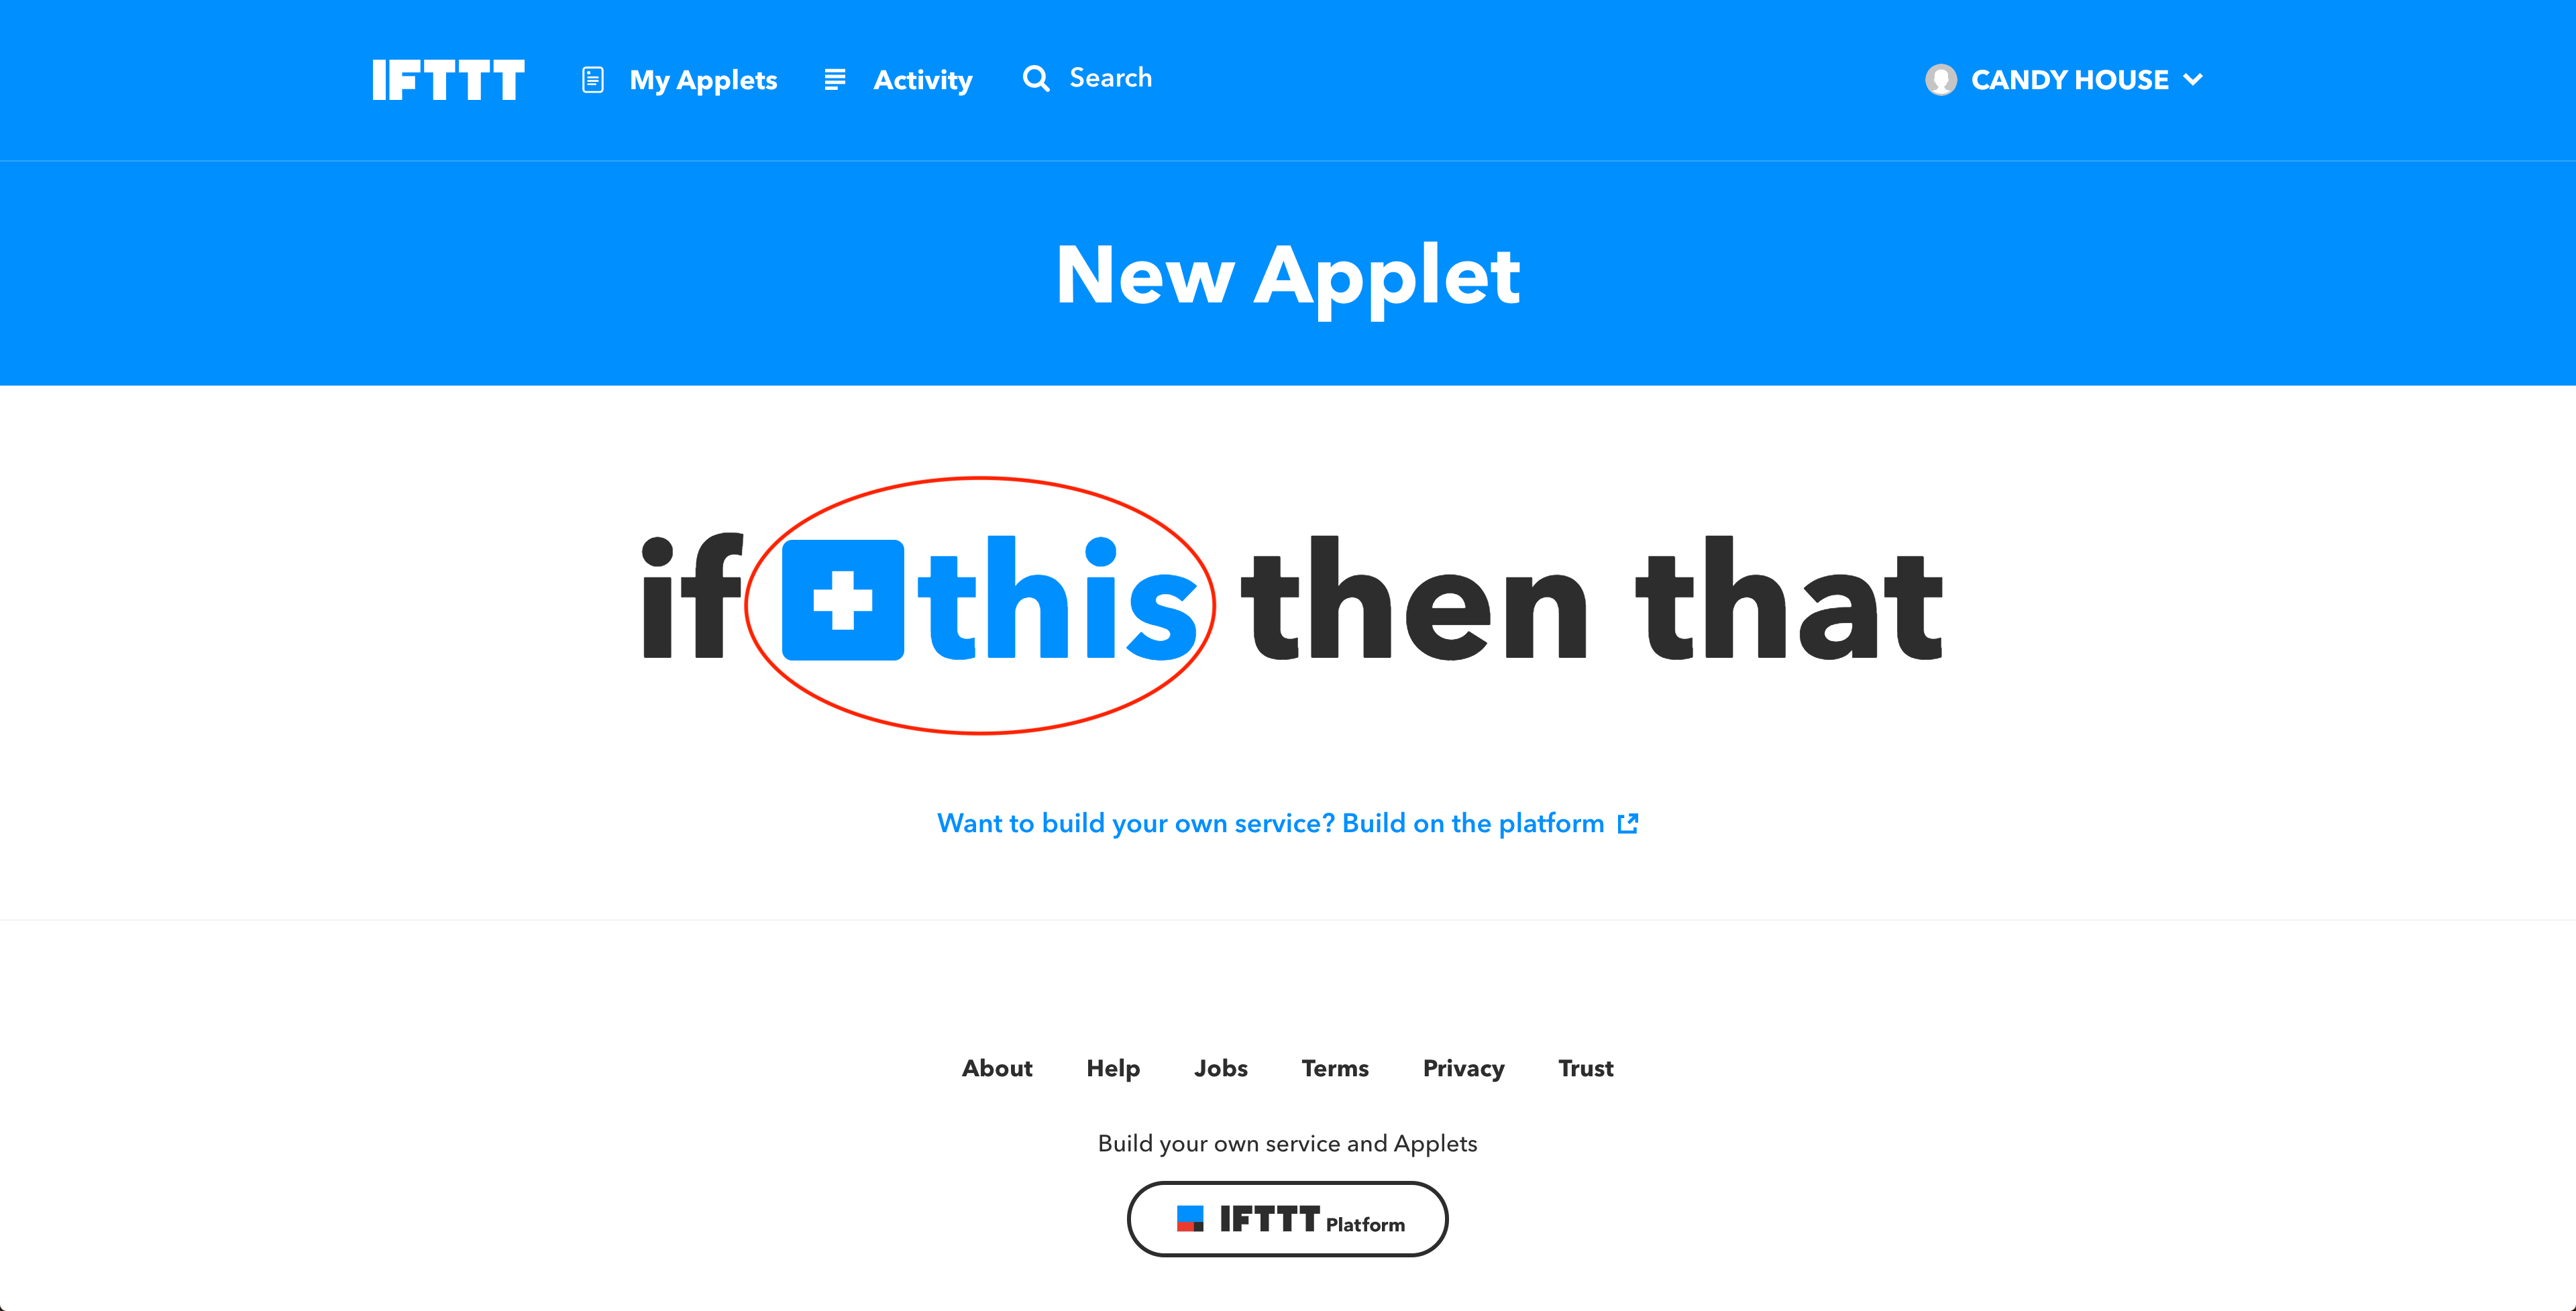
Click on +this and select the trigger you would like to use. For our example, we chose the Button Widget and selected “Button press” as our trigger.


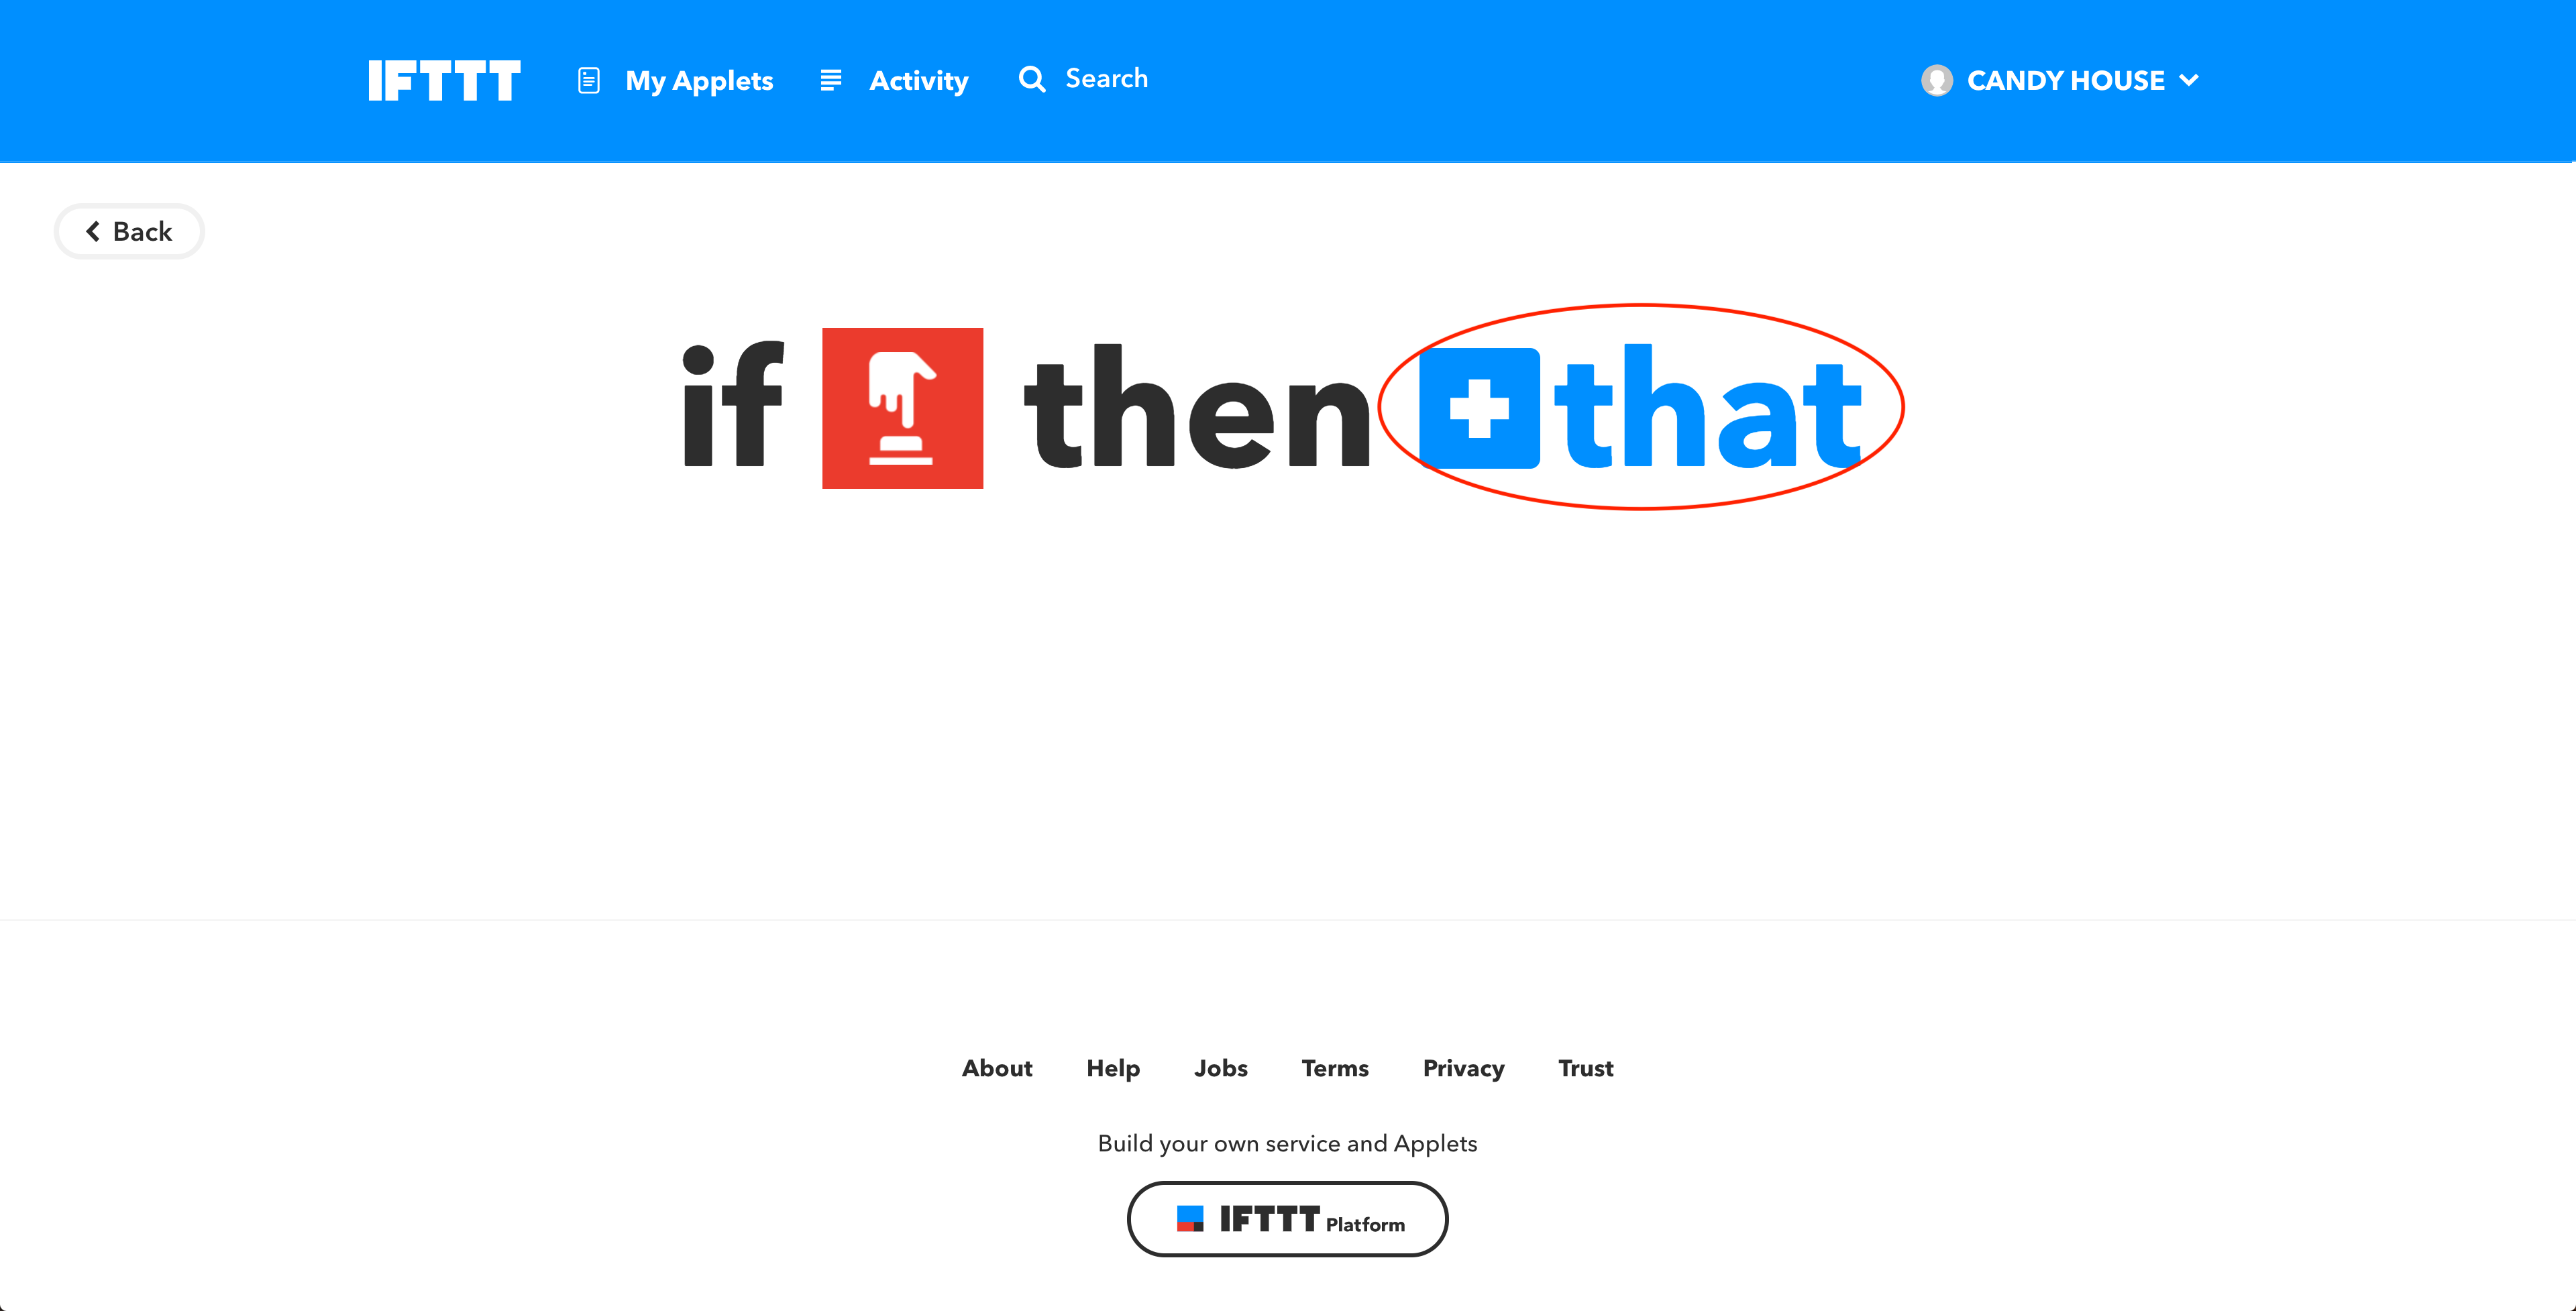
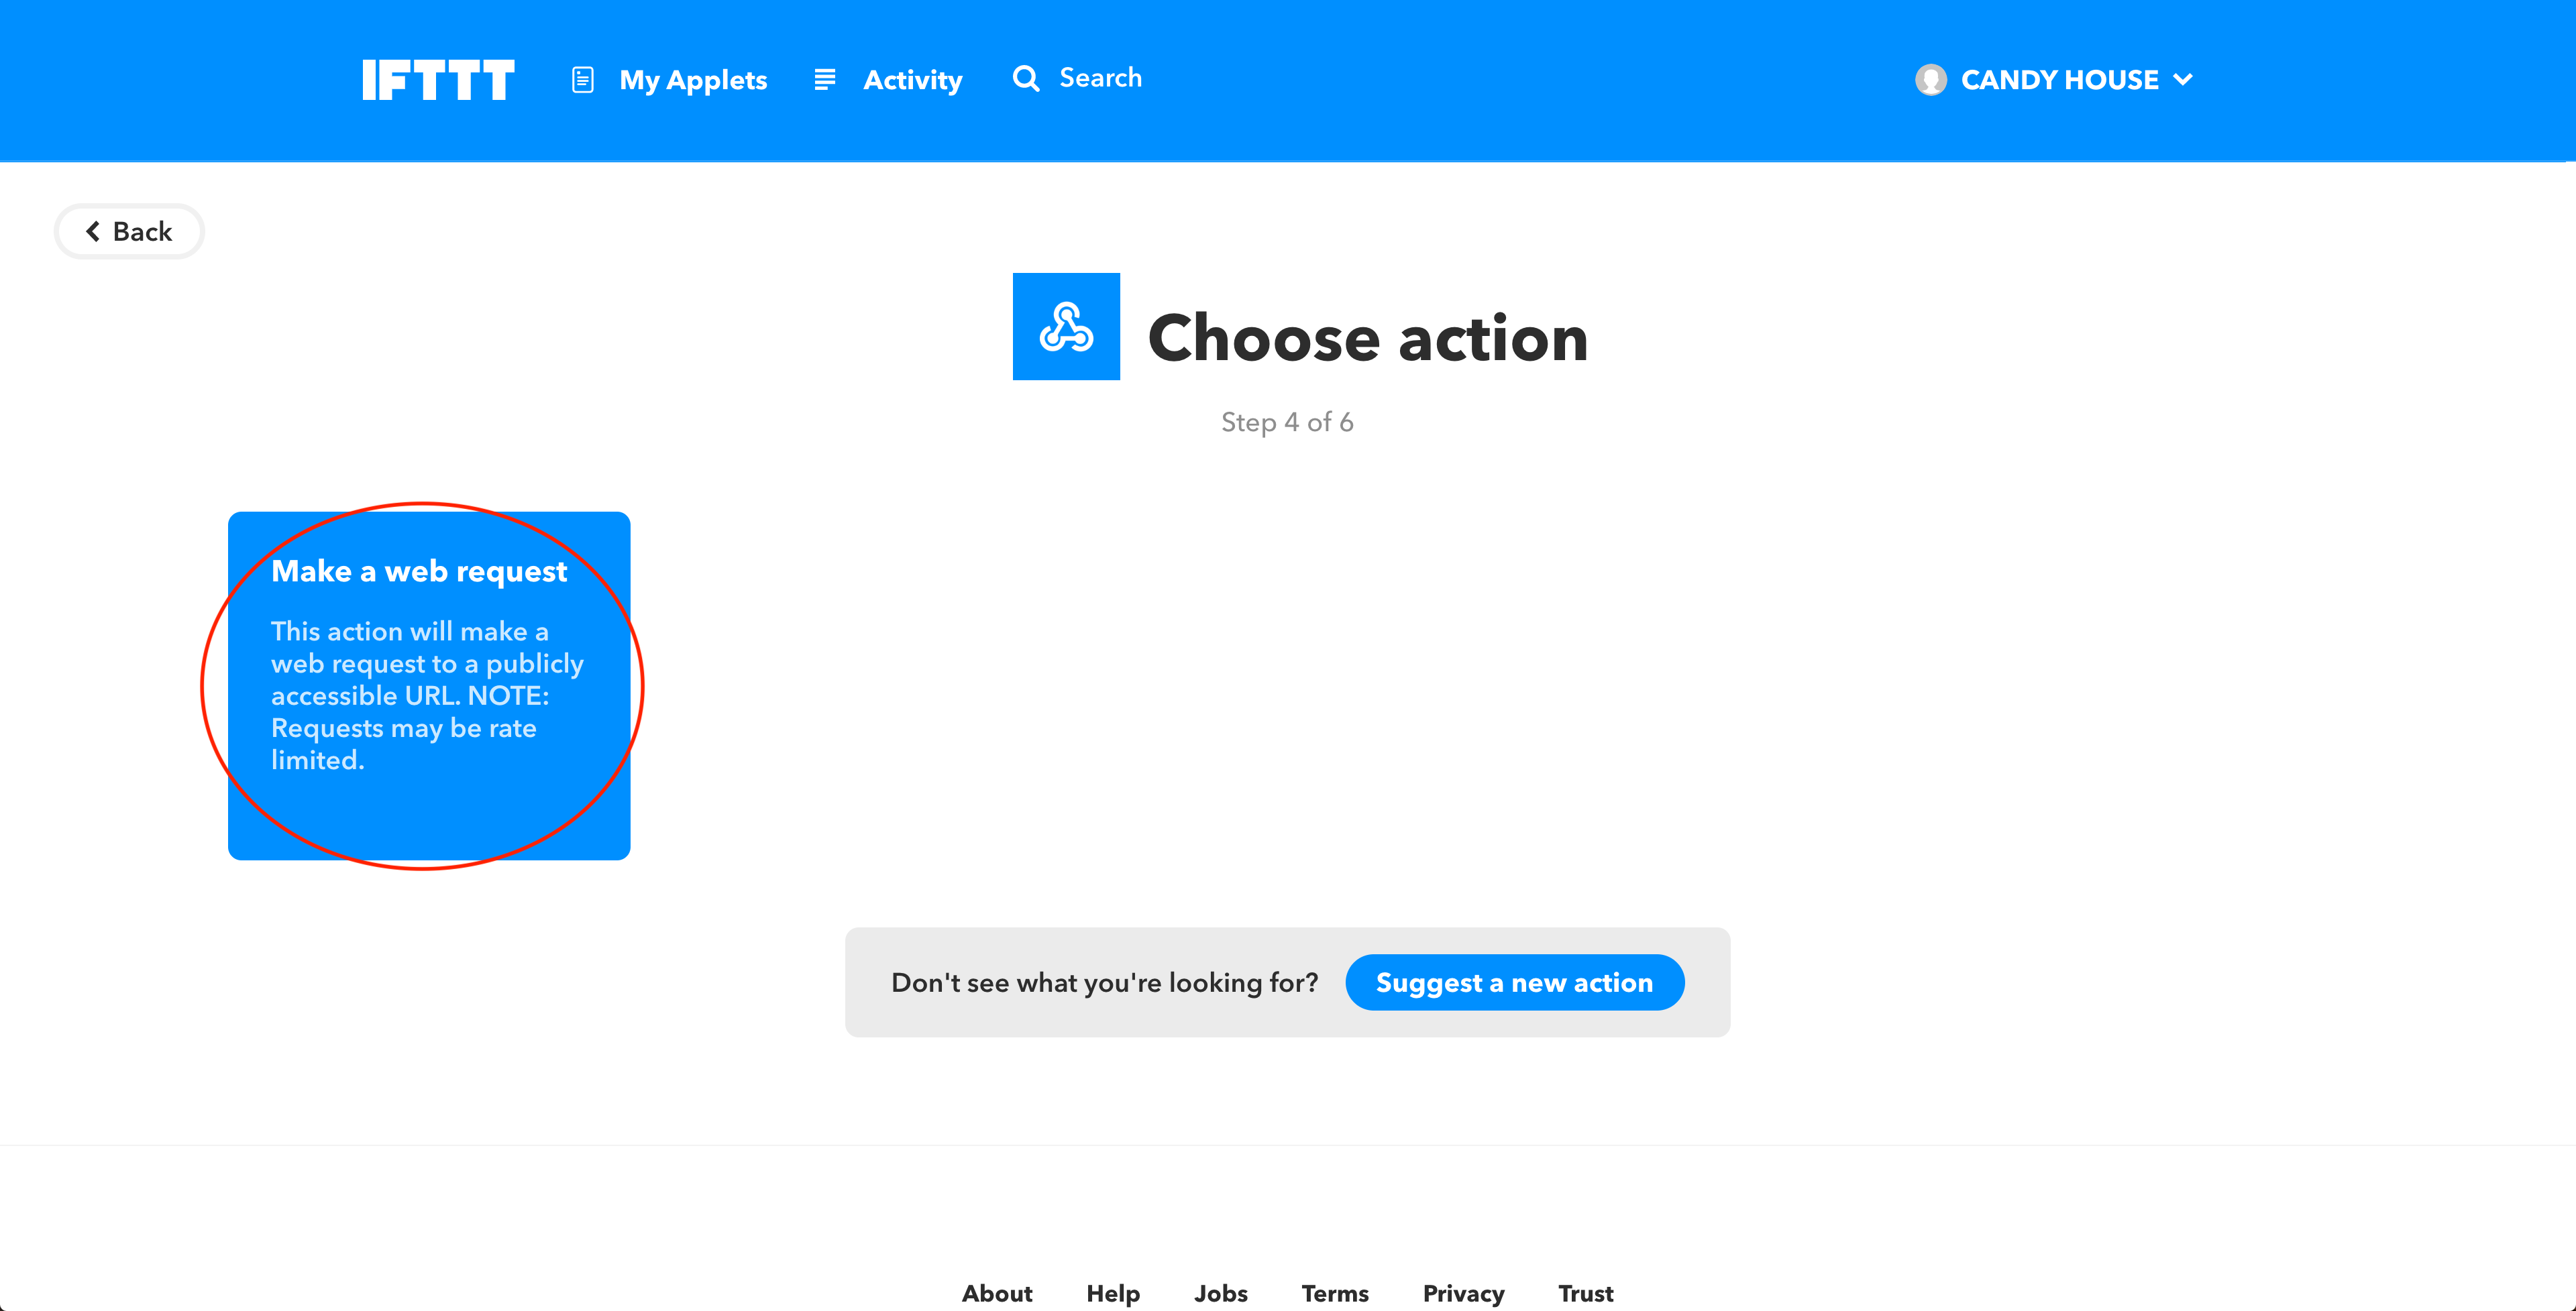
Click on +that and search for the Webhooks widget. Select “Make a web request”.

Enter the following information to create your action:
- In the URL field, enter:
https://api.candyhouse.co/public/partners/ifttt - For the Method field, select POST.
- For Content Type, select application/json.
- In the Body section, enter:
{"command": "*COMMAND*", "apikey": "*API_KEY*", "device_id": "*DEVICE_ID*"}. Be sure to replace*COMMAND*with either lock or unlock depending on whether you want the applet to lock or unlock. Be sure to also replace*API_KEY*with your actual API key, and replace*DEVICE_ID*with your actual device ID.


- In the URL field, enter:
Once finished, click Create Action, edit the name of the applet if you’d like, then click Finish and your new Sesame applet is good to go!

Trigger Actions when Sesame is Locked or Unlocked
First, go to the Webhook service on IFTTT and make sure it is connected to your account (if not, click on CONNECT to do so). Click on Documentation to obtain your IFTTT Maker Key.

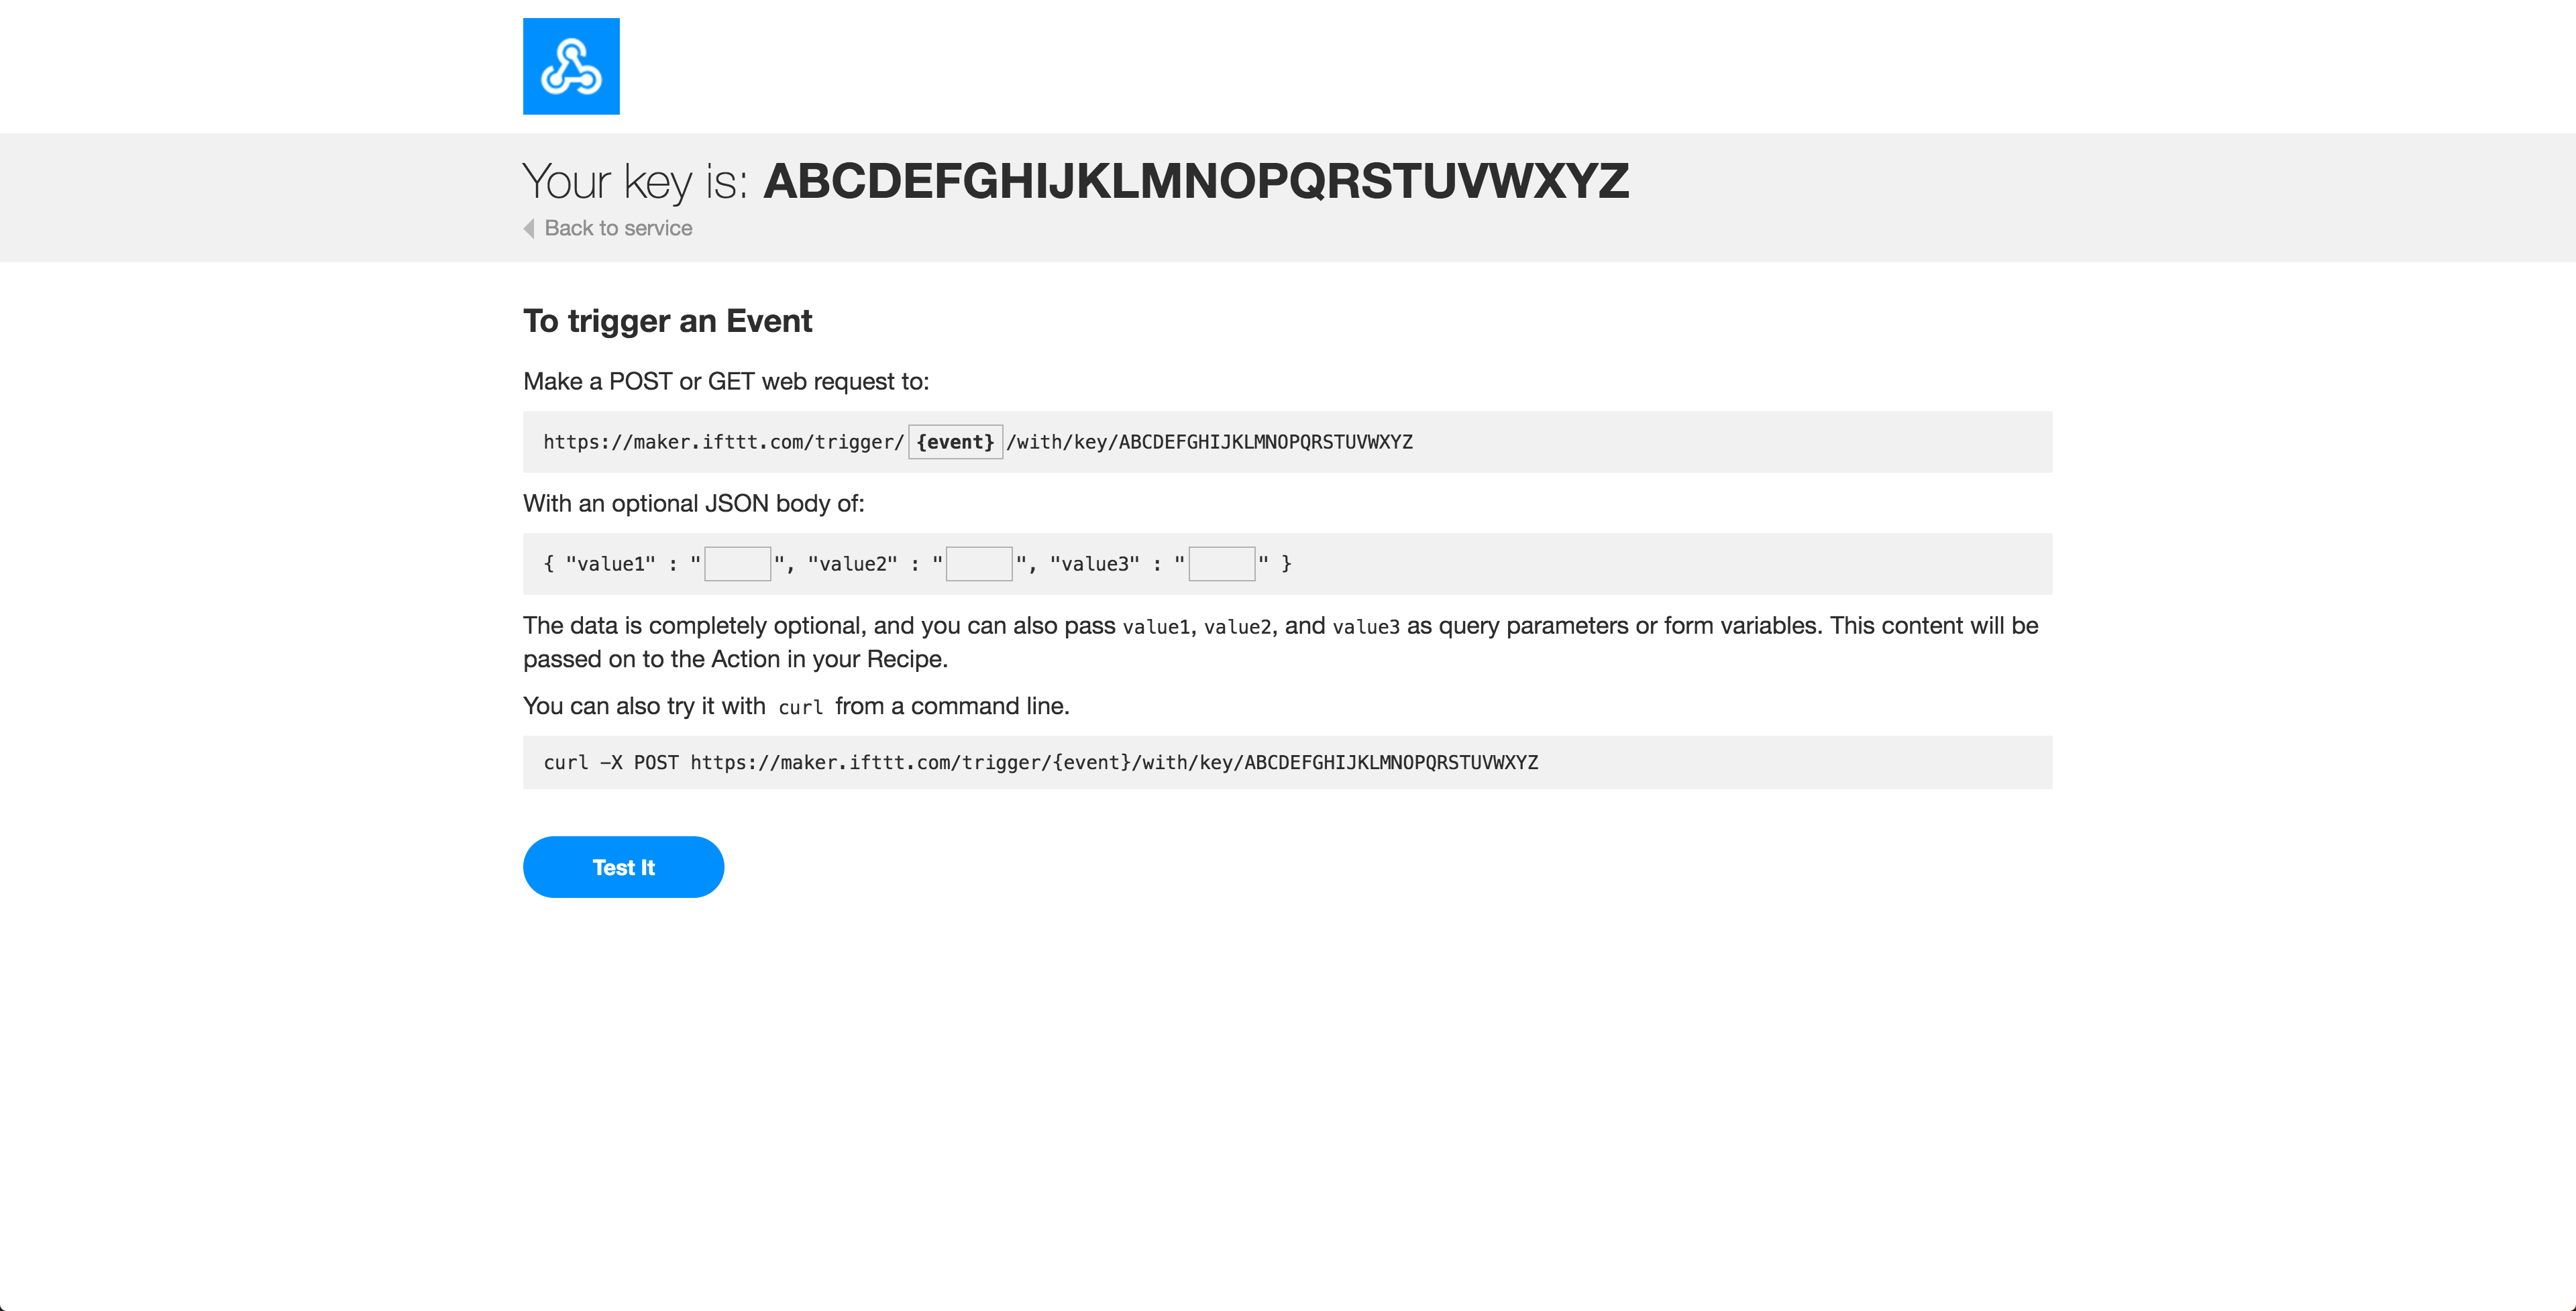
In the Event field, type
{device_id}_{state}, then copy the URL at the bottom of the page.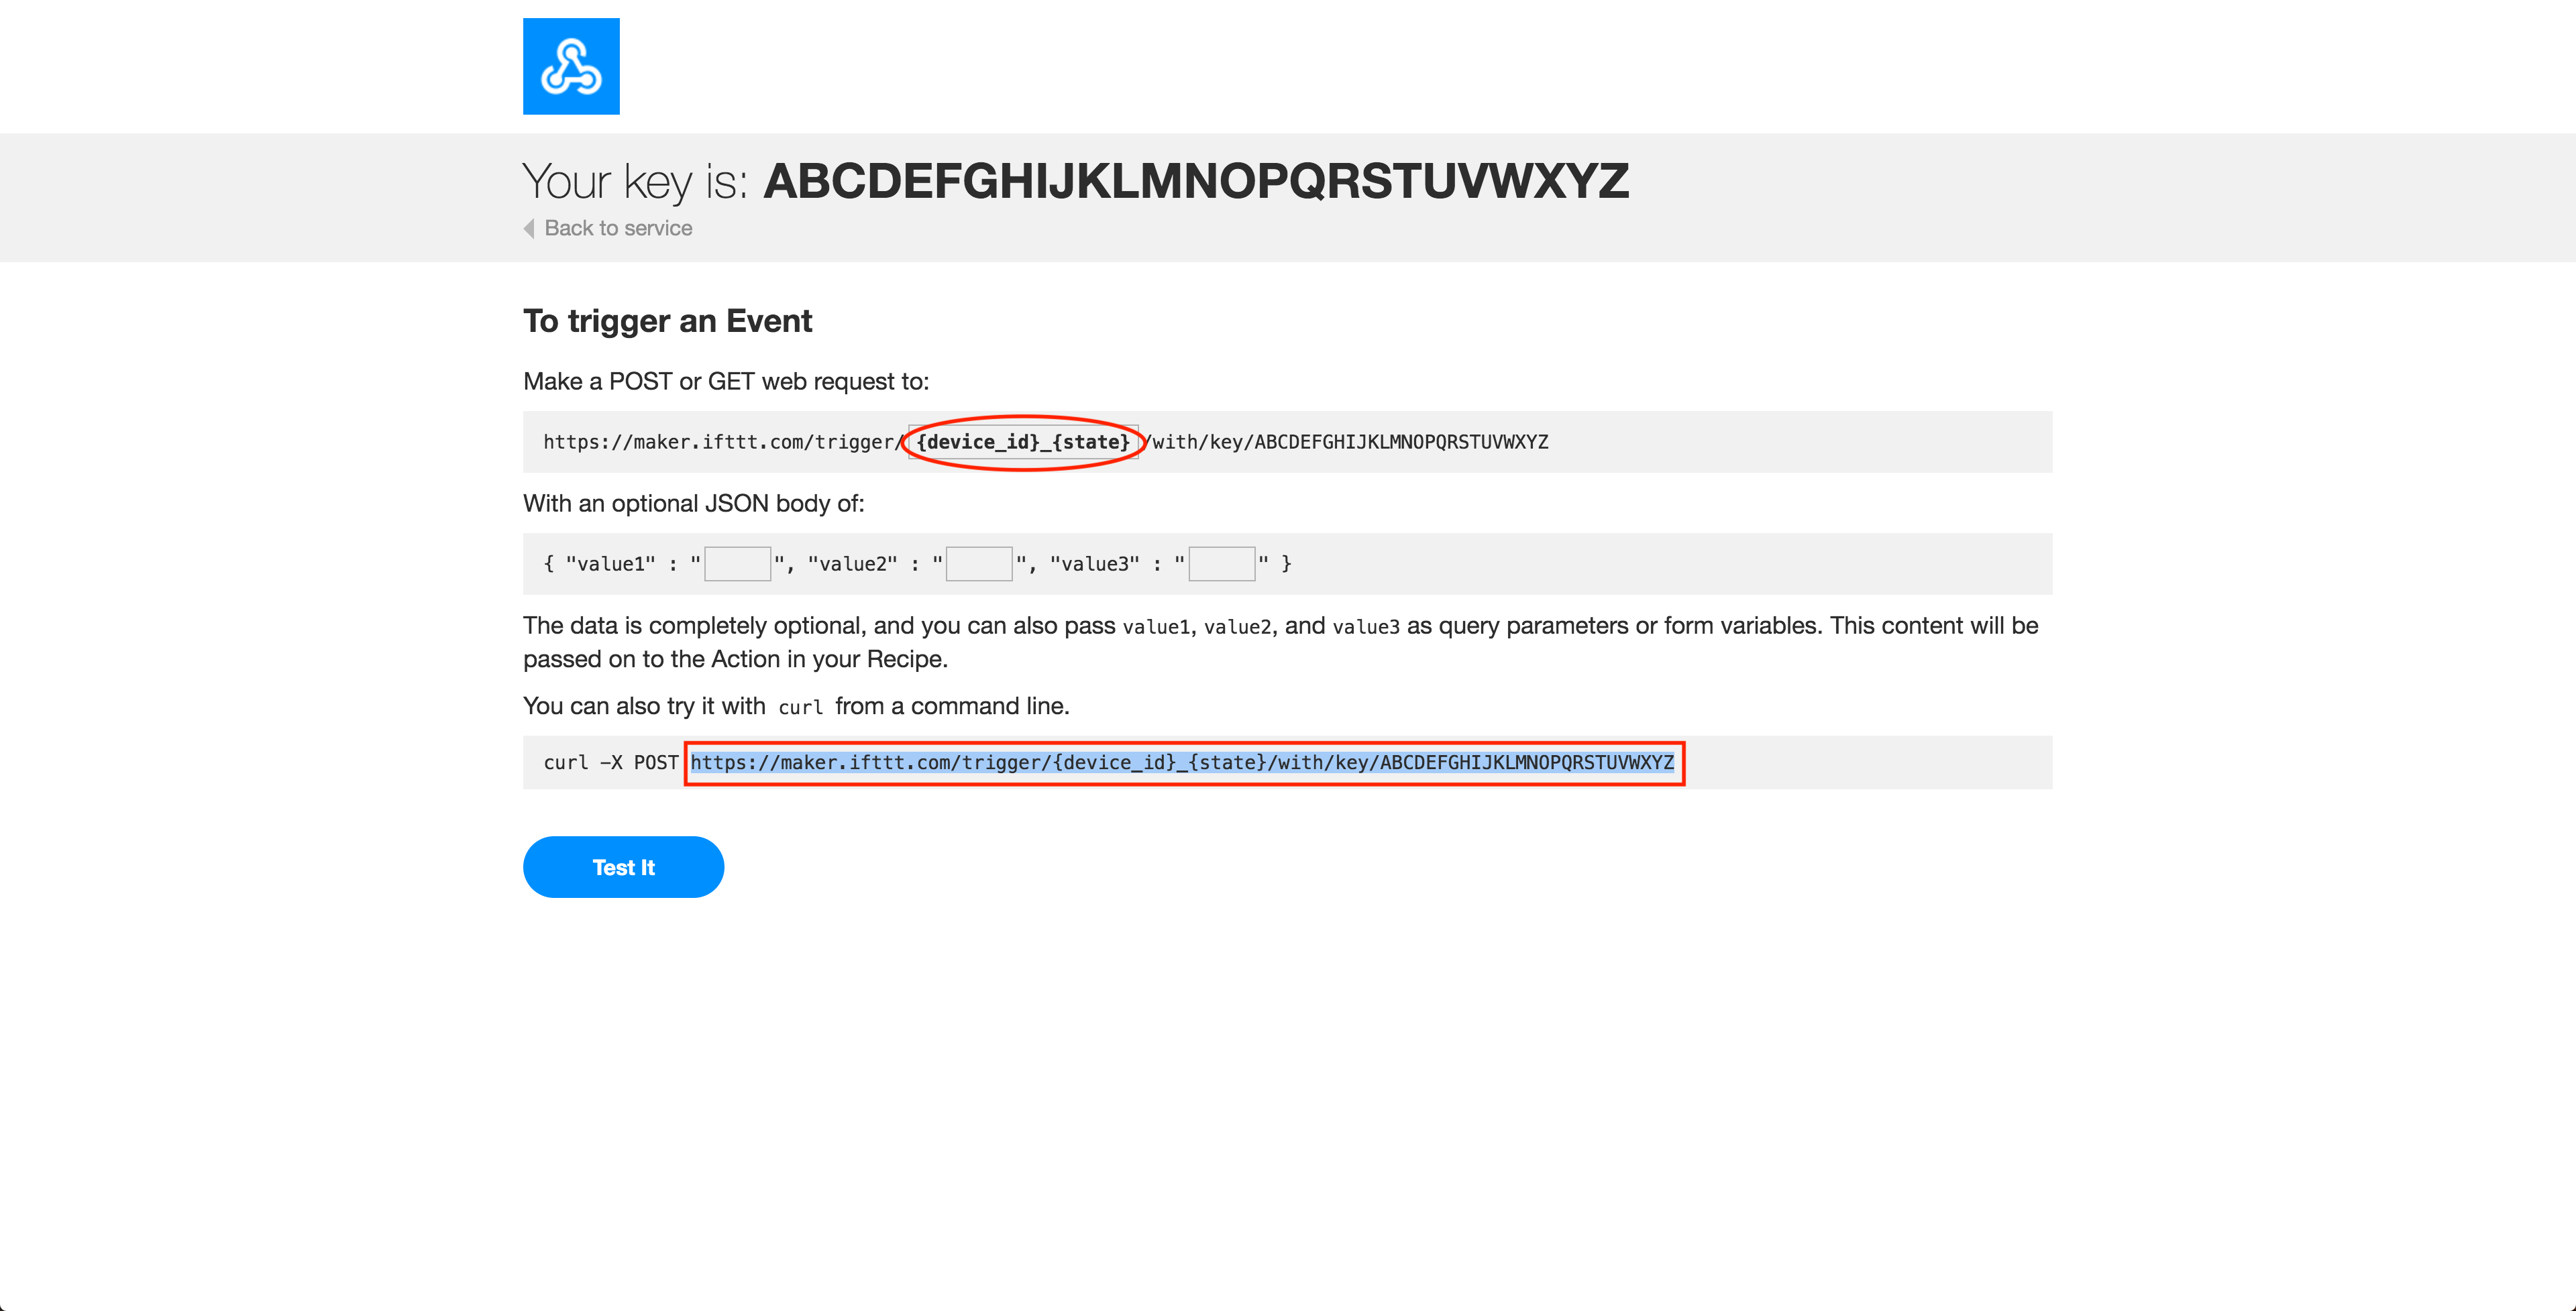
Next, go to the CANDY HOUSE Dashboard and click on API Settings. Create a webhook by clicking on the EDIT button, then paste the copied URL in the URL field. It will be
https://maker.ifttt.com/trigger/{device_id}_{state}/with/key/*MAKER_KEY*with*MAKER_KEY*replaced with your own actual key. Your webhook will then be Enabled.

Next, return to your IFTTT account and click on the New Applet button.
Click on +that and search for the Webhooks widget. Select “Receive a web request”.

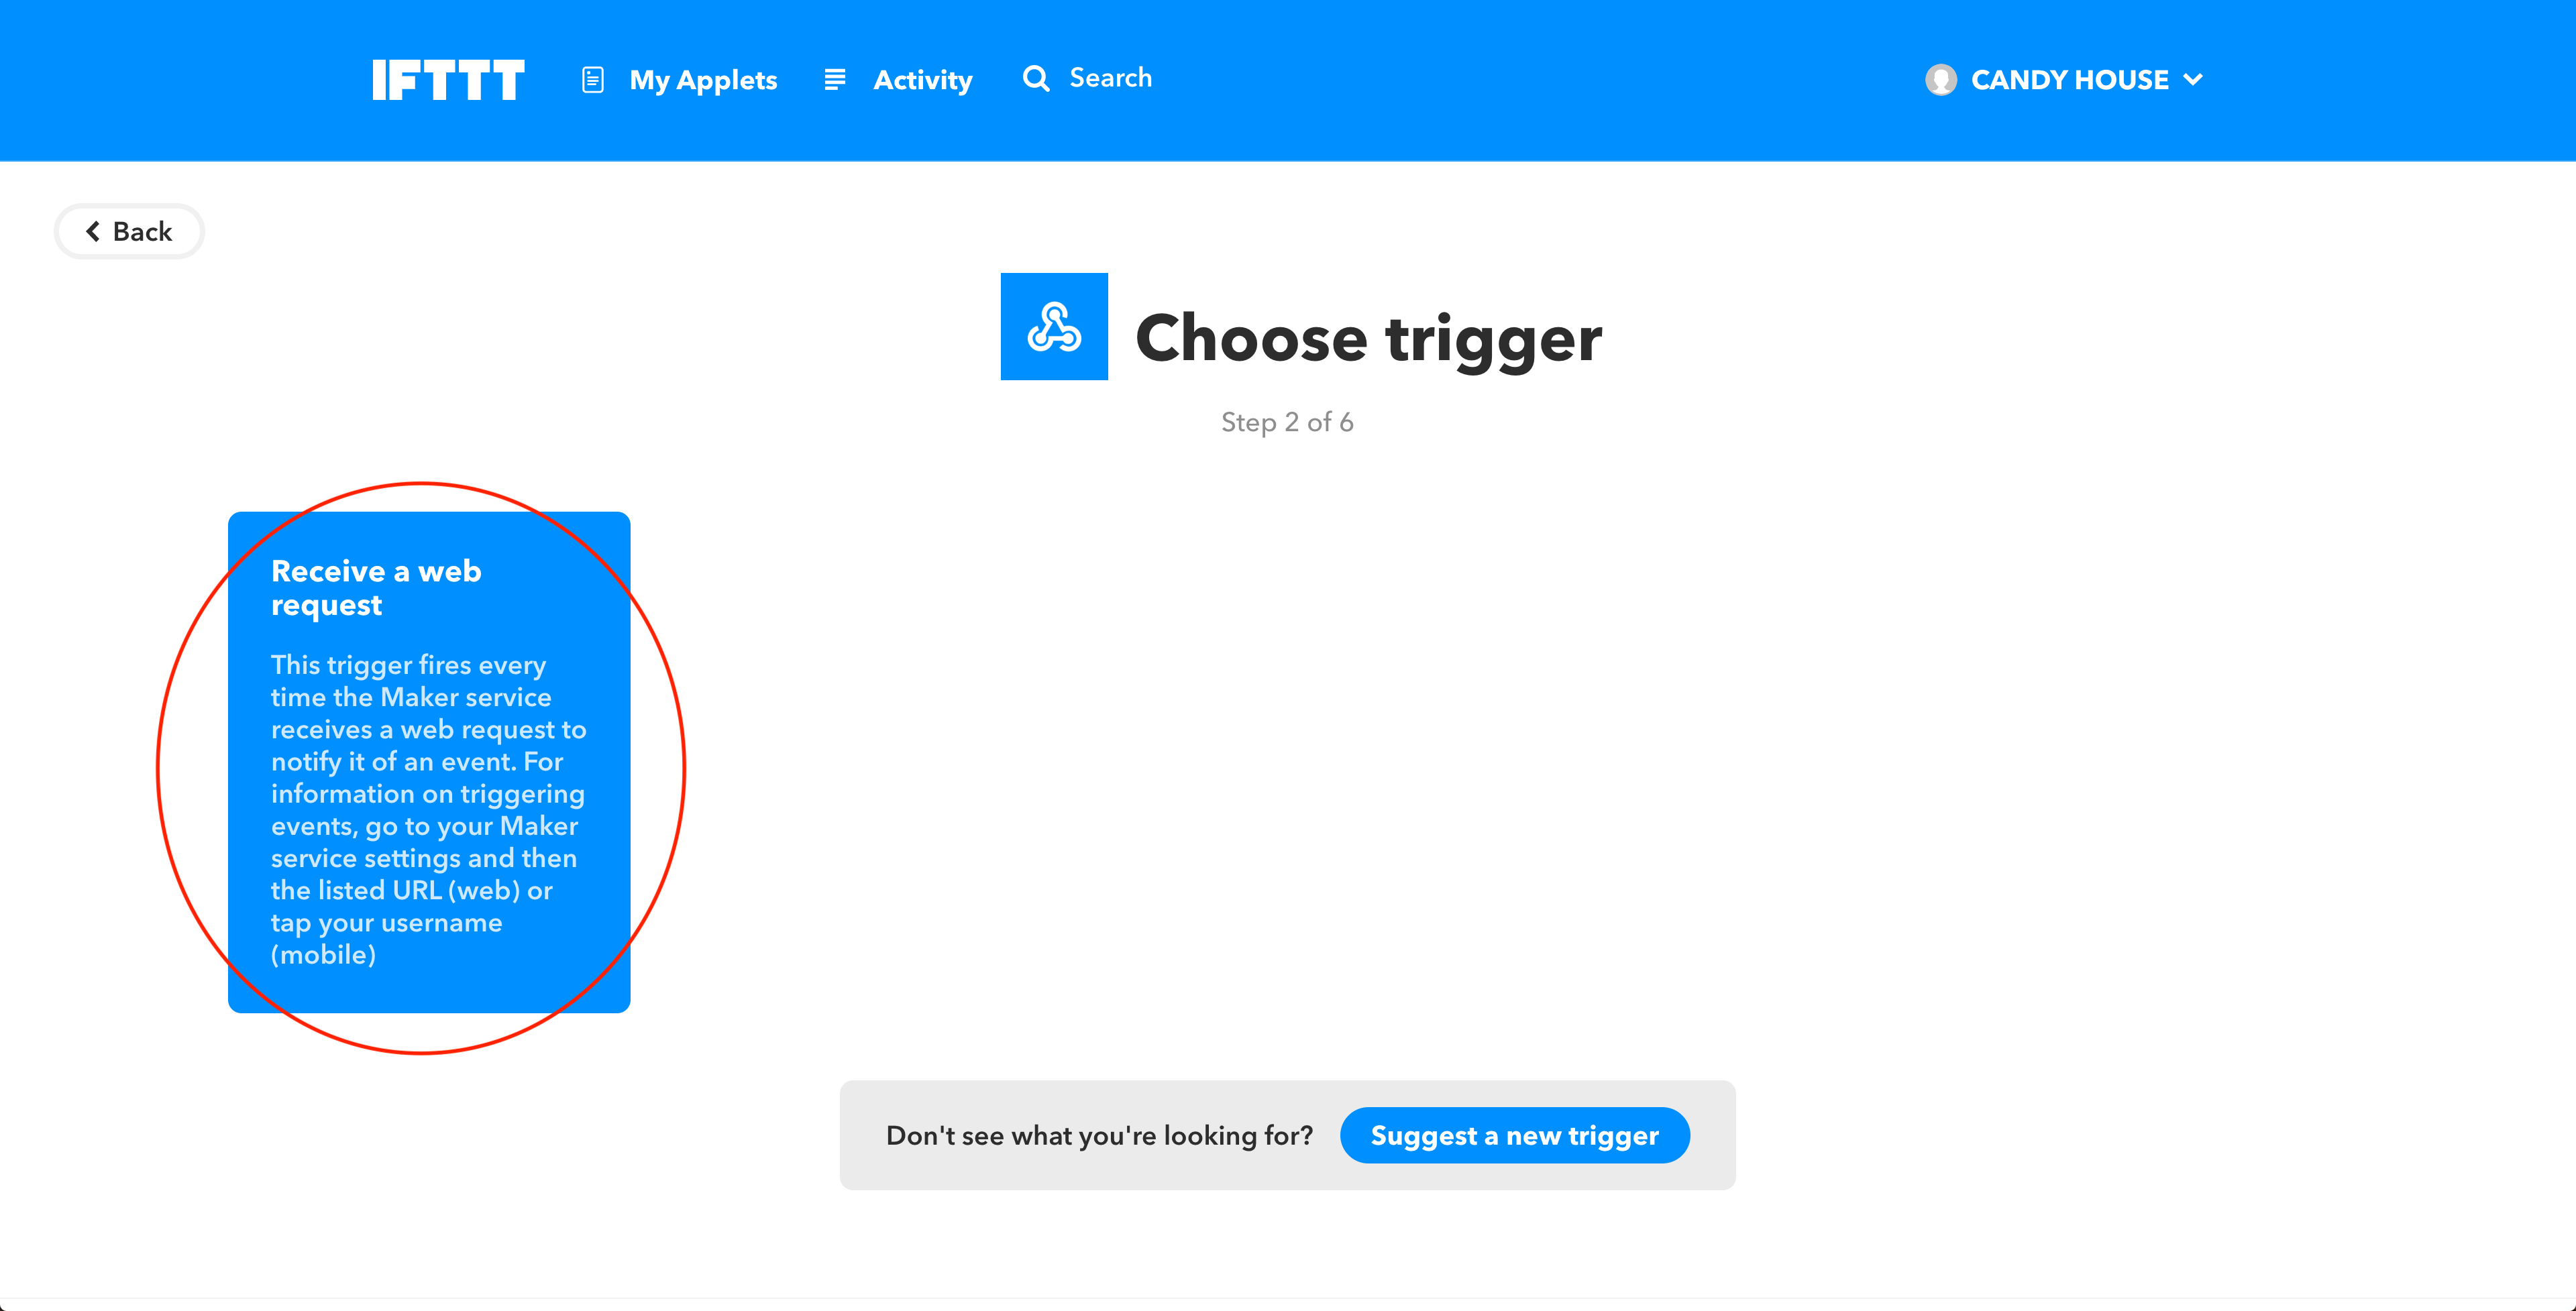
In the Event Name field, enter
*DEVICE_ID*_*STATE*, but replace*DEVICE_ID*with your actual device ID, and replace*STATE*with either lock or unlock depending on which state you would like to trigger the applet. The end result will be something like “12345678-ABCD-1234-EFGHIJKLMNOP_lock” or “12345678-ABCD-1234-EFGHIJKLMNOP_unlock”. Click Create Trigger to proceed.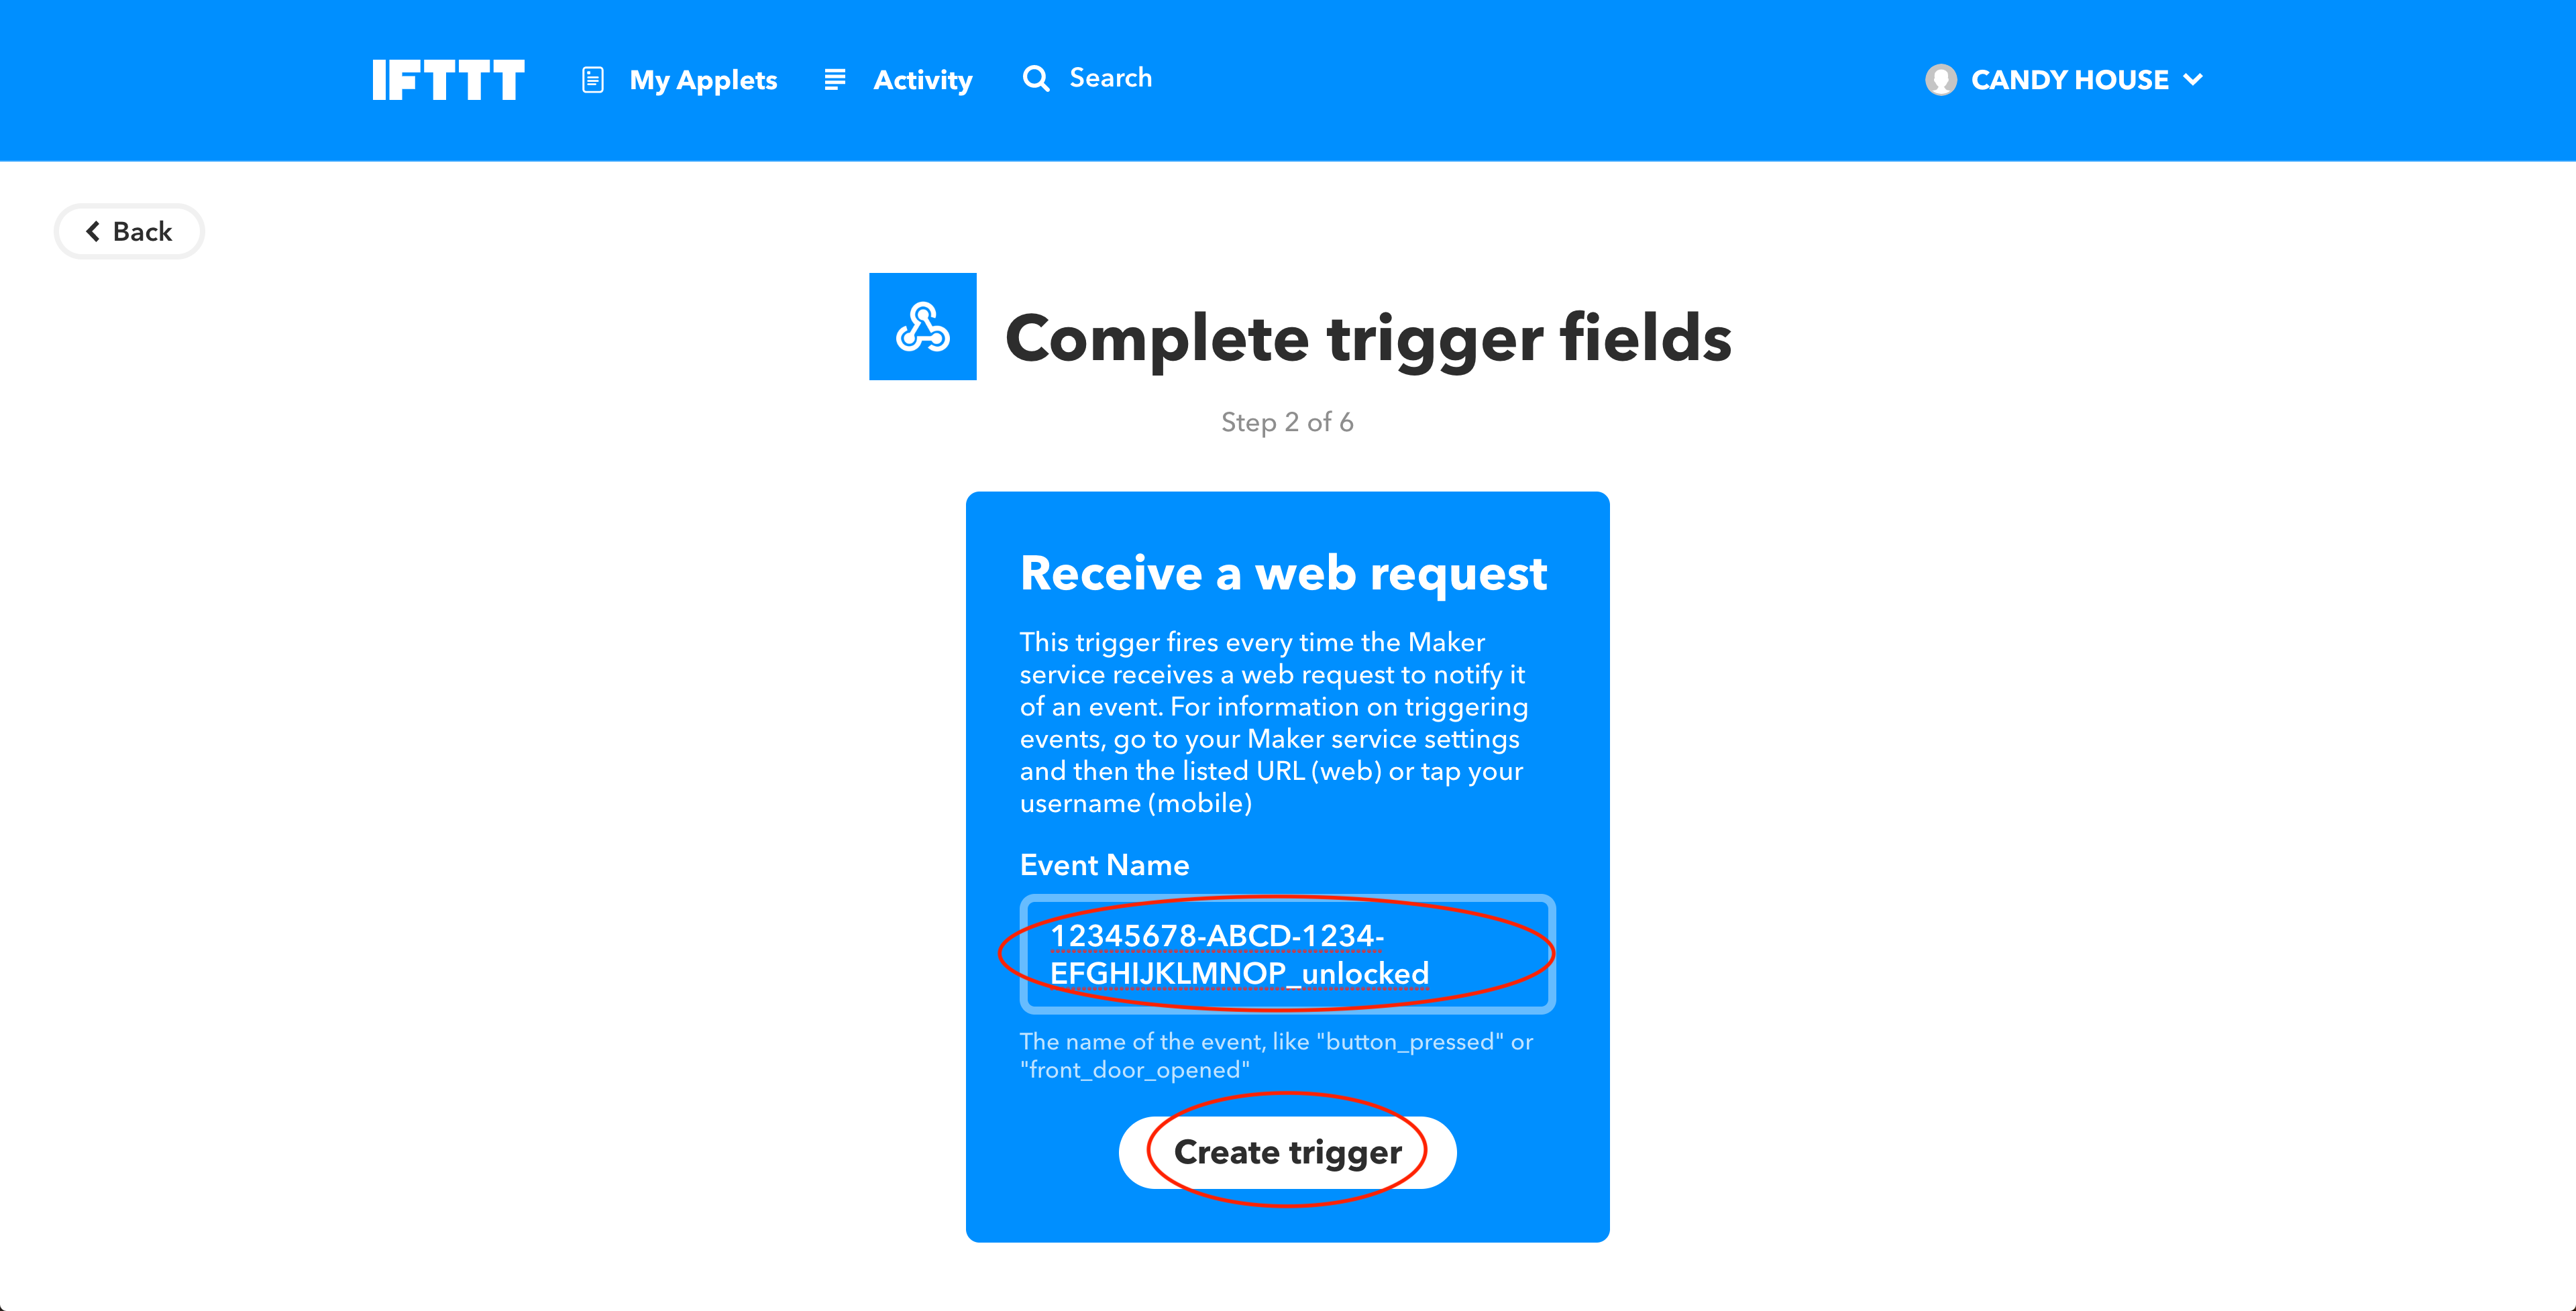
Next, click +that and select the action you would like to happen. In our example, we chose “Send an email.” You can also edit the content of the email or your own trigger using
MakerEventNameorOccurredAt. Values 1, 2, 3 are not used.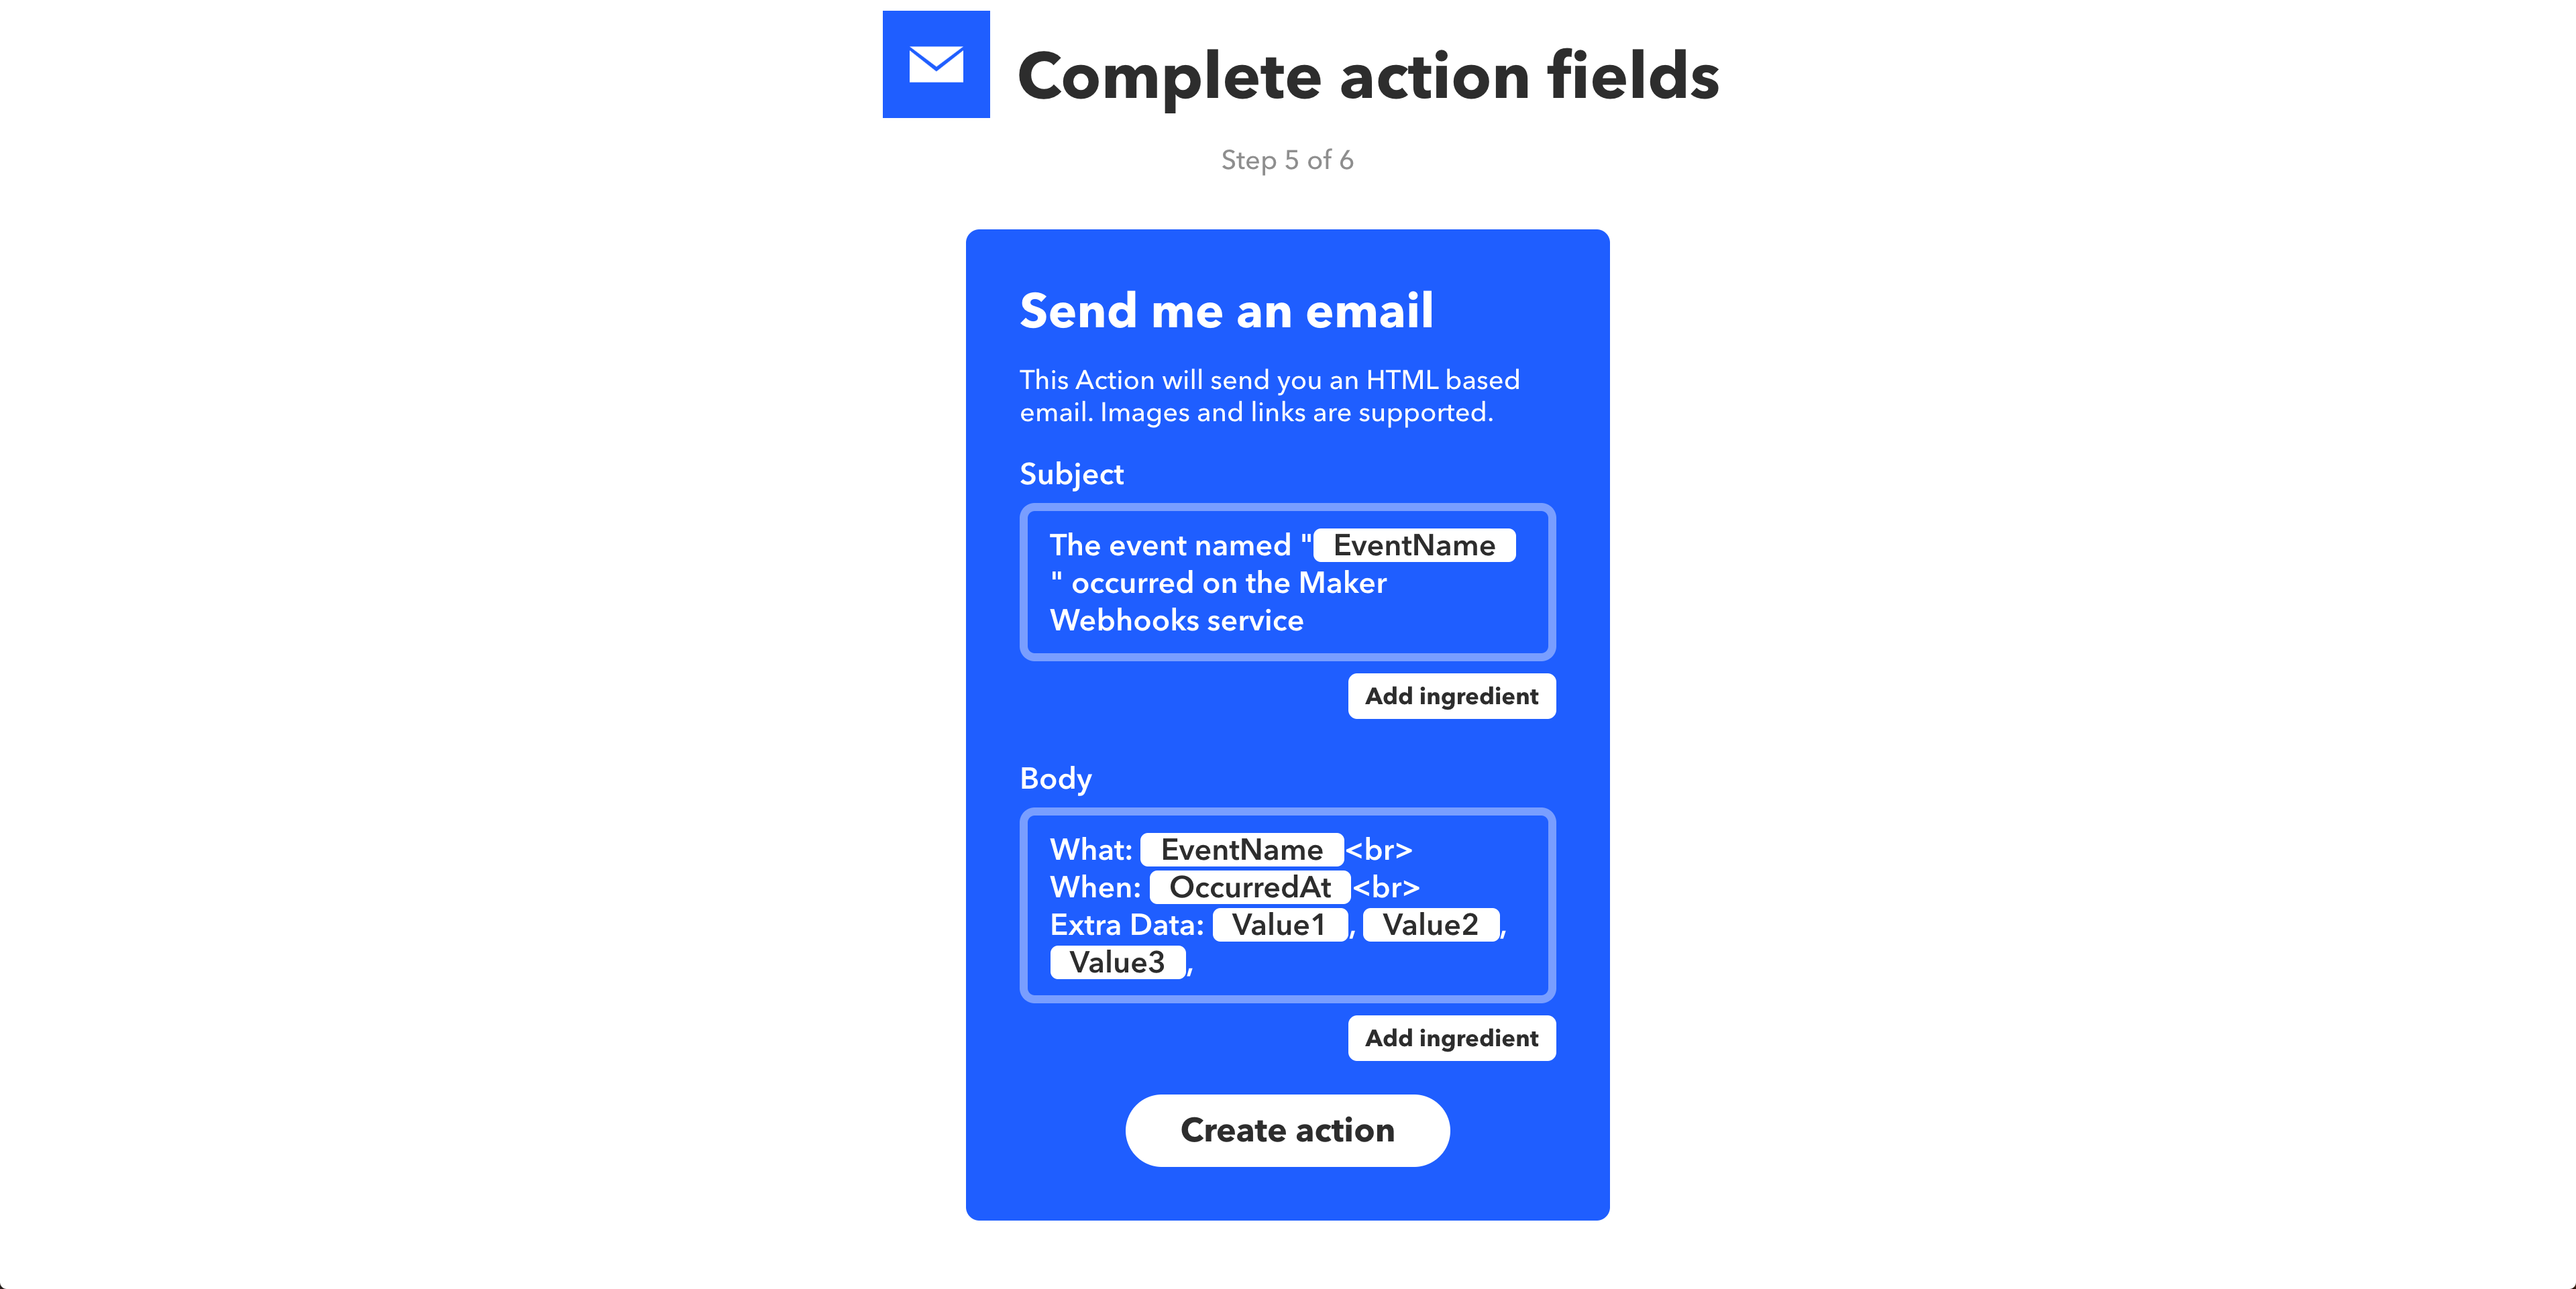
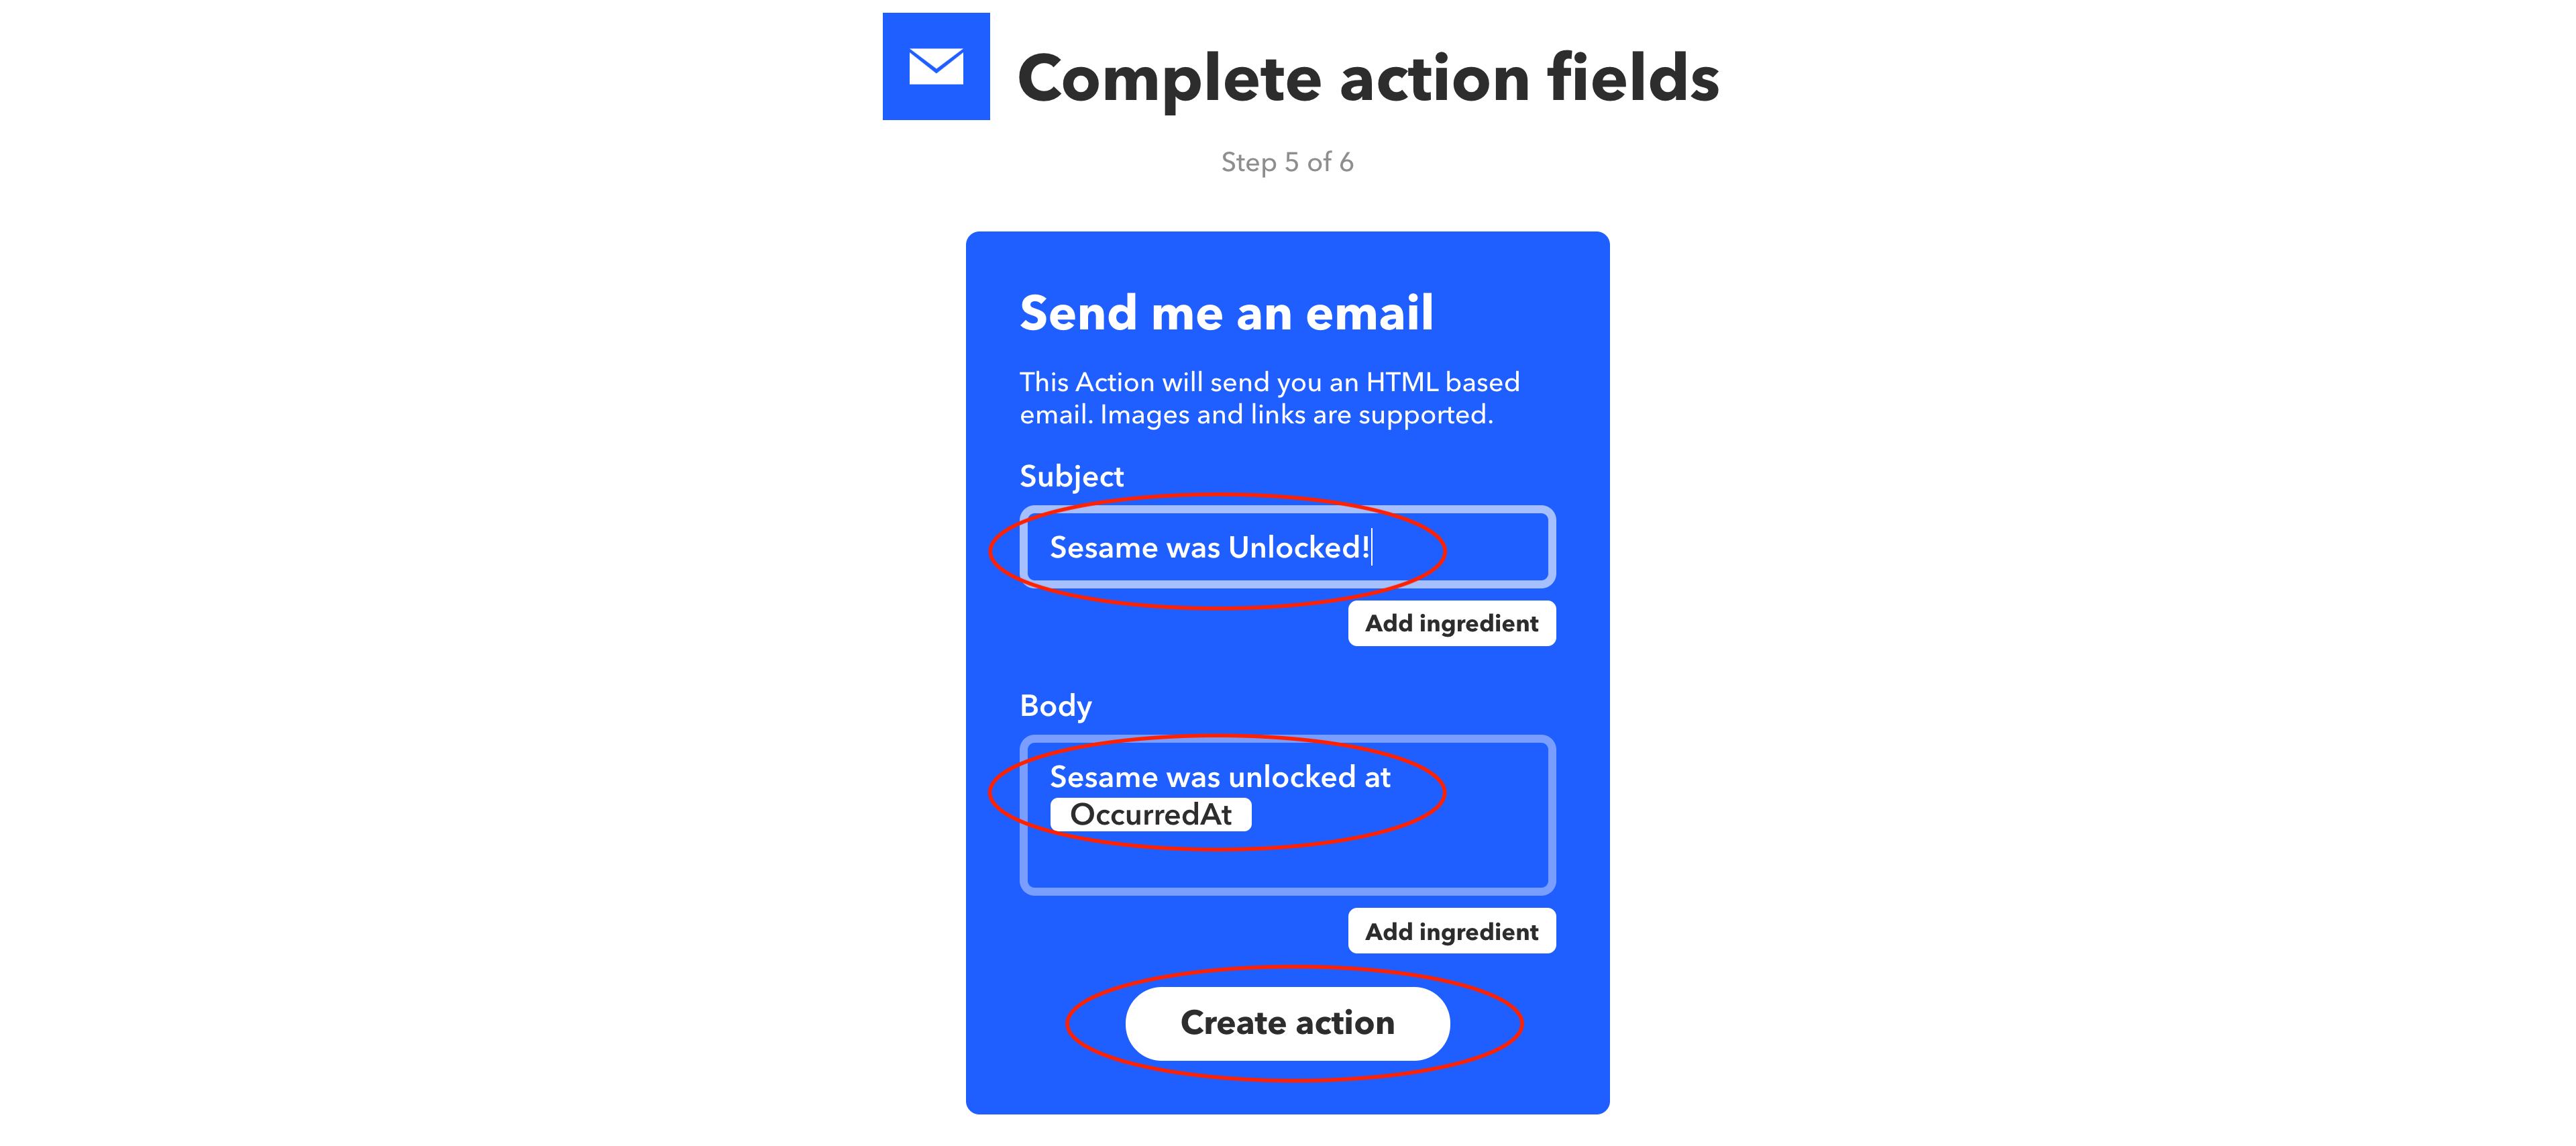
Click Create Applet, then rename your applet and click Finish. Now your action will trigger when Sesame is locked or unlocked, depending on which state you chose to enter in the Event Name field.

Support
We hope you found our tutorial helpful! If you have any feedback or questions for us, please feel free to email sesame@candyhouse.co and we’ll be happy to answer your questions! You can also check out the CANDY HOUSE forum for API-related discussions - just sign in with your CANDY HOUSE account email and password.